SERVICE MANUAL
TK-AM200U/TK-AM200E
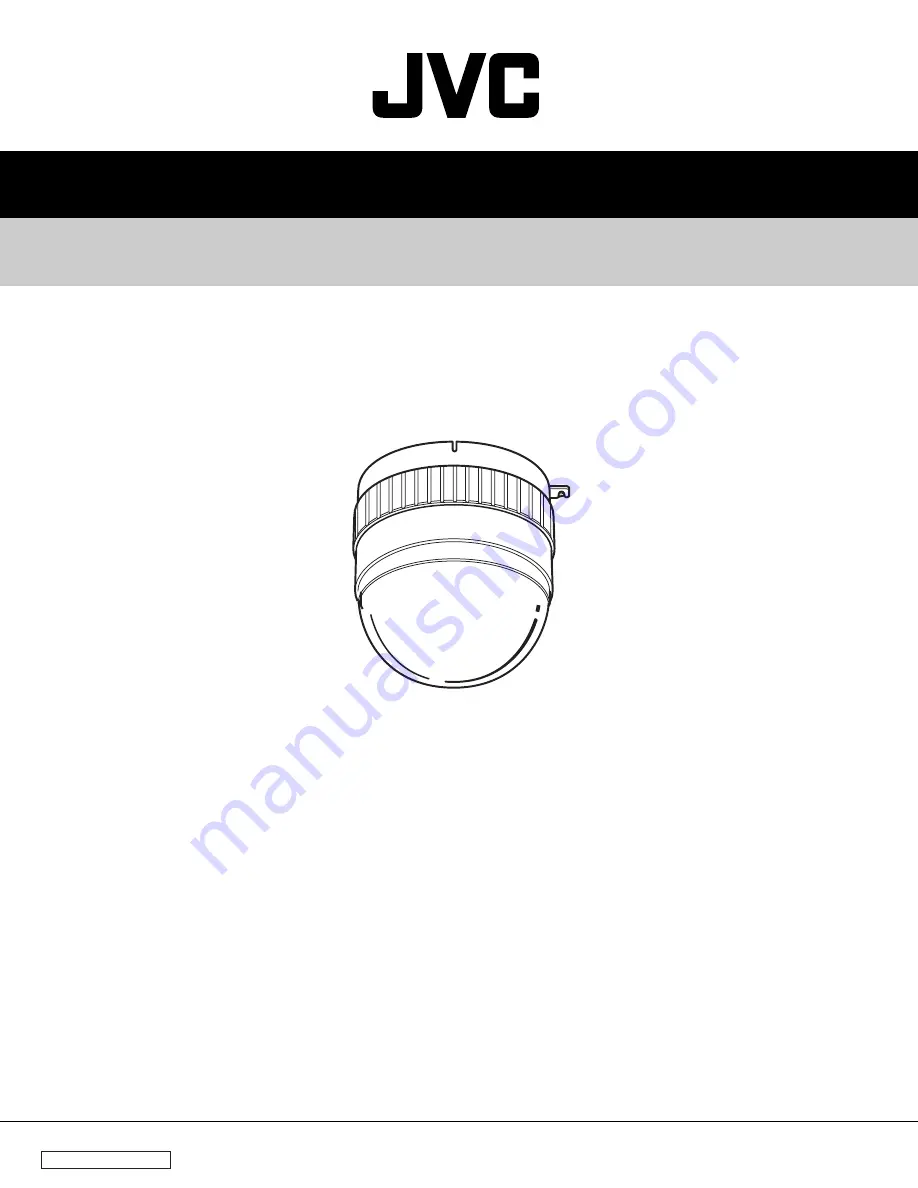
ACTIVE MOVEMENT VIDEO CAMERA
No. 6688
February 2000
COPYRIGHT © 2000 VICTOR COMPANY OF JAPAN, LTD.
Printed in Japan
(S)
VICTOR COMPANY OF JAPAN, LIMITED
100% recycled paper
Страница 1: ...SERVICE MANUAL TK AM200U TK AM200E ACTIVE MOVEMENT VIDEO CAMERA No 6688 February 2000 COPYRIGHT 2000 VICTOR COMPANY OF JAPAN LTD 100 recycled paper ...
Страница 2: ... FOR ADJUSTMENT 2 1 2 2 INSTRUMENTS 2 1 2 3 GENERAL SETUP 2 1 2 4 USING THE ADJUSTMENT MENUS 2 2 2 5 TEST POINTS USED IN ADJUSTMENTS 2 2 2 6 VIDEO SIGNAL SENSOR AND BACK FOCUS 2 2 3 DIAGRAMS AND CIRCUIT BOARDS 3 1 BLOCK DIAGRAM 3 2 3 2 OVERALL WARNING DIAGRAM 3 3 3 3 CCD BOARD SCHEMATIC DIAGRAM 3 4 3 4 CCD CIRCUIT BOARD 3 4 3 5 DSP BOARD SCHEMATIC DIAGRAM 3 5 3 6 DSP CIRCUIT BOARD 3 6 3 7 MOTOR BO...
Страница 3: ...E DOME COVER 1 Rotate the dome cover Å in the direction of the arrow e and remove it from the main body Fig 1 1 1 2 REMOVING THE MAIN BODY 1 Loosen screw 1 then rotate the main body in the direction of the arrow f to remove the main body from the ceiling Symbol No Part No F1 QMFZ035 5R0 S Fig 1 2 Fig 1 4 1 a 2 Remove the spring Ç in the direction of the arrow 3 Disconnect CN8 and CN9 and the remov...
Страница 4: ... that metallic objects such as the tip of a screwdriver or a screw etc do not come into contact with the magnet If a metallic object touches the magnet the sensor may be destroyed 6 CPU board 1 Remove the two screws 7 Magnet 7 8 CN2 3 Remove the two screws 5 and disconnect CN2 4 Pull out the DSP board in the direction of the arrow g and then remove the DSP board 5 Also remove the MOTOR board on th...
Страница 5: ...le only with a speci fied image sensor New image sensors and crystal filters should be han dled so as not to leave fingerprints or grease on their glass surfaces To remove attached dirt or grease blow on the glass surface until it becomes misted then wipe it gently with a cotton swab Do not use alcohol or other simi lar substances After replacement all of the adjustments should be performed from t...
Страница 6: ...nd hold the MENU button of the RM P2580 for 3 seconds then select CAMERA from the SETUP menu Press the SET button of the RM P2580 then press the ENTER button 4 times within 4 seconds Fig 1 7 a shows the initial display of the SERVICE menu The menu items are selected with the pan tilt control lever and pressing the SET button then enters the selection The menu items accompanied with _ _ indicate th...
Страница 7: ... the grooves ay the opposite corners of the IC socket and remove the IC as if pulling it up Fig 1 10 b A B B Fig 1 10 c Fig 1 10 a Table 1 9 Symbol No Part No Å SCV2803 1325B ı SCV2803 2425B Fig 1 9 Table 1 8 1 9 SERVICING OF DSP MOTOR AND CPU BOARDS Although the DSP MOTOR and CPU boards are hardly accessible for servicing the access for their servicing can be assured by using extension cables Å 2...
Страница 8: ...o noise derived from the GND loop may oc cur In such a case it is necessary to use an electrically isolated interface in the RS 232C on the PC side Fig 1 12 2 4 Simplex unidirectional multi drop multi point connection mode 1 The TX and TX terminals of the remote controller are connected to the RX and RX terminals of the camera using two communication wires 2 Multiple cameras up to 32 share a set o...
Страница 9: ...pins with EIA RS 232C compliant signal lev els TXD is the output and RXD is the input Video signal ground Outputs the monitoring video VBS 1 Vp p 75 Ω Table 1 13 1 Therefore the control signal at CN13 is permanently at the RS 232C level regardless of the setting of S1 RS 485 RS 232 switch on the CPU board When CN13 is used the remote control unit connected to the bottom panel terminals is unavaila...
Страница 10: ...M P2580 RM P2580 ALARM ALARM POWER KEY LOCK KEY LOCK 2 Capture a test pattern so that it just fills the scanned area by adjusting the pan tilt control lever and zoom of the RM P2580 Set the current condition as the home position 3 Remove the dome cover by referring to the adjustment de scription Board name CPU MOTOR Symbol S1 S2 1 S2 2 S2 3 S2 4 S2 5 S2 8 S3 S4 S5 1 S5 4 S1 1 S1 4 Setting RS 422A ...
Страница 11: ...ency indicator Remove the dome cover before proceeding to adjustment 1 Adjust the voltage as specified 2 FH adjustment Multimeter Leave the dome cover attached during adjust ment 1 Maximize the ALC LEVEL so that the gray scale waveform is dense 2 Move the cursor to Y GAIN and adjust the white level at the center of the gray scale as specified 3 Set the ALC LEVEL to the original value 3 Y GAIN adju...
Страница 12: ...olor bar to 100 2 Move the cursor to C GAIN and adjust it so that the red level of the color bar is as specified 3 Set the ALC LEVEL back to the original value 6 C GAIN adjustment Oscilloscope Color bar chart Reflective type VIDEO OUT PAN TILT control lever 300 mVp p SERVICE MENU ADJUST 1 ALC LEVEL ADJUST 1 C GAIN When the color bar chart is of the transmissive type Leave the dome cover attached d...
Страница 13: ... backward and forward with respect to the CCD attachment surface 4 Focus the chart located at a distance of more than 1 meter 5 Tighten the BF clamping screw 9 Back focus adjustment Focus chart Monitor screen Lens tube Best focus AGC OFF Digital zoom OFF BF clamping screw Å Leave the dome cover attached during adjust ment 1 While turning the pan motor by hand adjust the PAN TILT control lever to s...
Страница 14: ...Printed in Japan S VICTOR COMPANY OF JAPAN LIMITED ...
Страница 15: ... To demonstrate the full capacity of this set place an order for proper parts referring to the diagrams and parts lists in the section 5 Soldering cautions 1 Do not apply heat for more than 3 seconds 2 Avoid using a rubbing stroke when soldering 3 Discard removed chips do not reuse them 4 Supplementary cementing is not required 5 Use care not to scratch or otherwise damage the chips 3 Chip diodes ...
Страница 16: ...ERATOR IC2 IC3 DSP IC1 TP1 CCD BOARD DSP BOARD TERMINAL BOARD POW BOARD CPU BOARD MOTOR BOARD CPU 6V 5V 15V 7V 15V 5V 6V 15V 7V 5V 15V 7V IRIS MS ADJ SC ADJ IC14 EEPROM ADDRESS IC3 DATA ADDRESS DATA Y C MIX IC2 TP1 Y BPF IC1 2 TP2 C 75Ω DRIVER LPF IC16 PHASE COMP BUFFER RS232C DRIVER Q2 IC3 IC18 RS485 RS422 DRIVER LINE LOCK POWER SUPPLY UNIT IC19 75Ω DRIVER 6 MONITOR OUT TX TX RX RX 4 RXD 3 TXD CN...
Страница 17: ...3 2 OVERALL WARNING DIAGRAM SC92636 3 3 3 3 1C Page 3 4 Page 3 5 Page 3 7 Page 3 9 Page 3 11 Page 3 12 See Sec 1 13 Not used ...
Страница 18: ...IAGRAM 3 4 CCD CIRCUIT BAORD 8 5 1 4 1 24 3 1 14 8 1 4 1 7 SIDE A SIDE B SC93495 FROM TO DSP CN2 FROM TO LENS UNIT 2 9 2 9 5 4 1 0 2 9 2 9 9 0 15 0 10 8 14 8 10 9 CCD CCD 3 4 3 4 2C 両面 3 4 C5 47p C11 OPEN 22k Page 3 3 Page 3 5 ...
Страница 19: ... 0 1 6 1 6 6 4 2 3 2 3 9 2 DSP AD CDS AGC V DRIVER AGC 10bit ADC OUTPUT LATCH CDS CC y y BLK BLK MTRX D A D A MOD 1 4 1 n 1 2 1 m BUF F F C GMIX C GMIX MTRX GAIN MTRX MLTPLX BUF P C 1H DL MLTPLX OB CLAMP PRE KNEE DECODE TIME DIV LC1 LC2 3 SSV2782 P107Z X1 TP1 3 5 3 5 2C 3 5 SSV2782 P507Z PAL NC 10k NC R15 NTSC 10k R16 33 0 R65 17 734475MHz 14 31818MHz X1 L1 10 0 NC R27 100 D3 3V R41 1 2k Page 3 4 ...
Страница 20: ...A 4A A 4A A 4A A 3B B 3B B 4A B 4B B 3A B 4B A 4C A 4C A 4C A 4C A 2C A 2C A 3C B 2B B 2B B 2B B 2B B 4B R71 R72 C1 C2 C3 C4 C5 C6 C7 C8 C9 C10 C11 C12 C13 C14 C15 C16 C17 C18 C19 B 4B B 4B B 1C B 1C B 2C B 2C B 2C A 1C A 2C A 2C A 1C B 1C A 1C A 1C A 1C A 1C B 1C A 1B B 1C B 2C B 2C C20 C21 C22 C24 C25 C26 C27 C28 C30 C31 C32 C33 C34 C35 C36 C37 C38 C39 C40 C41 C42 C43 B 2C B 2C B 2C A 3C B 3C B ...
Страница 21: ...9 1 5 2 2 0 2 0 2 4 8 4 8 4 8 4 8 0 5 0 4 8 0 0 4 8 4 8 4 8 4 8 4 8 4 8 4 8 5 0 0 0 6 2 4 0 8 4 5 0 4 8 4 8 4 8 4 8 4 8 4 8 4 8 0 0 0 0 0 2 0 2 2 2 1 5 2 9 1 9 1 8 2 9 2 7 2 6 2 6 2 6 2 6 2 6 0 1 1 1 7 2 6 2 6 2 1 2 5 2 5 2 0 2 0 1 9 2 0 2 0 2 1 2 3 2 2 2 4 3 7 0 1 9 2 4 4 6 2 5 2 5 2 5 2 5 2 2 0 2 5 2 5 2 5 1 6 2 5 2 5 5 0 2 5 2 5 4 4 0 2 5 2 5 2 5 5 0 15 0 BRAKE DRIVER BRAKE DRIVER EEPROM ROM CP...
Страница 22: ...B B 1B A 3B A 3B A 3B R39 R40 R41 R42 R43 R44 R45 R46 R47 R48 R49 R50 R51 R52 R53 R54 R55 B 1B B 1B B 1B B 1B A 3B B 3C B 1C B 1C B 1B A 3A A 3A A 3B A 3B A 1B A 1B B 3B A 1B R56 R57 R58 R59 R60 R61 R62 R63 R64 R65 R66 R67 R68 R69 R70 R71 R72 B 3C B 3C B 3C B 3B A 1C A 1C B 1C A 1C B 3B B 3B B 3B A 1B B 1B A 3B A 3B B 1C A 2C R73 R74 R75 R76 R77 C1 C2 C3 C4 C5 C6 C7 C8 C9 C10 C11 B 1C B 1C B 1C B ...
Страница 23: ...5 1 6 2 0 0 8 0 2 0 1 2 3 5 3 6 3 5 2 7 2 2 2 6 2 2 2 4 4 8 0 0 0 0 0 0 0 1 7 2 8 2 6 2 3 1 7 1 8 2 6 2 0 5 0 2 6 2 3 0 2 6 4 9 4 9 0 0 0 4 9 4 9 4 8 4 3 4 6 4 9 4 9 4 9 4 9 4 9 4 9 0 8 5 0 0 4 9 4 8 4 6 4 9 4 9 0 0 0 0 4 9 0 4 8 3 5 3 6 3 5 2 7 2 2 2 6 2 2 2 4 2 0 2 6 1 8 1 7 2 3 2 6 2 8 1 7 0 7 0 8 2 4 2 0 2 0 1 2 0 5 1 1 8 5 1 5 0 9 4 9 4 9 0 4 3 0 3 0 CPU D A ROM DRIVER 232C 422 DRIVER 485 GEN...
Страница 24: ... B 3D R94 R95 R97 R98 R99 R100 R101 R102 R103 R104 R105 R106 R107 R108 R109 R110 R111 R112 B 3D A 2D B 1C B 2D B 2D B 2D B 2D B 2C B 2C B 2C B 2C B 2C B 2C B 2C B 2C B 2C B 2C B 2C R113 R114 R115 R116 R117 R118 R119 R120 R121 R122 R123 R124 R125 R126 R127 R128 R129 R130 B 2C B 2C B 2C B 2C B 2C B 2C B 2C B 3C B 3C B 3C B 3C B 3C B 3C B 3C B 3C B 3C B 3C B 3C R131 R132 R138 R139 R140 R141 R142 R143...
Страница 25: ...3 11 FROM TO TERM CN7 FROM TO CPU CN8 SC93512 17 2 15 0 6 1 5 0 6 1 5 0 2 5 9 7 125V 5A TP1 3 11 3 11 2C 3 11 L71 0 POW BOARD SCHEMATIC DIAGRAM 1000p C70 OPEN Page 3 12 K1 Page 3 9 ...
Страница 26: ...59 R60 R61 R64 R71 R72 R81 R82 R83 R84 R85 R86 R181 R201 5C 2B 2B 2A 2A 3B 3B 3B 4C 5B 2B 4B 1D 1C 1C 1C 1C 1B 2C 4F R202 R611 R612 R613 R831 R832 C4 C6 C8 C14 C15 C16 C18 C20 C21 C22 C23 C24 C25 4E 5B 6B 6B 1C 1C 5F 4F 5B 2E 3C 3C 3A 3A 4D 4A 2E 1F 1E C26 C27 C28 C29 C30 C42 C55 C56 C57 C64 C65 C72 C73 C81 C111 C112 C141 C142 C143 C171 1E 1E 2F 4E 4A 5C 3A 4B 4B 5B 5B 4B 5A 1D 4F 3E 2E 2E 2E 3C C...
Страница 27: ...SUSHITA Variable Shunt Regulator 䡵 AN78L09M X MATSUSHITA 3 Terminal Positive Voltage Regulator 9V 䡵 AN79L07 T MATSUSHITA Voltage Regulator 䡵 AN8085M X MATSUSHITA REG Servo 䡵 CXA1211M X SONY Electric Volume 䡵 HD49815TF HITACHI Video camera signal processor ...
Страница 28: ...3 14 3 14 䡵 ICX208AK A SONY 1 4 Inch CCD Image Sensor for NTSC Color Camera ...
Страница 29: ...3 15 3 15 䡵 ICX209AK A SONY 1 4 Inch CCD Image Sensor for PAL Color Camera ...
Страница 30: ...3 16 3 16 䡵 CXD1267AN T4 SONY Vertical Clock Driver for CCD Image Sensor 䡵 HD49323AFC 01 HITACHI CDS AGC 10bit ADC 䡵 M51995AFP X MITSUBISHI Switching Regulator Controller ...
Страница 31: ...䡵 M62353GP X MITSUBISHI 8 Bit 8 Channel D A Converter 䡵 M66242FP X MITSUBISHI 12 Bit 4 Channel PWM Generator 䡵 MB90613A FUJITSU MCU 䡵 PLSC1284 FUJITSU 2M Bit Flash Memory 䡵 MC14046BF X MOTOROLA Phase Locked Loop ...
Страница 32: ...TSUSHITA Voltage Detecter 䡵 MPC17A29VM X MOTOROLA 2 Channel Motor Driver 䡵 NJM2267V W JRC Dual 6dB Video Amplifier including 75OHM Driver 䡵 NJM2509V W JRC Super Imposer including Y C MIX Circuit 䡵 TC74VHC14FT X TOSHIBA Hex Schmitt Inverter 䡵 NJU7064V X JRC Quad Op Amp ...
Страница 33: ...tage CMOS EEPROM 䡵 SP491EEN X SIPEX RS 485 Transceivers 䡵 TC4W53F X TOSHIBA 2 Channel Multiplexer 䡵 PQ05RD11 SHARP Series Regulator 䡵 PQ30RV11 SHARP Regulator 䡵 TC74VHCT00AFT X TOSHIBA Quad 2 Input NAND Gates 䡵 TC74VHCT08AFT X TOSHIBA Quad 2 Input AND Gates 䡵 TC74VHCT74AFT X TOSHIBA Dual D Type Positive EDGE Triggered Flip Flops With Preset AND Clear ...
Страница 34: ... TC7SH86FU X TOSHIBA Single Exclusive OR Gate 䡵 TC7WU04F X TOSHIBA Triple Unbuffered Inverter Gate 䡵 TK11333BMC X TOKO Regulator 䡵 TK11650U X TOKO 3 Terminal Positive Voltage Regulator 䡵 UPC358G2 W NEC Dual Op Amp 䡵 UPC358G2 X NEC Refer to UPC358G2 W 䡵 UPD6461GS 936 NEC On Screen Charactor Display ...
Страница 35: ... Ferrite core Note View in the direction of arrow D View in the direction of arrow F Soldering x 2 points Black Brown Pass the wire through the two holes View in the direction of arrow E View in the direction of arrow G Insulation tape Pass the wire through the hole Soldering x 2 points Should not slacken Note Brown Attach the COIL SPRING as shown below Locate the reinforcing plate to upper side L...
Страница 36: ...TOR CN5 on MOTOR ASSEMBLY PAN 25 SC32277 00A CHASSIS 26 SC46481 001 POLE 27 SC46478 001 BRAKE BASE 28 SC32097 001 CONNECTOR COVER 29 SC46124 003 TERMINAL LABEL 30 SC46486 001 TERMINAL BASE 31 SC32280 001 CEILING PANEL 32 SCV2992 002 WIRE ROPE 33 SC45925 001 LABEL E only 33 SC45396 002 LABEL U only 34 SS47383 001 LABEL U only 35 SC46638 001 TABLE SHAFT 36 SC46640 001 SHIELD PLATE S1 QYSPBP2004N SCR...
Страница 37: ...SECTION 6 PACKING 6 1 PACKING 6 1 Note Accessovies above are subject to change without notice SC 96866 U SC 96867 E INSTRUCTIONS CARTON CARTON CARTON CARTON BOX ...
Страница 38: ...Focus chart ...
Страница 39: ...CAPACITOR Non Poler electrolytic Capacitor P P CAPACITOR PolyPropylene Capacitor PPS CAPACITOR PolyPhenylene Sulfied film Capacitor P S CAPACITOR PolyStyrene Capacitor TAN CAPACITOR Tantal Capacitor TRIM CAPACITOR Trimer Capacitor VAL CAPACITOR Valiable Capacitor RESISTORS In the Description column All resistance values are in ohms k expresses kilo ohm 1 000 ohms k M expresses mega ohm 106 ohms M ...
Страница 40: ...ODE HITACHI D3 HVU306A5 W V C DIODE HITACHI D4 HVU306A5 W V C DIODE HITACHI R1 NRSA63J 472X M G RESISTOR 4 7k 1 16W R2 NRSA63J 333X M G RESISTOR 33k 1 16W R3 NRSA63J 823X M G RESISTOR 82k 1 16W R4 NRSA63J 221X M G RESISTOR 220 1 16W R5 NRSA63J 221X M G RESISTOR 220 1 16W R6 NRSA63J 221X M G RESISTOR 220 1 16W R7 NRSA63J 221X M G RESISTOR 220 1 16W R8 NRSA63J 0R0X M G RESISTOR 0 1 16W R9 NRSA63J 0R...
Страница 41: ...CAPACITOR 10 10V C40 NBE21AM 106X TAN CAPACITOR 10 10V C41 NBE21AM 106X TAN CAPACITOR 10 10V C42 NCF31EZ 104X CER CAPACITOR 0 1 25V C44 NCB31EK 103X CER CAPACITOR 0 01 25V C45 NCF31EZ 104X CER CAPACITOR 0 1 25V C46 NCF31EZ 104X CER CAPACITOR 0 1 25V C47 NCB31EK 103X CER CAPACITOR 0 01 25V C48 NCF31EZ 104X CER CAPACITOR 0 1 25V C49 NBE41AM 226X TAN CAPACITOR 22 10V C50 NCF31EZ 104X CER CAPACITOR 0 ...
Страница 42: ... 104X M G RESISTOR 100k 1 16W R55 NRSA63J 473X M G RESISTOR 47k 1 16W R56 NRSA63J 331X M G RESISTOR 330 1 16W R57 NRSA63J 331X M G RESISTOR 330 1 16W R58 NRSA63J 223X M G RESISTOR 22k 1 16W R59 NRSA63J 223X M G RESISTOR 22k 1 16W R60 NRSA63J 331X M G RESISTOR 330 1 16W R61 NRSA63J 331X M G RESISTOR 330 1 16W R62 NRSA63J 223X M G RESISTOR 22k 1 16W R63 NRSA63J 223X M G RESISTOR 22k 1 16W R64 NRSA63...
Страница 43: ...W U NRSA63J 123X M G RESISTOR 12k 1 16W E R52 NRSA63J 332X M G RESISTOR 3 3k 1 16W R53 NRSA63J 0R0X M G RESISTOR 0 1 16W R54 NRSA63J 102X M G RESISTOR 1k 1 16W R55 NRSA63J 103X M G RESISTOR 10k 1 16W R56 NRSA63J 222X M G RESISTOR 2 2k 1 16W R57 NRSA63J 473X M G RESISTOR 47k 1 16W R58 NRSA63J 103X M G RESISTOR 10k 1 16W R61 NRSA63J 183X M G RESISTOR 18k 1 16W R62 NRSA63J 333X M G RESISTOR 33k 1 16W...
Страница 44: ...ACITOR 0 1 25V C38 NCF31EZ 104X CER CAPACITOR 0 1 25V C40 NCF31EZ 104X CER CAPACITOR 0 1 25V C46 NCF31EZ 104X CER CAPACITOR 0 1 25V C47 NBE21CM 105X TAN CAPACITOR 1 16V C48 NCB31CK 273X CER CAPACITOR 0 027 16V C51 NCF31EZ 104X CER CAPACITOR 0 1 25V C52 NCB21EK 104X CER CAPACITOR 0 1 25V C53 NCB21EK 104X CER CAPACITOR 0 1 25V C54 NCB21EK 104X CER CAPACITOR 0 1 25V C55 NCB21EK 104X CER CAPACITOR 0 1...
Страница 45: ...02D 562X M G RESISTOR 5 6k 1 10W R612 NRSA02D 561X M G RESISTOR 560 1 10W R613 NRSA02D 561X M G RESISTOR 560 1 10W R831 NRSA02D 152X M G RESISTOR 1 5k 1 10W R832 NRSA02D 182X M G RESISTOR 1 8k 1 10W C4 QCZ9019 222 CER CAPACITOR 2200p C6 QFZ9073 103 FILM CAPACITOR 0 01 C14 NCB11HK 224X CER CAPACITOR 0 22 50V C15 NCZ1010 102X CER CAPACITOR 1000p C16 NCZ1008 473X CER CAPACITOR 0 047 C18 NCZ1025 335X ...
Страница 46: ...Name Description 5 6 TERM BOARD ASSEMBLY PARTS LIST 06 SCK2594 02 A0A 06 5 8 SC1 SS47723 001 SCREW M3x7 5 D1 HZM27WA W ZENER DIODE HITACHI CN7 QGA2004C1 14S CONNECTOR 7PIN CN12 SCV2957 002 CONNECTOR 2PIN TB1 SCV2968 001 CONNECTOR 8PIN TG1 SC46620 001 TERMINAL GUARD ...
Страница 47: ... VICTOR COMPANY OF JAPAN LIMITED TK AM200 ACTIVE MOVEMENT VIDEO CAMERA Printed in Japan SC96866 U SC96867 E 3 TK AM200 INSTRUCTIONS For Customer Use Enter below the Serial No which is located on the body Retain this information for future reference Model No TK AM200 Serial No This instruction book is made from 100 recycled paper ACTIVE MOVEMENT VIDEO CAMERA SC96866 U SC96867 E ...
Страница 48: ...ntact your electrician to replace your obsolete outlet Do not defeat the safety purpose of the grounding plug 11 For added protection for this product during a lightning storm or when it is left unattended and unused for long periods of time unplug it from the wall outlet and disconnect the antenna or cable system This will prevent damage to the product due to lightning and power line surges 12 Do...
Страница 49: ...EVITER LES RISQUES D INCENDIE OU D ELECTRO CUTION NE PAS EXPOSER L APPAREIL A L HUMIDITE OU A LA PLUIE Safety Precautions INFORMATION FOR CANADA RENSEIGNEMENT POUR CANADA This Class B digital apparatus complies with Canadian ICES 003 Cet appareil numérique de la Class B est conforme á la norme NMB 003 du Canada WARNING TO REDUCETHE RISK OF FIRE OR ELECTRIC SHOCK DO NOT EXPOSETHIS APPLIANCETO RAIN ...
Страница 50: ...sed to rain or water In a place with vapor or oil soot for example in a kitchen Where the temperature is outside the allowed operating temperature range 10 C to 50 C Near a source of radiation X rays strong radio waves or magnetism In a place subjected to vibrations In a place with excessive dirt The camera incorporates an AGC circuit When it is used under low light conditions the camera sensitivi...
Страница 51: ...2C side Controls Connectors and Indicators Camera Body With terminal board in attached condition INTRODUCTION Side view 7 6 9 2 7 7 3 5 4 1 8 0 9 12 System setting switches Set switches in accordance with the sys tem to be connected to The settings comprise setting the form of the control signal cable connection communication protocol control signal termination ON OFF and image synchro nization me...
Страница 52: ...R OUTPUT 2 MONITOR OUTPUT 1 Memo When operating a system using the RM P2580 several cameras up to 8 can be connected and used on one control signal cable Consequently an incorrect switch setting on just a single camera will cause the entire system to work incorrectly 11 Connections Settings When connecting Turn OFF the power supply to all equipment to be used before making connections Carefully re...
Страница 53: ...ction terminals become RS 232C In this case the use of multi conductor shielded cables is recommended for the connection Maximum extension is 5 m Video signal coaxial cables Use RG 59 U coaxial cables Treat the tips of the coaxial cables as shown on the left before connection CAUTION The RG 11 U coaxial cable cannot be used Control signal cables These cables should be connected when the camera is ...
Страница 54: ...amera image OFF Internal synchronization INT ON The camera s vertical synchroniza tion is matched with the frequency of the AC 24V line power supply When switching between mul tiple cameras using a switcher selecting this mode and adjust ing the vertical phase can re duce the monitor sync distur bances occurring when the camera image is switched This cannot be used in regions where the power frequ...
Страница 55: ... is secured to the camera 2 Connect the connector cable from the camera body to the connector on the ter minal board 4 Attach the drop prevention wire As shown in the illustration pull the drop prevention wire out from the ceiling mount and attach it to the drop prevention wire hook on the underside of the camera body 17 Positioning alignment protrusion A Camera clamp B Camera clamping screw Camer...
Страница 56: ...T LENS CAMERA POSITION CAMERA POSITION CAMERA CAMERA POSITION POSITION REMOTE CONTROL UNIT REMOTE CONTROL UNIT RM P2580 RM P2580 ALARM ALARM PO POWER WER KEY LOCK KEY LOCK MENU button SET button Power switch on the rear panel PAN TILT control lever S E T U P P O S I I O N S E T U P T C A ME A R C O N T O L U N I T R Item cursor Submenu to be followed SETUP screen from the remote control RM P2580 1...
Страница 57: ...sed for setting functions separately for each camera 21 CAMERA VIDEO ADJUST Screen Item Function Variable Factory range setting AGC MODE SUPER AGC SHUTTER SPEED ENHANCE AV PEAK Sets the maximum gain of the AGC Automatic Gain Control Set to OFF when the AGC function is not used Set to 20 dB when illumination is particu larly dim Used when the brightness is still insufficient even if the AGC MODE is...
Страница 58: ...y the value resulting from the AWC adjustment to the setting values of ATW or MANUAL respectively AWC adjustment works separately for each position but only one adjustment value is stored and the value stored in the camera body is the value obtained when AWC adjustment was last performed Integer steps 23 VIDEO ADJUST FOR POSI Screen Item Function Variable Factory range setting BLC MODE W BALANCE R...
Страница 59: ...This is a screen for changing the position of the light metering area used for backlight compensation There are two types of screens on which the light metering area can be changed BLC EDIT 1 and BLC EDIT 2 BLC EDIT Screen 1 Select BLC EDIT 1 on the CAMERA MODE SELECT screen When the SET button is pressed the BLC EDIT 1 screen is displayed See page 20 When BLC EDIT 2 is selected and the SET button...
Страница 60: ...or each camera RM P2580 27 POSITION TEXT Setting 1 Select the POSITION TEXT item on the TEXT EDIT screen and then press the SET button The POSITION TEXT screen is displayed on the monitor Characters selected from the character area are displayed in the text input area Select the position for which position title text should be set Use the POSITION button Numeric key ENTER button to select the posi...
Страница 61: ...T E D I T A U T O P A T R O L S E T A U T O P A N S E T P A N I A L A RM S E T C F A C T R Y S E T T I N G S O U T O A P A N S E T S T A R P O S E T T S I I O N T R E T U N P O S E T R I T I O N S T P O T A R S S I T I ON S E T CAMERA SETUP screen AUTO PAN SET screen START POSITION SET screen MENU button SET button Numeric key PAN TILT control lever CAMERA button ENTER button ZOOM TELE button ZOOM...
Страница 62: ...ls see the instruction manual for the RM P2580 1 Select the AUTO PATROL item on the camera s SETUP screen and then press the SET button The AUTO PATROL setting screen is displayed on the monitor The AUTO PATROL setting screen consists of two screens When the ZOOM TELE button is pressed the next AUTO PATROL set ting screen appears When the ZOOM WIDE button is pressed the first AUTO PATROL set ting ...
Страница 63: ...1 alarm generating switch ALARM IN2 If the resistance is large the alarm may not work correctly When the contact closes short the alarm condition is generated When the contact opens open the alarm condition is generated 2 Setting of Alarm Signal Polarity POLARITY Match the setting with that of the alarm generating contact switch See page 24 Set to MAKE Set to BREAK ALARM 1 OTHERS ALARM 2 33 3 Sett...
Страница 64: ... Specifications Contour compensation Horizontal vertical Lens Focal length f 2 2 mm Max aperture ratio F1 0 Moving mechanism Panning 30 Panning speed 2 s 4 s 6 s 12 s 20 s 40 s 60 s 80 s in MANUAL mode 4 s AUTO PAN mode 120 s Preset maximum Tilting 0 to 60 from down to horizontal direction Tilting speed 2 s 4 s 6 s 12 s 20 s 40 s 60 s 80 s in MANUAL mode 120 s Preset maximum General Power requirem...