background image

English   

- 25 -

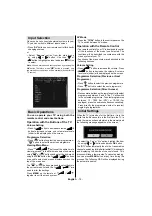
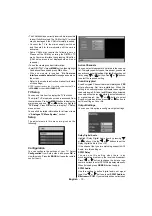
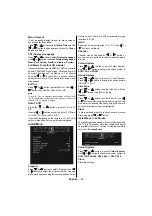
Menu Timeout

To set a specifi c display timeout for menu screens, 
set a value for this option.

Press “

” or “

” button to select 

Menu Timeout

. Use 

“ ” or “ ” button to change menu timeout to 

15 sec

30 sec

 or 

60 sec

.

TXT (Teletext) Language

Press “

” or “

” button to select 

Teletext Language

Use “ ” or “ ” button to change 

Teletext Language

 to 

West, East, Cyrillic, Turk/Gre, Arabic 

or

 Persian. 

Full Mode (*only for FHD models)

If you connect a device via HDMI or YPbPr connectors 
and set 1080i/1080P resolutions, Full Mode item will 
be visible.You can set Full Mode as 1:1 or Normal 
by using “ ” or “ ”.If you select 1:1, screen ratio will 
be adjusted correctly. If you set Normal, screen ratio 
may expand. 

Ext Out

Press “

” or “

” button to select Ext Out. Use “ ” or 

“ ” button to set the Ext Out as On or Off.

Note:

To record TV on an external video recorder set Ext. Out to 
‘On’ to enable video output from scart connector. If Ext. Out 
is set to ‘Off’, only audio is output.

Auto TV Off

Press the “

” or “

” buttons to select “Auto TV 

Off”.

Use the “ ” or “ ” buttons to set the Auto TV Off time 
to 1H, 2H, 3H, 4H, 5H, 6H or OFF.

If no button is pressed on the remote or TV, the TV will 
switch to standby after the set time has elapsed.

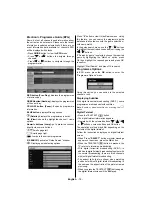
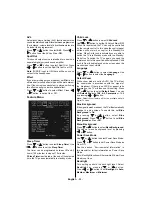
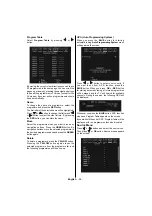
Install Menu

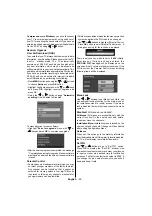
Program

Press “

” or “

” button to select Program. Use  “ ” 

or “ ” button to select the program number. You can 
also enter a number using the numeric buttons on the 

remote control. There are 200 programme storage 
locations 0 to 199.

Band

Band can be selected either C or S. Press “ ” or 
“ ” button to set Band. 

Channel

Channel can be changed by “ ” or “ ” button or 
use the numeric buttons to input channel numbers 
directly.

Colour System

Press “

” or “

”  button to select Colour System. 

Use “ ” or “ ” button to change the colour system to 

AUTO, PAL

 or 

PAL60.

Sound System

Press “

” or “

” button to select  Sound System.  

Press “ ” or “ ” button to change the sound system 
to BG,DK, I, L or L’.

Fine Tune

Press “

” or “

” button to select Fine Tune. Press     

“ ” or “ ” button to adjust the tuning.

Search

Press “

” or “

” button to select Search. Use  “ ” 

or “ ” button to start programme searching. You can 
also enter the desired frequency using the numeric 
buttons while Search item is highlighted.

Store

To store settings, press OK in any sub menu or select 
Store and press “ ” or “ ” or OK.

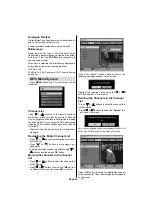
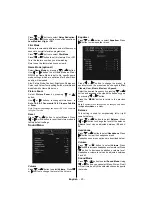
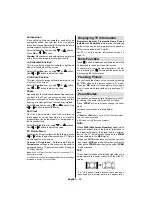
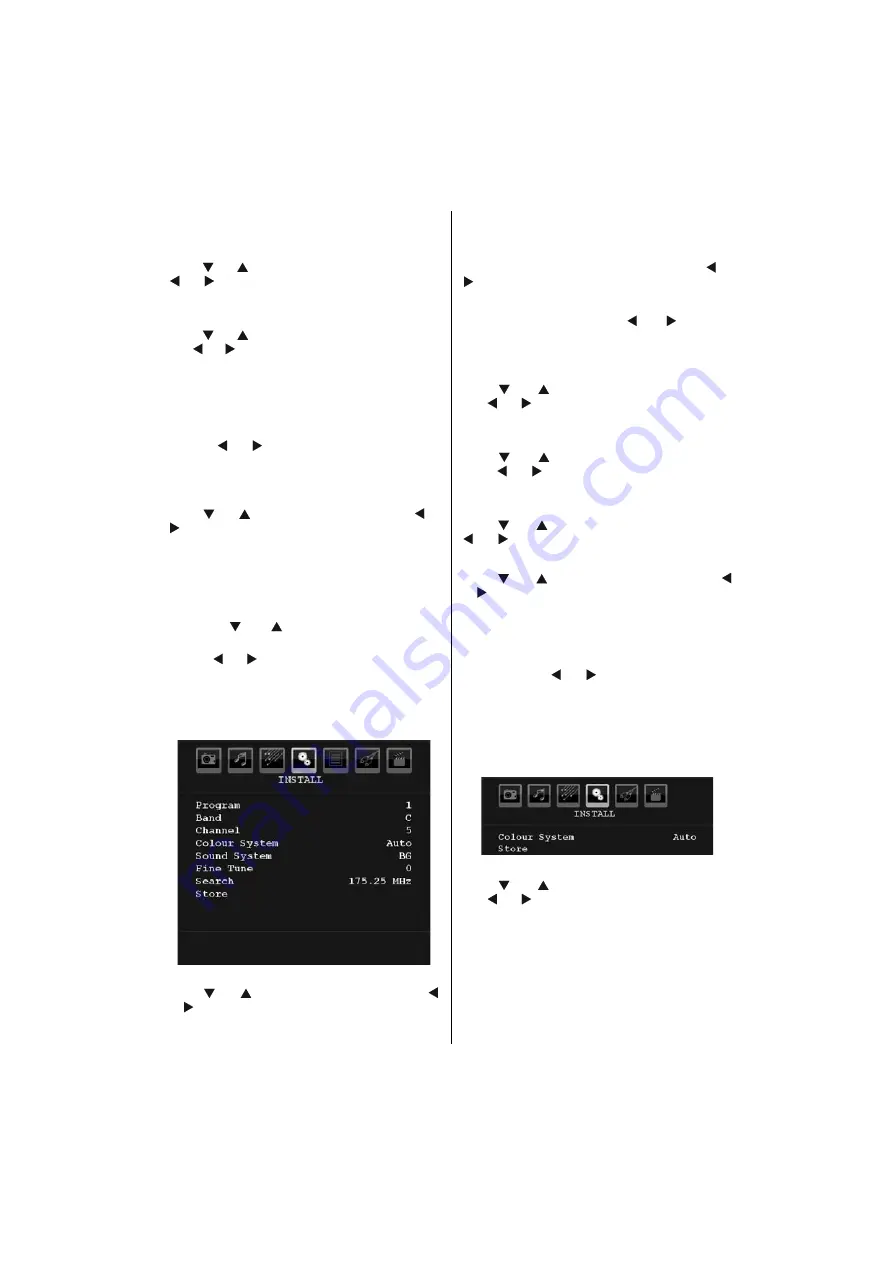
Install Menu in AV Modes

The following screen appears in the install menu when 
the TV is in AV modes. Note that limited options will 
be available. Switch to TV mode for viewing complete 
version of the 

Install

 menu.

Colour System

Press “

” or “

” button to select 

Colour System

Use “ ” or “ ” button to change the colour system to 

AUTO, PAL, PAL60, NTSC 4,43 

or

 NTSC 3,58.

Store

Store the settings.

Содержание LT-32HG25J

Страница 1: ...LT 32HG25J 0311TMH VT VT INSTRUCTIONS LCD TV ENGLISH ...

Страница 2: ...recovery and recycling in accordance with your national legislation and the Directive 2002 96 EC and 2006 66 EC By disposing of these products correctly you will help to conserve natural resources and will help to prevent potential negative effects on the environment and human health which could otherwise be caused by inappropriate waste handling of these products For more information about collec...

Страница 3: ...ng Subtitles 16 Digital Teletext 16 Analogue Teletext 17 Widescreen 17 IDTV Menu System 17 Channel List 17 Navigating the Entire Channel List 17 Moving the channels in the channel list 17 Deleting the Channels in the Channel List 17 Renaming channels 18 Adding Locks to Channels 18 Setting Favourites 18 Common Interface 19 TV Setup 19 Setup 19 Configuration 19 Language Settings 21 Installation 21 A...

Страница 4: ...ogramming system Forward or backward manual tuning Automatic sound mute when no transmission NTSC playback AVL Automatic Volume Limiting When no valid signal is detected after 5 minutes the TV switches itself automatically to standby mode PLL Frequency Search PC input Plug Play for Windows 98 ME 2000 XP Vista Windows 7 Audio line out Game Mode Introduction Thank you for choosing this product This ...

Страница 5: ...tandards but as with any electronic equipment you must take care to stay safe and get the best results Here is some good advice to help you do this Read these instructions carefully before you try to use the television Protect the mains lead You must make sure the mains lead cannot be walked on crushed chafed or cut Avoid hursh conditions such as wet or damp places high humidity strong vibration e...

Страница 6: ...ied stand in 8 accordance with the installation instructions Eye Fatigue When using this product as a computer monitor health and safety experts recommend short frequent breaks rather than occasional longer breaks for example a 5 10 minute break after an hour of continuous screen work is likely to be better than a 15 minute break every 2 hours Do not use the monitor against a bright back ground an...

Страница 7: ...in TXT mode Expand in TXT mode Hold in TXT mode TV RADIO Switches between TV and radio broadcasts in DTV mode Standby GUIDE Programme guide Cursor up Cursor right BACK Return Cursor down Jump to now in EPG mode BLUE Install Menu Analogue TV YELLOW Feature Menu Analogue TV Volume up down Muting 0 1 8 9 Numeric buttons Teletext on PAT Picture and text Teletext off Analogue TV Text on Text off Digita...

Страница 8: ...kage of batteries Batteries should not be exposed to excessive heat such as sunshine fire or the like Operating Range for the Remote Control Point the top of the remote control toward the LCD TV s remote sensor LED while pressing a button Remote range is approximately 7m 23ft Power Connection IMPORTANT The TV set is designed to operate on 220 V 240 V AC 50 Hz After unpacking allow the TV set to re...

Страница 9: ...uttons on the remote control or on the TV set the programme that you were watching last will be reselected To Switch the TV Off Switch the button to position 2 as illustrated so the TV will switch OFF To power down the TV completely unplug the power cord from the mains socket Note When the TV is switched to standby mode Power LED can blink to indicate that Over Air Download is active Using the Cab...

Страница 10: ...ack Connectors 12 LAN EXT 2 EXT 1 Subwoofer Out is for connecting an external active subwoofer to the set to give a much deeper bass effect Use an appropriate RCA cable to connect the set to a subwoofer unit Audio Line Outs output audio signals to an external device such as an optional sound system To connect the external speakers to your TV use AUDIO LINE OUTS of the TV with an audio cable EXT 2 ...

Страница 11: ...Connect the audio cable between AUDIO INPUTS on the TV and audio outputs of your device to enable component audio S PDIF Coaxial Out outputs digital audio signals of the currently watched source Use an SPDIF coaxial cable to transfer audio signals to an amplifier with a digital sound input RF Input connects to an antenna or a cable system Note that if you use a decoder or a media recorder you shou...

Страница 12: ...f external devices Connect the video cable between the VIDEO IN socket on the TV and the VIDEO OUT jack on your device Audio Inputs SIDE AV are used for connecting audio signals of external devices Connect the audio cable between the AUDIO INPUTS on the TV and the AUDIO OUTPUT jacks on your device Note If you connect a device to the TV via the VIDEO INPUT you should also connect your device with a...

Страница 13: ...ery hazardous operation Do not repeatedly plug and unplug the drive This may cause physical damage to the USB interface or the USB device itself SIDE VIEW USB MEMORY USB Memory Connection Plug your USB device to the USB input of the TV If the USB device is not recognised remove and re insert it It is recommended that you connect your USB device directly to the Side USB input 2 of the TV Side USB i...

Страница 14: ...levels of quality It is not necessary to connect by all three methods HDMI inputs Scart sockets Component video inputs Component audio inputs DVD Player Using Side AV Connectors You can connect a range of optional equipment to your LCD TV Possible connections are shown below Note that cables shown in the illustration are not supplied For connecting a camcorder connect to the S VIDEO or VIDEO IN so...

Страница 15: ...en AV modes Operation with the Remote Control The remote control of your TV is designed to control all the functions of the model you selected The functions will be described in accordance with the menu system of your TV Functions of the menu system are described in the following sections Volume Setting Press button to increase the volume Press button to decrease the volume A volume level scale sl...

Страница 16: ...assigned to the programmes If you do not accept the locations and or the names of the programmes you can change them in Program table For details see the section Program table If the table is acceptable Press MENU twice to revert to the picture General Operation Press the AV button and select DTV from the list The TV then switches to digital TV mode Information Screen Whenever you change the chann...

Страница 17: ...genre is selected choose the required genre by highlighting the Match on option press OK then highlight the required genre and press OK to confirm Highlight Start Search and press OK to search Programme Options In EPG menu press the OK button to enter the Programme Options menu Using this option you can switch to the selected channel or exit Displaying Subtitles With digital terrestrial broadcasti...

Страница 18: ...annel List directly Channel List is the place where the channels are managed Navigating the Entire Channel List Press or keys for selecting the previous or next channel Press or buttons to move page up or page down To watch a specific channel highlight it using or buttons and then press OK button Moving the channels in the channel list Press or buttons to select the channel that will be moved Pres...

Страница 19: ...g a selected channel by using YELLOW button Use GREEN button to Tag Untag all channels Adding a Channel to a Favourites List By pressing or buttons highlight the channel that you want to add to the favourite list By pressing OK button the highlighted channel is added to Favourite List F icon indicates that a channel is added to Favourite List Removing a Channel from a Favourite List Highlight the ...

Страница 20: ...ure the settings of your TV Select Configuration from Setup menu and press OK to view this menu Press the BACK button on the remote control to exit Active Channels You can select broadcasts to be listed in the channel list To display specific types of broadcast you should use active channel list setting HighlightActive channel list by using or buttons Use or buttons to select the required setting ...

Страница 21: ...nnot be selected for viewing unless a four digit PIN code is entered In this way any channel not suitable for younger viewers can be prohibited This function enables or disables the menu protection system and allows the PIN code to be changed Use or buttons to highlight Parental Control Press OK button to enter Parental Control menu A dialog box asking for the lock key is displayed There is only o...

Страница 22: ...nguage settings menu will be displayed You can set the desired language options by using and buttons IP Settings You can configure your TV s IP settings by using this menu screen Press YELLOW button to set static IP settings Use BLUE button to configure dynamic IP settings You can press RED button to disable IP configuration In order for the Ethernet host to work correctly with your Internet conne...

Страница 23: ...gs Selecting Yes by pressing OK button while the Yes is highlighted will delete the existing channel table After deleting the channel table a message asking to start an automatic DIGITAL channel scan appears Select YES and follow the on screen prompts as described in initial settings on page 14 Analogue TV Menu System Picture Menu Mode For your viewing requirements you can set the related mode opt...

Страница 24: ...default settings Sound Menu Volume Press or button to select Volume Press or button to change the level of the Volume Equaliser Press or button to select Equaliser Press button to view equaliser menu Press or button to change the preset In equalizer menu the preset can be changed to Flat Classic User Music Movie and Speech Select the desired frequency by pressing or button and increase or decrease...

Страница 25: ...y On button When Child Lock is activated you are able to switch the TV into Standby mode with the Standby On button To switch the TV on again you need the remote control In this case if a button is pressed Child Lock Is On will be displayed on the screen when the menu screen is not visible Language Press or button to select Language Use or button to select the Language Default Zoom While zoom mode...

Страница 26: ...ll Menu Program Press or button to select Program Use or button to select the program number You can also enter a number using the numeric buttons on the remote control There are 200 programme storage locations 0 to 199 Band Band can be selected either C or S Press or button to set Band Channel Channel can be changed by or button or use the numeric buttons to input channel numbers directly Colour ...

Страница 27: ...amme space and press the GREEN button again Delete To delete a programme press the YELLOW button Pressing the YELLOW button again erases the selected programme from the programme list and the following programmes shift one line up APS Auto Programming System When you press the BLUE button for starting automatic tuning Auto Programming System menu will appear on the screen Press or button to select...

Страница 28: ...essage will be displayed on the menu screen Note Unknown file formats will be marked with a question mark You can use the following remote control buttons to browse between files stored on your USB drive Up Down Explores the files OK Views plays a selection enter folder Menu Back Red Filters JPG files GREEN Filters MP3 files Select next or previous file Playing mp3 Files If you play an mp3 file th...

Страница 29: ...you set Colour Temp as User you can define R G B settings manually Sound Feature and Source settings are identical to thesettings explained in Analog Tv menu system Displaying TV Information Programme Number Programme Name Sound Indicator and Zoom Mode information is displayed on the screen when a new programme is entered or button is pressed in ATV mode For DTV see the section information screen ...

Страница 30: ... once Pressing this button again will split the screen into two windows one displaying the teletext and the other displaying the current channel Pressing again will quit the teletext mode Index Selects the teletext index page Expand Press once to enlarge top half of the page press again to enlarge the bottom half of the page Press again to revert back to normal size Reveal Shows hidden information...

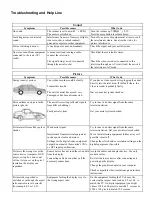
Страница 31: ...s you can improve the picture quality by changing the direction of the aerial Is the picture or teletext unrecognisable Check if you have entered the correct frequency Please retune the channels The picture quality may degrade when two peripherals are connected to the TV at the same time In such a case disconnect one of the peripherals No Picture Is the aerial connected properly Are the plugs conn...

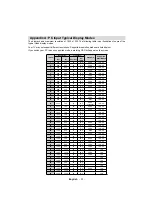
Страница 32: ... 8 16 9 4 3 12 800 600 72 48 1 VESA 16 9 4 3 13 800 600 75 46 9 VESA 16 9 4 3 14 800 600 85 53 7 VESA 16 9 4 3 15 832 624 75 49 7 MAC 16 9 4 3 16 1024 768 43 35 5 VESA interlace 16 9 4 3 17 1024 768 60 48 4 VESA 16 9 4 3 18 1024 768 70 56 5 VESA 16 9 4 3 19 1024 768 72 57 7 16 9 4 3 20 1024 768 75 60 0 16 9 4 3 21 1024 768 85 68 3 16 9 4 3 22 1152 864 60 53 8 16 9 4 3 23 1152 864 70 64 2 VESA 16 9...

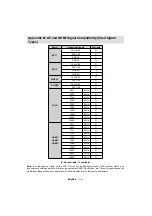
Страница 33: ...720P 60Hz O 1080I 50Hz O 1080I 60Hz O 1080P 50Hz O 1080P 60Hz O HDMI1 HDMI2 HDMI3 480I 60Hz O 480P 60Hz O 576I 50Hz O 576P 50Hz O 720P 50Hz O 720P 60Hz O 1080I 50Hz O 1080I 60Hz O 1080P 50Hz O 1080P 60Hz O 1080P 24 HZ O X Not Available O Available Note In some cases a signal on the LCD TV may not be displayed properly The problem may be an inconsistency with standards from the source equipment DVD...

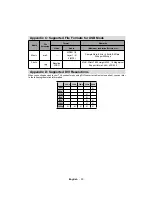
Страница 34: ...le Rate 8kHz 48kHz Bit Rate 32kbps 320kbps Photo jpg Baseline JPEG MAX Width 7680 Height 4320 16 Mega pixel Support format 444 422 420 Appendix D Supported DVI Resolutions When connecting devices to your TV s connectors by using DVI converter cables not supplied you can refer to the following resolution information 24Hz 25Hz 30Hz 50Hz 60Hz 480i 480p 576i 576p 720p 1080i 1080p ...

Страница 35: ... x 520 x 97 Weight kg 11 60 Digital Reception DVB T Transmission Standards MPEG2 MPEG4 HD DVB T i DEMODULATION Symbol rate COFDM with 2K 8K FFT mode Modulation 16 QAM 64 QAM FEC for all DVB modes automatically found ii VIDEO H 264 MPEG 4 part 10 main and high profile level 4 1 MPEG 2 MP HL video decoder HD display multi format capable 1080i CVBS analogue output iii AUDIO MPEG 1 layer I II MPEG 2 l...

Страница 36: ...soft cushioned 2 material such as a pillow or thick piece of foam beneath the screen Install remove the four screws and then install remove the STAND to from the TV as shown below 3 in pictures A and B MOUNTING ON THE WALL This unit is VESA compliant and is designed to be wall mounted with a VESAcompliant 200mm x 200mm mounting kit designed for flat panel TVs sold separately Mount this unit accord...

Страница 37: ...ignals from hills or buildings Faulty aerial system Try to tune in a better signal from the same television station Get your aerial system checked Picture interference like spots or streaks Weak aerial signal Interference from electrical equipment such as power tools and motors Settings for the digital video equipment output do not match the monitor s VGA or DVI input specifications Try to tune in...

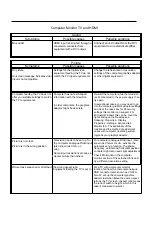
Страница 38: ...at to do Television seems dead no lights come on and nothing works The stand by light is on but the buttons don t seem to work Mains supply missing Main power switch is off Blown fuse or circuit breaker Try the front panel STANDBY ON button if TV comes on then check The remote does not function Make sure it is not a general power cut Check the power switches on the television and at the power outl...

Страница 39: ... can support For Microsoft Windows this can be found by right clicking on the Desktop and following Properties Display Properties Settings dvanced tab Monitor tab The availability of this function and the method of adjustment varies with computer operating system Upgrade your graphics adaptor Picture is not clear Picture is in the wrong position Television needs to be set up for the computer analo...

Страница 40: ...ot understand and you live in the UK you can phone our help line during normal office hours on 0844 8009595 Calls are charged at standard rates We apologise for any inconvenience caused by minor inconsistencies in these instructions which may occur as a result of product improvement and development Kesa Electricals U K HU1 3AU 04 03 2011 ...

Отзывы: