


5
ENGLISH
4
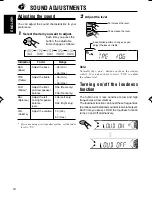
Adjust the sound as you want (see
page 12 – 14).
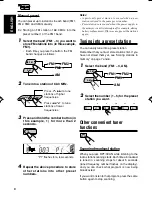
To drop the volume in a moment
Press
briefly while listening to any
source. “ATT” starts flashing on the display, and
the volume level will drop in a moment.
To resume the previous volume level, press the
button briefly again.
To turn off the power
Press and hold
until "SEE YOU"
appears on the display.
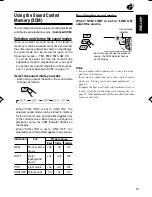
Note:
When you use this unit for the first time, set the built-
in clock correctly, see page 15
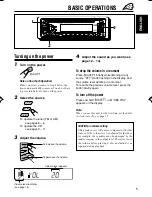
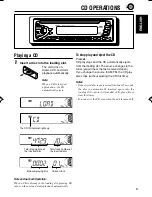
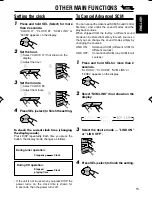
Turning on the power
1
Turn on the power.
Note on One-Touch Operation:
When you select a source in step 2 below, the
power automatically comes on. You do not have
to press this button to turn on the power.
2
Select the source.
3
Adjust the volume.
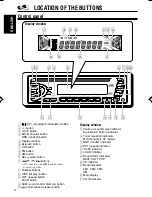
BASIC OPERATIONS
C D
A M
F M
Volume level indicator
(see page 16)
Volume level appears
To increase the volume.
To decrease the volume.
To operate the tuner (FM or AM),
see pages 6 – 8
To operate the CD,
see pages 9 – 11.
CAUTION on volume setting
CDs produce very little noise compared with other
sources. If the volume level is adjusted for the tuner,
for example, the speakers may be damaged by the
sudden increase in the output level. Therefore, lower
the volume before playing a disc and adjust it as
required during playback.
2
1
3
160W
EN05-05KD-S50[J]/9th
11/6/01, 2:13 PM
5


