


< Contents >
16
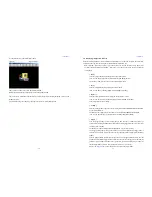
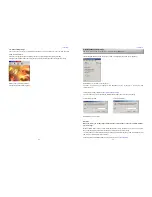
(5) Streamproducer is connected with the camera.
Camera name is shown above of the video display window.
Buttons for operation images appear above of the video display window.
You can see more information about the camera currently connected by choosing [Property...] after click on
the [Menu] button.
It is possible to change the camera by choosing [Other Camera...] from [Menu] button.
< Contents >
17
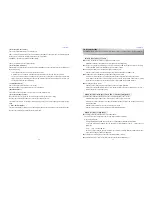
5-2. Displaying images from cameras
Each video display window has its own buttons and operation menu. It is possible to operate up to four video
display windows separately by clicking on its control buttons or operation menu.
Note: Operations; Start, Stop, Capture, Trigger, and Sound on this page do not mean casting stop or start
but of the individual video display window. Please see "7. Casting" about casting image and operation
casting image.
[
Ņ
Start
Ņ
]
Click the [Start] button to display image from a connected camera.
( You can also display it by choosing [Start Playback] from [Menu] button. )
The live image from camera appears on the video display window.
[
Ņ
Stop
Ņ
]
Click the [Stop] button to stop displaying connected camera.
( You can also stop by choosing [Stop Playback] from [Menu] button. )
[
Ņ
Capture
Ņ
]
Click the [Capture] button to start recording the image from the camera.
( You can also start recording by choosing [Start Capturing] from [Menu] button.)
Click [Stop] button to stop recording.
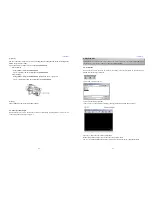
[ Setting ]
Click the [Setting] button to open the page for setting of DV CAMCORDER and NETWORK PACK
by your internet browser.
For details on the settings, please read the User's Guide of KA-DV300U NETWORK PACK.
( You can also open the page by choosing [Camera Setting] from [Menu] button.)
[
Ņ
Trigger
Ņ
]
Click the [Trigger] button to start recording images from the camera automatically when the
camera starts recording. (Streamproducer detects the recording trigger from the camera and starts
recording at the same time.)
Streamproducer stops recording automatically when the camera stops recording.
The [Trigger] button appears to be pushed when you click it, indicating that the trigger mode is
effective.(It is possible to achieve the same effect by choosing [Capture Trigger] from the [Menu]
button.)
Click the [Trigger] button again to stop the trigger mode. The [Trigger] button reverts to its usual
position indicating that the trigger mode disabled. (You can also stop the trigger mode by choosing
[Capture Trigger] from [Menu] button. If there is a check mark next to 'Capture Trigger' it indicates
that the trigger mode is effective, and stopped if there is NOT a check mark.)
Please read "
Trigger mode
" on this chapter for more details about trigger mode.