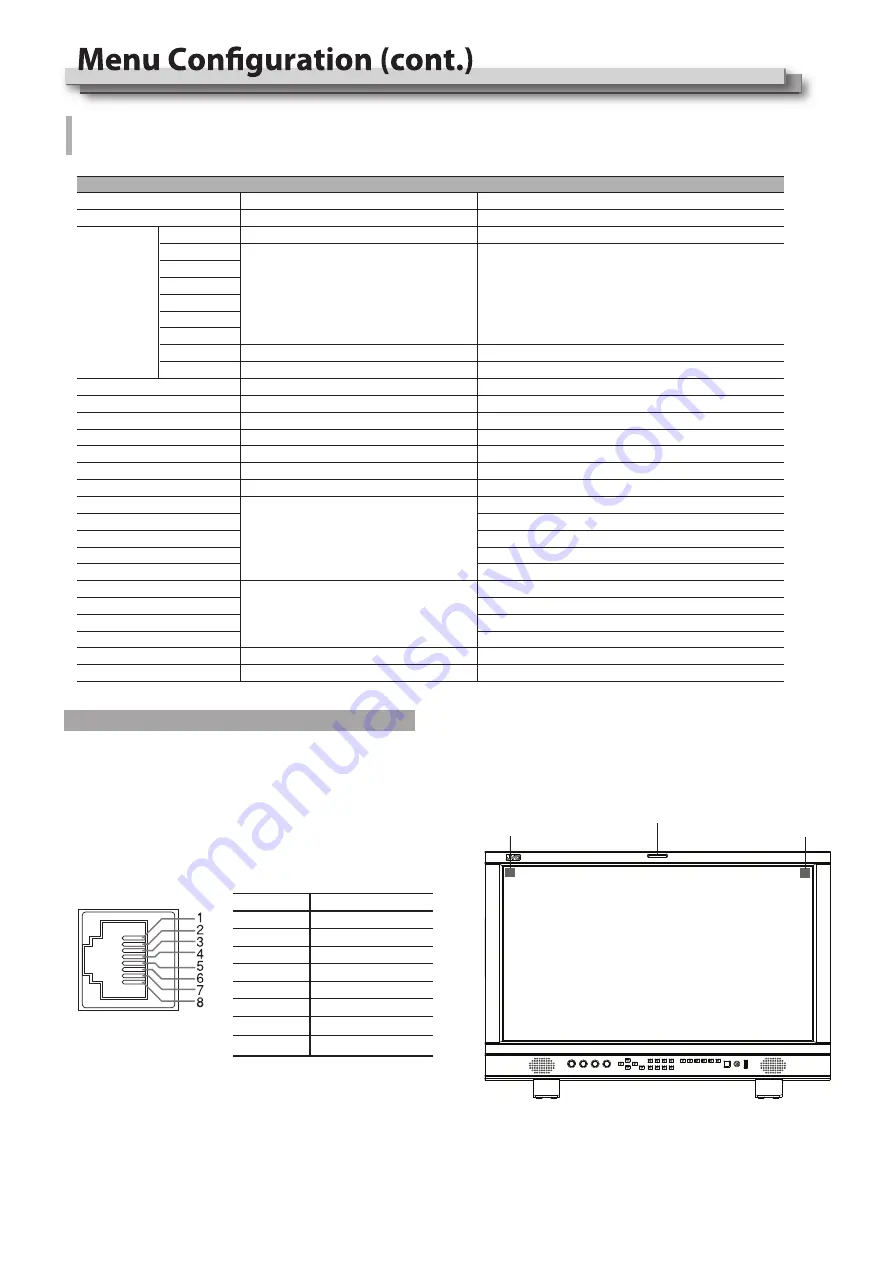
GPI
Pin No
Pin name
1
GPI 1
2
GPI 2
3
GPI 3
4
GPI 4
5
GPI 5
6
GPI 6
7
NC
8
GND
Setting for TALLY, UMD, IP control to the monitor
Exit Main Menu
Return to previous menu
Exit Main Menu
Return to previous menu
Item
Tally Setting
OFF, ON, Blinking
OFF, ON
OFF, ON
Internal, External
Top, Bottom
Large, Small
White, Red, Green, Blue, Black, Gray
OFF, Low, HIGH
1~126
A-Z, a-z, 0-9, Space, &()*+,-./:<>_
115200
8
192.168.001.200
255.255.255.000
192.168.001.001
08080
1
Top, Bottom
Enable GPI control
Set on-screen tally display mode
Switch on the UMD display
Select the UMD source
Select the display position of UMD
Select UMD display size
Select UMD display color
Select UMD background transparency
Edit internal UMD letters
TSL UMD setting
Set monitor IP address for webserver
remote control
Select the display position of on-screen tally
Assign functions to the GPI terminals
SFP, SDI1,SDI2, SDI3, SDI4, 4xSDI(2SI), 4xSDI(SQ),
HDMI, Red Tally, Green Tally, Yellow Tally, Time code,
Color Temp, Flip mode, Freeze Frame,
WFM Single Line,UMD, Marker, H/V Delay,
Audio bar, Zebra, Vector, Low Latency Mode, Histogram
Odd/Even Frame, Lissajous, Focus Assist, False color
To do
External Control
Tally Position
GPI *1
GPI Control
1 Pin
2 Pin
3 Pin
4 Pin
5 Pin
6 Pin
Back
Exit
UMD *2
UMD Mode
UMD Position
UMD Size
UMD Color
UMD Blending
Source ID
TSL Address
TSL Data Bits
TSL Stop Bits
IP *3
Net Mask
Gateway
Port(1024~65535)
Back
Exit
TSL Baud Rate
Setting value
17
*1 GPI control
Connect GPI remote controller with “GPI” port of the monitor
rear panel.
Switch on the “GPI Control”.
Assign functions for GPI 1-6.
Control the GPI 1-6 pin terminals to short-circuit with the GND
pin terminal, to enable the assigned function, and disconnect-
ing (opening) to disable the functions.
The GPI controlled TALLY signal will display both front TALLY
light and on-screen TALLY:
On screen TALLY
Green/Red/Yellow
On screen TALLY
Green/Red/Yellow
TALLY light
Green/Red/Yellow
TSL Parity
None


