


30
MENU
V-KEYSTONE
PC
H-KEYSTONE
VOL.
EXIT
VIDEO
QUICK ALIGN.
PC
VIDEO
VOLUME
PRESET
HIDE
ENTER
MENU
EXIT
FREEZE
OPERATE
V-KEYSTONE H-KEYSTONE
SCREEN
DIGITAL
ZOOM
FOCUS
W
S
V-KEYSTONE
V-KEYSTONE
Projector:
Control Panel
Remote Control
Unit
Projector:
Control Panel
Remote Control
Unit
V-KEYSTONE
V-KEYSTONE
H-KEYSTONE
H-KEYSTONE
H-KEYSTONE
H-KEYSTONE
Projector:
Control Panel
Remote Control
Unit
Projector:
Control Panel
Remote Control
Unit
“Vert. Keystone” Display
1
Adjusted value
range: - 100 ~ 0 ~100
2
Level displayed
level displayed is based on the adjustment value.
“Horiz. Keystone” Display
1
Adjusted value
range: -40 ~ 0 ~40
2
Level displayed
level displayed is based on the adjustment value.
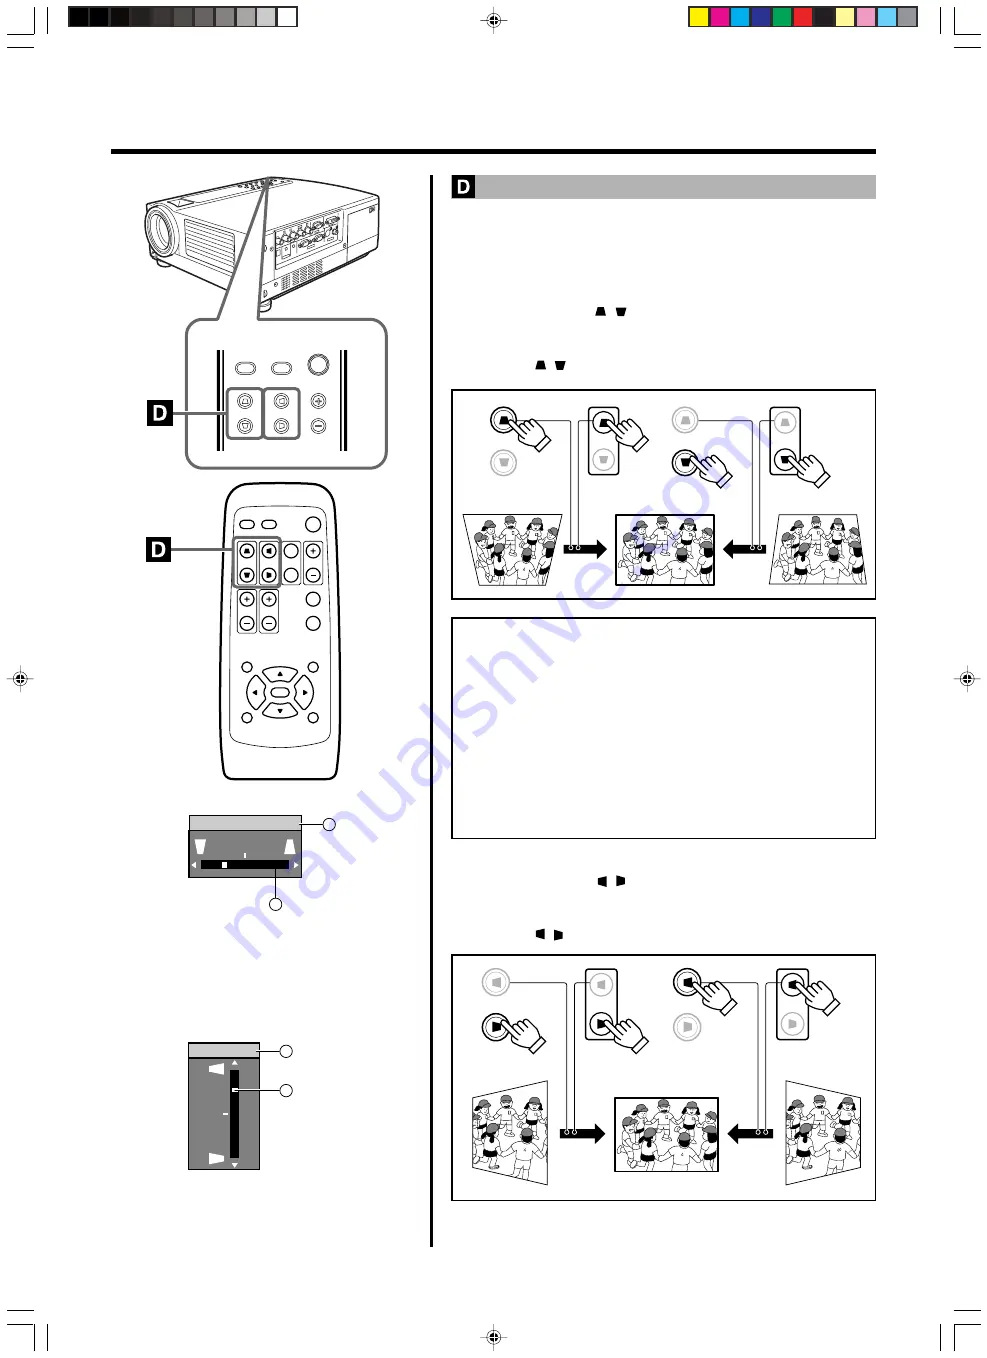
Basic Operations
Removing the Trapezoidal Distortion of the Image
Depending on the angle of projection onto the screen, the image may get
distorted in trapezoid form sometimes.
When installing the projector or screen for the first time, or when rein-
stalling in other rooms, etc., the trapezoid distortion (Keystone) has to be
removed by adjustments.
Press V-KEYSTONE / to adjust in the vertical direction.
A “Vert. Keystone” display appears on the screen, and the projector goes
into the KEYSTONE MODE.
Press button ( / ) in the direction that corrects the trapezoid form.
Notes
• The range where the trapezoidal distortion can be rectified is
30˚
vertically and 10˚ horizontally
with respect to the projector screen.
However, when both are rendered together, the range of effective
rectification will be narrower.
• Depending on the signal inputted, the keystone adjustment range
may narrow or parts of the image may disappear. This is not a mal-
function.
• Interference patterns may appear on the screen when adjusting the
keystone. This is not a malfunction.
• To restore the original set value, press the PRESET button. (Adjusted
value: 0)
Press H-KEYSTONE / to adjust in the horizontal direction
A “Horiz. Keystone” display appears on the screen, and the projector
goes into the KEYSTONE MODE.
Press button ( / ) in the direction that corrects the trapezoid form.
Vert. Keystone
1
2
–12
Horiz. Keystone
1
2
12
Содержание D-ILA DLA-SX21S
Страница 57: ...57 Memo ...


