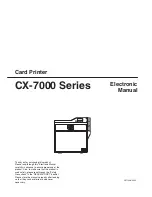
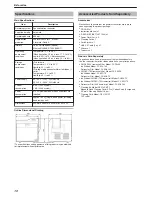
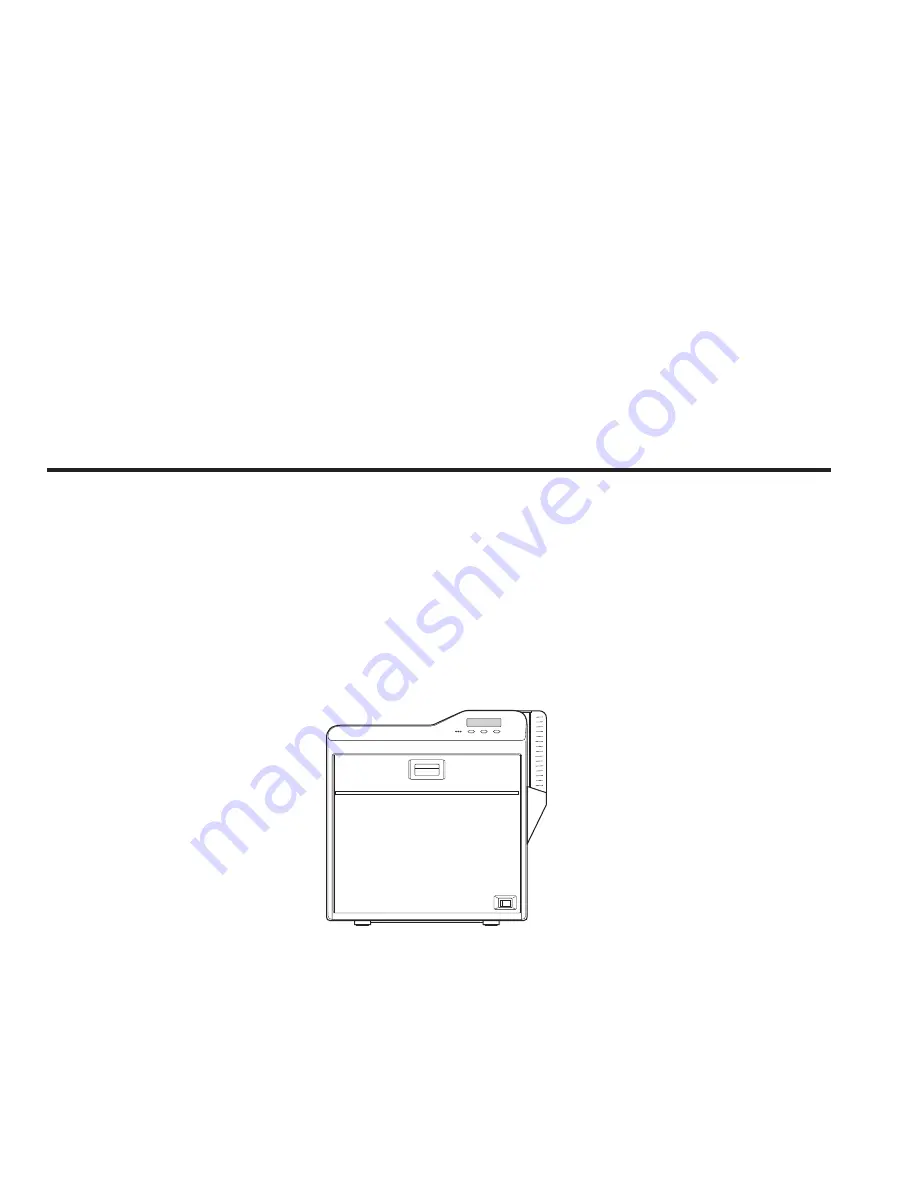
manualshive.com logo in svg
background image

Card Printer

CX-7000 Series

Electronic

Manual

Thank you for purchasing this product.
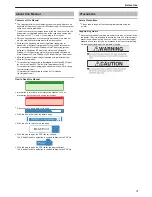
Please read through this “Electronic Manual”
carefully in advance to ensure proper use of the
product. Also, to make sure that the product is
used safely, please read through the “Safety
Precautions” in the “READ ME FIRST” booklet.
Please store the manuals properly after reading
so that they can be referred to whenever
necessary.

LST1006-002A

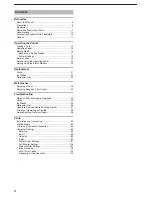
Содержание CX-7000 Series

Страница 1: ... Electronic Manual carefully in advance to ensure proper use of the product Also to make sure that the product is used safely please read through the Safety Precautions in the READ ME FIRST booklet Please store the manuals properly after reading so that they can be referred to whenever necessary LST1006 002A ...

Страница 2: ... Retransfer Film 33 Maintenance Servicing of Parts 35 Servicing Based on Print Output 43 Troubleshooting When an Error Message is Displayed 44 Cards 46 Ink Ribbon 54 Retransfer Film 56 Unable to Produce Desired Printing Results 57 Printer not Operating as Desired 58 Before Sending Printer for Repair 58 Setup Installation and Connection 59 Printing Media 60 Printer and Computer Connection 64 Comput...

Страница 3: ...y the OpenSSL Project for use in the OpenSSL Toolkit http www openssl org This product includes cryptographic software written by Eric Young eay cryptsoft com This product includes software written by Tim Hudson tjh cryptsoft com How to Read this Manual v Information in this frame is for reference purposes such as information on functions and usage restrictions v Precautions are described in this ...

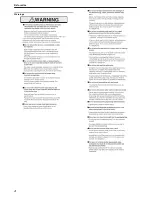
Страница 4: ...Warnings Before Use 4 ...

Страница 5: ...Caution Before Use 5 ...

Страница 6: ...ality Store the printing media or card in one of the following locations m Storage environment v Temperature 5 C to 25 C v Relative humidity 40 to 60 m Storage location Do not store the printing media or card in the following locations Doing so may cause the media or card to deteriorate v Places exposed to direct sunlight v Places with a high temperature and humidity v Places near organic solvents...

Страница 7: ... to a magnetic stripe card G Card turn over unit double sided printer only v Inverts the card H Cleaning roller v Removes dust or dirt attached to the card I Card hopper v For loading cards J Retransfer film take up side v For attaching the take up side of the retransfer film K Retransfer film supply side v For attaching the unused side of the retransfer film L Ink ribbon take up side v For attach...

Страница 8: ...ting the power cord Right A NG card outlet v If a card is left inside the printer when the power is turned on or reset the card will be automatically discharged v Cards in the printer are discharged when an error occurs in the magnetic stripe card or IC card B Air suction fan opening v Air inlet of the internal cooling fan C Handle v Hold this area when moving the printer D Filter cover v Cover of...

Страница 9: ...ransfer film cassette v For installing the retransfer film H Cassette buttons v Press these buttons in order to pull out the ink ribbon cassette or retransfer film cassette Ink Ribbon Cassette A Guide shaft v Provides guide to the position for installing the cassette B Shafts v For installing the ink ribbon C Bobbin holder black v For securing the take up side of the ink ribbon D Bobbin holder yel...

Страница 10: ...D Outline Dimensional Drawing The specifications and appearance of this product may be modified for improvement without prior notice Accessories Products Sold Separately Accessories Please check to ensure that the printer accessories are in place when unpacking the product package v CD ROM x 1 v Instruction Manual x 1 v READ ME FIRST LST1004 x 1 v Power Cord 2 m x 2 v Cleaning Card x 1 v Card Stac...

Страница 11: ...ting v Magnetic encoder Device for writing data to a magnetic stripe card It can only be installed on a double sided printer v Contact IC encoder Device for writing data to a contact IC card v Non contact IC encoder Device for writing data to a non contact IC card Before Use 11 ...

Страница 12: ...e consult our authorized dealers in advance v For printing using application software prepared by the user refer to the instruction manual of the corresponding application 1 Turn on the power 2 Check to ensure that cards are inserted into the card hopper 3 Open the application s print settings screen and select this printer in Name v If there are multiple printers select the name of the printer th...

Страница 13: ...s the setting m Pressing it each time displays the next setting item Next m Pressing it each time displays the next setting m Enters the settings change mode Change v If F is not displayed for an item you can adjust the settings on the status monitor of a computer Status Monitor Settings A page 107 m Enters the scroll mode for the displayed characters Scroll m Scrolls to the next displayed charact...

Страница 14: ...rting up B o o t U p m Initializing I n i t i a l i z i n g m Preheating P r e h e a t i n g m Ready R e a d y m Feeding card or discharging NG card M o v i n g m Printing P r i n t i n g m Test print in progress Te s t i n g m Loading card L o a d i n g m Downloading D o w n l o a d i n g m Magnetic encoding in progress M G E n c o d i n g m IC encoding I C E n c o d i n g m Adjusting heating rol...

Страница 15: ...larger value increases the density level Retransfer v Displays the retransfer mode settings Settings v Temp Level 2 1 0 1 2 For setting the retransfer heating roller temperature Selecting a larger value increases the temperature Retransfer may fail depending on the card used If retransfer fails raise the setting to the next higher value A higher retransfer heating roller temperature helps to enhan...

Страница 16: ...ay Contrast Setting A page 27 v Buzzer On Off For setting whether to sound the buzzer when an error occurs or when settings are changed Buzzer Setting A page 28 v Unit No No 1 No 10 For setting the printer s unit number according to the USB environment Unit Number Setting A page 28 Option v Displays the optional settings Settings v MG None ISO Displays the availability of a magnetic encoder or the...

Страница 17: ...mode A page 15 1 Press I v Enters the setting mode 2 Press J v Pressing it each time displays the next setting item v Pressing G displays the setting item on the next lower level v Pressing F enters the settings change mode v Pressing B confirms or executes the setting v Pressing H displays the setting item on the next higher level Operating the Printer 17 ...

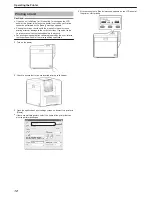
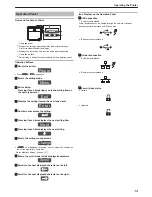
Страница 18: ... Operating the Printer 18 ...

Страница 19: ... Roller Item Factory Settings Power Saving Off HR Control On m Setting Item Factory Settings Display Mode Counter Counter Total Cnt Contrast 0 Buzzer On Unit No No 1 m MG Item Factory Settings ISO Type Hico Retry Count 1 m Network Item Factory Settings Printer Name PRINTER01 Host IF LAN IPv4 DHCP On Setting IP Address 192 168 0 141 Subnet Mask 255 255 255 0 Gateway 192 168 0 1 Effective IP IP Addr...

Страница 20: ... v To change the security key number you have to delete it and register a new number again 1 Press the operation button center for at least three seconds v A Set Sec Key OK message appears 2 Press B v A New key message appears 3 Enter a number v You can enter up to 8 digits v Pressing A each time advances to the next number v Pressing E each time advances to the next digit 4 Press B v A Re enter m...

Страница 21: ...Key OK Enter a number again Deleting the Security Key Number v You can delete a registered security key number as follows v To change the security key number you have to delete it and register a new number again 1 Press the operation button center for at least three seconds v A Unlock Sec Key OK message appears 2 Press J to set to Delete Sec Key OK 3 Press B v A Key for DEL message appears 4 Enter...

Страница 22: ... film cassette from the printer body dust may adhere to the ink ribbon or retransfer film Errors such as discoloring may occur depending on the size of the dust particles To avoid these problems it is recommended that you forward by one or two images after installing the cassette 1 Press K v An Initialize OK message appears m Initializing printer without feeding the image A Press B v An Initializi...

Страница 23: ...tem error occurs by separating the computer from the printer Test Pattern Types v Test Pattern Prints standard color pattern on a single side of a card v Printer Setting Prints the printer settings v Network Setting Prints the network settings v Lami Setting Prints the laminator settings 1 Press I v A Cleaning message appears 2 Press J to set to Test Print v Pressing it each time displays the next...

Страница 24: ...wer Off message appears turn off the power v The firmware is updated after the power is turned on again m If download fails and printer cannot be started up v If download of the printer firmware fails the printer may not be able to start up when it is rebooted When this occurs download the firmware again according the following procedure A Turn on the power while holding down the operation button ...

Страница 25: ... it each time displays the setting item on the next higher level Counter Setting v This is used for setting the type of counter displayed on the operation panel Counter Types v Total Cnt total counter Displays the total number of cards that are correctly printed v Head Cnt head counter Displays the total number of printed sides for the same head v Free Cnt free counter Displays the number of cards...

Страница 26: ...to exit the setting mode v Pressing it each time displays the setting item on the next higher level Counter Reset v This is used to reset the free counter and error counter 1 Press I v A Cleaning message appears 2 Press J to set to Counter Reset 3 Press B v Resets the free counter and error counter m Checking reset v Select Free Cnt or Error Cnt for Counter setting Operating the Printer 26 ...

Страница 27: ...3 Press G v A Display message appears 4 Press G v A Mode message appears 5 Press J to set to Contrast v Pressing it each time displays the next setting item 6 Press F v Enters the settings change mode 7 Press A and select a setting 8 Press B to confirm the setting v Pressing B confirms the setting and returns you to the previous screen 9 Press H to exit the setting mode v Pressing it each time dis...

Страница 28: ...igher level Unit Number Setting v For setting the printer s unit number according to the USB environment Settings v No 1 No 10 1 Press I v A Cleaning message appears 2 Press J to set to Setting v Pressing it each time displays the next setting item 3 Press G v A Display message appears 4 Press J to set to Unit No v Pressing it each time displays the next setting item 5 Press F v Enters the setting...

Страница 29: ... left to remove the retransfer film 4 Close the printer door 5 Press KNB to reset the printer 6 Check to ensure that Film Search is displayed on the operation panel of the printer 7 Press I v A Cleaning message appears 8 Press J to set to Transport Mode v Pressing it each time displays the next setting item 9 Press B v After setting to the transport mode a Please Power Off message appears 10 Turn ...

Страница 30: ...Setting Using the Status Monitor Status Monitor Settings A page 107 Operating the Printer 30 ...

Страница 31: ... not close properly and this may damage the printer v Printing the card on the side with the magnetic stripe may cause printing errors or damage to the card s functions If you want to do so please consult our authorized dealers in advance v To set cards with both functions magnetic stripe and contact IC follow the procedure for setting the contact IC card 1 Set the card hopper knob to OPEN 2 Lift ...

Страница 32: ...e heavy objects or apply load on the printer Doing so may damage it v During replacement clean the four bobbin holders on the printer If burrs produced by friction with the bobbins are attached to the bobbin holders they may fall onto the card ink ribbon or retransfer film causing printing errors Cleaning the bobbin holders A page 40 1 Open the printer door 2 Press and hold down the cassette butto...

Страница 33: ...ilm is loaded To prevent the cassette from dropping during handling make sure to hold it with both hands v When installing a used retransfer film align the unused side of the film with the arrow indicated on the label of the cassette Improper alignment may result in errors or the print may turn out light v When installing a new film make sure that at least three black lines are wound onto the take...

Страница 34: ...n holders with the film set to the far end of the guides v A take up side black v B unused side green 4 Remove any slack in the film A Hold the retransfer film cassette B Turn the knob in the direction indicated by the arrow 5 Insert the cassette all the way in along the guide rail until a click sound is heard followed by closing the printer door 6 Press KNB to reset the printer Memo v To avoid pr...

Страница 35: ...ion v Do not perform any work on the printer door Do not place heavy objects or apply load on the printer Doing so may damage it v After washing allow the cleaning roller to dry completely before installing it to the printer v Do not wash the cleaning roller with anything other than water e g alcohol v Replace the cleaning unit with a new one after using it for about one year For details on its re...

Страница 36: ...ection 3 Install the card hopper Fan Filter v The color of the printed card may appear faded or dirt may appear conspicuous if the fan filter is dirty v Perform cleaning after printing about 10 000 cards Cautions v Start work after ensuring that the power has been turned off v After cleaning is complete check to ensure that all dismantled parts are restored to their original positions Failure to r...

Страница 37: ...er of the printer Doing so automatically discharges the card v Do not perform any work on the printer door Do not place heavy objects or apply load on the printer Doing so may damage it v Each cleaning card can only be used once Reusing a dirty card may dirty the roller or cause the printer to malfunction v After cleaning is complete check to ensure that all dismantled parts are restored to their ...

Страница 38: ...in 20 seconds after pressing B v After pressing B the buzzer sounds upon a lapse of 20 seconds and a Jam Hopper error message appears about 10 seconds later Press KNB to cancel the error v When a standard sized card is inserted the card is automatically discharged from the NG card outlet and a Cleaning Start OK message appears 11 Press B and insert the cleaning card again v Reverse the adhesive fa...

Страница 39: ...place heavy objects or apply load on the printer Doing so may damage it v For details on separately sold items please consult our authorized dealers v Replace the magnetic head cleaning card accordingly if it has become dirty Using a dirty card may dirty the head and cause malfunction 1 Turn on the power 2 Check to ensure that Ready or Preheating is displayed on the operation panel of the printer ...

Страница 40: ...n the diagram Avoid doing so on the floor as dust attached to it may cause printing errors v Do not perform any work on the printer door Do not place heavy objects or apply load on the printer Doing so may damage it v Perform cleaning each time you replace the ink ribbon or retransfer film v After cleaning is complete check to ensure that all dismantled parts are restored to their original positio...

Страница 41: ...strated in the diagram Avoid doing so on the floor as dust attached to it may cause printing errors v Do not perform any work on the printer door Do not place heavy objects or apply load on the printer Doing so may damage it v Touching the thermal head with your body electrostatically charged may cause damage to the head Make sure that you touch the metallic part of the printer before commencing w...

Страница 42: ... wipe the thermal head Cotton swab and alcohol sold separately v Wipe the thermal head with care in the horizontal direction 5 Insert the retransfer film cassette along the guide rail until a click sound is heard 6 Insert the ink ribbon cassette along the guide rail until a click sound is heard followed by closing the printer door Maintenance 42 ...

Страница 43: ...an the card feed roller heating roller A page 37 v Clean the bobbin holders A page 40 Card Jam v Clean the cleaning roller A page 35 v Clean the card load roller A page 36 Error During Writing to or Reading of Magnetic Stripe Card v Clean the magnetic head A page 39 Lines Appear on Card after Printing v Clean the thermal head A page 41 Maintenance 43 ...

Страница 44: ...urn over unit Remove the jammed card A page 47 Jam MG 92 v Card jam in the magnetic encoder unit Remove the jammed card A page 49 Jam Transfer 93 v Card jam in the card feed roller Remove the jammed card A page 50 Jam Discharge 94 v Card jam near the card outlet Remove the jammed card A page 51 Jam Retran 95 v Card jam near the retransfer heating roller Remove the jammed card A page 52 Film Search...

Страница 45: ...recurs turn off the power and consult our authorized dealers TR Heater F1 v The retransfer heating roller is faulty Turn off and on the power again If the same problem recurs turn off the power and consult our authorized dealers TR Thermister F2 v The retransfer heating roller thermistor is faulty Turn off and on the power again If the same problem recurs turn off the power and consult our authori...

Страница 46: ...force on the card hopper Doing so may damage it v Do not touch the printing surface of the card Touching it may cause printing errors Put on the supplied gloves when handling the cards Error Code Jam Hopper 90 v Card jam near the card hopper and cleaning roller 1 Detach the card hopper cover and remove the unused cards 2 Remove the jammed card with a hand If the card cannot be removed by hand A pa...

Страница 47: ...is discharged from the card load slot Cautions v If the card cannot be removed do not try to do so forcibly Consult our authorized dealers or the servicing personnel F Restore the jog dial to its original position and close the printer door G Turn on the power Go to step 3 A page 46 Error Code Jam TurnOver 91 v Card jam near the card turn over unit 1 Turn off the power 2 Remove the card hopper 3 D...

Страница 48: ...urs the Jam TurnOver message will not disappear after removing the jammed card until the card turn over unit is set to Home Pos v If the printer door is opened when a Jam TurnOver error occurs a Please Adjust Turn Unit Pos message will be displayed Remove the jammed card and set the card turn over unit to Home Pos m If the card cannot be removed A Install the cleaning unit B Attach the jog dial to...

Страница 49: ...side the unit Doing so may jam the card and damage the printer D Turn the cleaning roller shaft in the clockwise direction E Remove the card after it is discharged from the card load slot Cautions v If the card cannot be removed do not try to do so forcibly Consult our authorized dealers or the servicing personnel Go to step 8 A page 48 Error Code Jam MG 92 v Card jam in the magnetic encoder unit ...

Страница 50: ...eaning roller shaft D Turn the card feed roller shaft and cleaning roller shaft in the clockwise direction while checking the position of the card v Remove the card after it is discharged from the card load slot For single sided printers the card is discharged from the NG card outlet Cautions v If the card cannot be removed do not try to do so forcibly Consult our authorized dealers or the servici...

Страница 51: ... card C Attach the jog dial to the card feed roller shaft D Turn the card feed roller shaft in the anti clockwise direction while checking the position of the card v The card is discharged from the card outlet Cautions v If the card cannot be removed do not try to do so forcibly Consult our authorized dealers or the servicing personnel E Restore the jog dial to its original position and install th...

Страница 52: ...the card is inside the printer unit A page 53 If the card is caught in the card feed roller to the right of the retransfer heating roller A page 53 If the card is caught in the card feed roller to the left of the retransfer heating roller A page 54 4 Install the retransfer film cassette and close the printer door 5 Press K v A Jam Card Removed message appears 6 Press O Cautions v Initializing the ...

Страница 53: ... cassette and close the printer door F Turn on the power Go to step 5 A page 52 m If the card is caught in the card feed roller to the right of the retransfer heating roller A Turn off the power and detach the card hopper B Check the position of the card C Attach the jog dial to the card feed roller shaft and cleaning roller shaft D Turn the card feed roller shaft and cleaning roller shaft in the ...

Страница 54: ...ard when installed with your hand Touching it may cause printing errors Put on the supplied gloves when handling the ink ribbon v The cassette is heavy when the ink ribbon is loaded To prevent the cassette from dropping during handling make sure to hold it with both hands v When installing a used ink ribbon align the yellow side of the unused ribbon with the arrow indicated on the label of the cas...

Страница 55: ...n the ink ribbon 6 Insert the cassette all the way in along the guide rail until a click sound is heard followed by closing the printer door 7 Press KNB to reset the printer Memo v To avoid printing errors it is recommended that you forward by one or two images after installing the ink ribbon cassette or retransfer film cassette Initializing printer when installing the cassette A page 22 Troublesh...

Страница 56: ...mage it v During replacement clean the four bobbin holders on the printer If burrs produced by friction with the bobbins are attached to the bobbin holders they may fall onto the card ink ribbon or retransfer film causing printing errors Cleaning the bobbin holders A page 40 1 Open the printer door 2 Press and hold down the cassette button and remove the retransfer film cassette on the left 3 Cut ...

Страница 57: ...ed roller heating roller A page 37 v Clean the bobbin holders A page 40 v Is the printing face of the card dirty Use a clean card Card is Printed in a Single Color v Is the print setting set to single color printing v Is the software application setting set to single color printing Check the print settings Strange Characters or Images are Printed v Is the driver for this printer selected on the co...

Страница 58: ...it could be due to malfunctioning of the printer Please consult our authorized dealers Printing does not Start or Stops Halfway v Is the printer door open Close the printer door properly and reset the printer A page 22 v Is the printer connected to a computer Connect the printer to a computer correctly using a USB LAN cable v Is the length of the USB cable too long A USB cable with a length of not...

Страница 59: ... Do not place any object on the printer Power Cord Connection 1 Insert the power cord supplied to the AC inlet at the rear of the printer 2 Plug the power cord supplied into an outlet Memo v Make use of an AVR automatic voltage regulator to prevent any fluctuation in voltage Alternatively an uninterruptible power supply is recommended in case momentary power failure occurs Cautions v Make sure tha...

Страница 60: ...e ink ribbon cassette on the right 3 Install a new ink ribbon v Install while referring to the indication on the label of the cassette A With the inked surface facing outward align the yellow side of the unused ribbon with the arrow on the cassette and unwind it along the three shafts B Insert the ink ribbon firmly into the bobbin holders with the ribbon set to the far end of the guides v A take u...

Страница 61: ...e button and remove the retransfer film cassette on the left 3 Install a new retransfer film v Install while referring to the indication on the label of the cassette A When installing the retransfer film make sure that at least three black lines are wound onto the take up side B With the retransfer face facing outward align the unused side of the film with the arrow on the cassette and unwind it a...

Страница 62: ...lied gloves when handling the cards v To prevent card jams from occurring limit the number of cards stored in the card hopper at any time to about 100 pieces regardless of the card thickness v When using new cards set them after making sure that they are not adhered to each other due to static v Align the cards before setting them in the printer Otherwise the card hopper cover may not close proper...

Страница 63: ...per knob to LOCK m Adjusting card thickness v The thickness of a card that is adjustable is between 0 25 mm and 1 00 mm This is adjusted to a thickness of 0 76 mm by default A Set the card hopper knob to LOCK B Remove the card hopper C Insert a ballpoint pen into the card separator hole and turn slowly v Adjust according to the range of the card thickness used Memo v If the card cannot be discharg...

Страница 64: ...le clamp Doing so may subject the USB connector of the printer to stress thus resulting in connection problems 3 Plug the other end of the USB cable into the USB cable connection terminal of the computer Connecting with a LAN Cable Cautions v Plug the LAN cable in correctly and firmly v Make use of a shielded LAN cable to avoid any malfunction v If a USB cable is also connected at the same time wh...

Страница 65: ...the illustrations in this Electronic Manual may not be displayed depending on the computer s environment Skip the procedures in this case v Printer Driver A page 65 v Network Sharing of Printer A page 73 v Status Monitor A page 75 v USB Driver A page 76 v Electronic Manual A page 79 Printer Driver Installing the Printer Driver USB Connection Cautions v Do not turn on the power of the printer until...

Страница 66: ...on of CX 7000 USB printer screen appears 4 Read through the Software License Agreement v If you accept the terms and conditions select I agree to start installation v If you do not agree click Cancel to stop the installation 5 Click Next v A start installation screen appears 6 Check the details followed by clicking Next v A screen for setting Printer model and Printer name appears A Select a Print...

Страница 67: ...XP v A Software Installation screen appears A Click Continue Anyway m Windows Vista v A Windows Security screen appears A Click Install part v A USB cable connection instruction screen appears 11 Connect the printer and computer using the USB cable 12 Turn on the power of the printer v Installation starts automatically after the printer is detected v Installation does not start if connection is im...

Страница 68: ...s 13 Select the Property tab A Select this printer from Printer List Memo v USB connection is improper if No Device appears in the Printer List When this occurs end the installation process and reinstall the program v If No Selection appears in the Printer List select a USB device name that coincides with the printer unit number that is currently being installed from the pull down list B Enter the...

Страница 69: ... appears on the installer v Do not turn on the power of the printer until instruction asking you to do so appears on the installer v You need to enable the LAN hub before connecting the printer via this hub v Exit all applications that are currently running v If document printing is currently in progress wait for all the jobs to complete 1 Start up Windows and set the supplied CD ROM into the comp...

Страница 70: ...a USB and Ethernet v Clicking Open the Electronic Manual opens the Electronic Manual v Clicking Exit ends the installation 3 Click Next v A Installation of CX 7000 Ethernet printer screen appears 4 Read through the Software License Agreement v If you accept the terms and conditions select I agree to start installation v If you do not agree click Cancel to stop the installation 5 Click Next v A sta...

Страница 71: ...When connecting using the IPv4 address select IPv4 followed by clicking Find to search for the printer After clicking IPv4 you can search for the printer by directly entering the IPv4 address in the Printer List v When connecting using the IPv6 address select IPv6 followed by clicking Find to search for the printer After clicking IPv6 you can search for the printer by directly entering the IPv6 ad...

Страница 72: ... program 16 Open Printers in Control Panel v Check to ensure that the printer is added m Windows XP Example m Windows Vista Example m Windows 2000 Example Cautions v To delete a printer execute Uninstall printer driver after restarting Windows Update of Printer Driver To update 1 Delete the existing printer driver Uninstalling the Printer Driver A page 80 2 Re install the printer driver Installing...

Страница 73: ... 4 Select A network printer or a printer attached to another computer and click Next v A Specify a Printer screen appears 5 Select Browse for a printer and click Next v A Browse for Printer screen appears 6 Select a printer from Shared printers and click Next v A Connect to Printer screen appears 7 Click Yes v A Default Printer screen appears 8 Select Yes if necessary and click Next v A Completing...

Страница 74: ...electing the printer appears 4 Select a printer and click Next v A driver installation confirmation screen appears 5 Click Install driver v A User Account Control screen appears 6 On the user account screen click Continue v A screen for entering the printer name appears 7 Select the Set as the default printer checkbox if necessary and click Next v A screen indicating that the printer is added appe...

Страница 75: ...2 Select the Status Monitor checkbox on the card printer setup screen A Select the language to use from the Language pull down menu v Selecting Japanese switches the program to the Japanese version v Selecting English switches the program to the English version B Select USB connection or Ethernet connection from Interface C Select Install under Action and select the Status Monitor checkbox Memo v ...

Страница 76: ...ing the printer driver via USB connection v Install the USB driver additionally only when you want to set items other than the Printer Name on the Printer Selection screen of the status monitor v Do not turn on the power of the printer until instruction asking you to do so appears on the installer v Do not connect the printer to the USB until instruction asking you to do so appears on the installe...

Страница 77: ...utomatically detected by the computer v A Found New Hardware screen appears Cautions v Connection is improper if this screen does not appear Make sure that the connection is properly established 3 Click Locate and install driver software Recommended v A User Account Control screen appears 4 Click Continue v A Found New Hardware screen appears 5 Click Don t search online v A screen appears promptin...

Страница 78: ...s automatically detected by the computer v A Found New Hardware Wizard screen appears Cautions v Connection is improper if this screen does not appear Make sure that the connection is properly established 4 Click Next v A search method selection screen appears 5 Select Search for a suitable driver for my device recommended and click Next v A Locate Driver Files screen appears 6 Select the CD ROM d...

Страница 79: ... English switches the program to the English version B Select USB connection or Ethernet connection from Interface C Select Install under Action and select the Electronic Manual checkbox Memo v You can select the Printer Driver and Status Monitor checkboxes to install them simultaneously v Clicking Open the Electronic Manual opens the Electronic Manual v Clicking Exit ends the installation 3 Click...

Страница 80: ...he computer is set to run automatically the installer will be executed automatically If the installer is not automatically initiated double click SETUP exe in the CD ROM v If you are not using the SETUP exe automatic execution program in the CD ROM start the uninstaller for the printer driver by double clicking the following file in the CD ROM English USB_Soft uninstall exe m Windows Vista v A Aut...

Страница 81: ... screen appears Memo v If the CD ROM drive of the computer is set to run automatically the installer will be executed automatically If the installer is not automatically initiated double click SETUP exe in the CD ROM v If you are not using the SETUP exe automatic execution program in the CD ROM start the uninstaller for the printer driver by double clicking the following file in the CD ROM English...

Страница 82: ...onfirmation screen appears 8 Check the details followed by clicking Finish v To change a printer click Back Cautions v In the case where multiple Ethernet LAN printer drivers are installed the uninstaller deletes all of these printer drivers v An uninstallation complete screen appears 9 Click Finish v Exits uninstallation Cautions v To reinstall the printer driver perform the installation procedur...

Страница 83: ... screen appears 3 Click OK v Uninstallation starts and a confirmation screen for deleting the setting file appears 4 Click Yes v Deletes the setting file for the status monitor If you do not want to delete it click No 5 Click Finish v Exits uninstallation Electronic Manual Uninstalling the Electronic Manual 1 Exit the Electronic Manual 2 Select Uninstall Electronic Manual from Start menu Memo v If...

Страница 84: ...r via USB and download the Certification Authority Certificate using the status monitor I Connect the printer via the network Ethernet and enable IPSec IP Security on the PC to start IPSec communication Memo v Consult the network administrator regarding A to D above Preshared Key Authentication A Connect the printer via USB and download the Preshared Key File using the status monitor B Connect the...

Страница 85: ...ed v Manage the Printer Certificate File according to the instructions of the network administrator v There is an expiration date for the Printer Certificate IPSec communication may fail or may not be encrypted successfully if an expired certificate is used 1 Obtain the printer certificate from the certification authority and install it on the PC s Certificates Local Computer v Obtain the printer ...

Страница 86: ...Authority Certificate IPSec communication may fail or may not be encrypted successfully if an expired certificate is used 1 Start Certificates Local Computer under the MMC Management Console 2 Open the Certification Authorities Store and export the same Certification Authority Certificate as the printer certificate v The format is DER encoded binary X509 The file is saved with the extension cer v ...

Страница 87: ...s printing Checked Executes printing Unchecked Printing is not executed but encoding can be performed m Print on both sides Prints both sides of the card Unchecked Prints one side of the card Checked Prints both sides of the card m Print the back side first Prints the image on the back side first when printing on both sides of the card Unchecked Starts printing from the image on the front side Che...

Страница 88: ...tment settings enabled v Settings button Opens the Color dialog Color Dialog Box A page 90 m Enable the look up table Uses the look up table Set a value in the Look up table dialog Unchecked Prints with the look up table disabled Checked Prints with the preset look up table enabled v Settings button Opens the Look up table dialog Look up table Dialog Box A page 90 m Dither button For specifying se...

Страница 89: ...ta You can enter up to 8 input data m Delete button Deletes the information selected in the list m Delete All button Deletes all registered information m Peeloff ink energy Print density of the peel off ink Do not alter the following values v E1 225 v E2 160 v E3 160 m Setting values The following requirements must be satisfied E1 E2 E3 E1 E2 E3 The following values are recommended when peel off p...

Страница 90: ... select a file m Add button Registers the input data You can enter up to 16 input data m Delete Deletes the information selected in the list m Delete All Deletes all registered information m File structure of the look up table v Data format of the file is CSV Comma Separated Values v Delimiter character is comma ASCII character code 0x2c or LF Line Feed ASCII character code 0x0A v There is a total...

Страница 91: ...a A page 92 v Text Prints the text of a specified color using the UV ink with maximum density White and black colors cannot be selected v File Prints the image files registered in the File information list using the UV ink m Page split Prints all components on a specific page using the UV ink with 256 gradation Page split is divided in the order of YMC ink Resin K ink and UV ink Page number for th...

Страница 92: ...nk printing position v 1 panel Always prints one panel of the retransfer film When the data of other ink types overlaps with the UV ink printing position the data of the ink types will be adjusted v 2 panels Always prints two panels of the retransfer film Number of retransfer film panels during printing A page 93 Priority of printing data v An extracted text has a higher priority than an image fil...

Страница 93: ...6 gradation in accordance with the color palette If any of the colors in the color palette is specified in No printing color other colors that are not specified are printed using the UV ink with maximum density m 16 colors v Bit s 4 Prints using the UV ink with 256 gradation in accordance with the color palette m 256 colors v Bit s 8 Prints using the UV ink with 256 gradation in accordance with th...

Страница 94: ...right end increases the transfer force However the stronger heat also increases the deformation of the card v Temperature Temperature of the retransfer heating roller v Speed Retransfer speed v UV speed Setting for printing the retransfer film in two panels when UV ink is used It is used to set the speed of the retransfer heating roller during retransfer of the UV ink This setting helps to increas...

Страница 95: ...g after encoding is complete Configuration Tab Memo v These settings can be altered only when the user logs into the printer driver settings page with administrator authority Administrators group This tab is displayed in the read only mode when a user without administrator authority logs in m Optional configuration For specifying whether the options are installed m Turn over unit m Bend remedy uni...

Страница 96: ...Example of Printer Setting Single sided Printing Landscape m Application software v Graphic colored v Text black m Printer v Graphic YMC ink v Text YMC ink Resin K ink Setup 96 ...

Страница 97: ...Single sided Printing Portrait m Application software v Graphic colored v Text black m Printer v Graphic YMC ink v Text Resin K ink Setup 97 ...

Страница 98: ...Double sided Printing Default m Application software v Graphic colored v Text black m Printer v Graphic YMC ink v Text YMC ink Resin K ink Setup 98 ...

Страница 99: ...Text colored Page 2 v Graphic black v Text black m Printer Front side v Graphic YMC ink v Text YMC ink Back side v Graphic Resin K ink v Text Resin K ink Memo v If page 2 is set as colored printing is performed using the Resin K ink after dithering is complete Dither Dialog Box A page 91 Setup 99 ...

Страница 100: ... UV Printing Clicking UV Ink opens the UV Ink dialog box m Application software v Graphic colored v Text black m Printer v Graphic YMC ink v Text YMC ink Resin K ink v UV1 bmp UV ink v MAC address UV ink Setup 100 ...

Страница 101: ...Page Split m Application software Page 1 v Graphic colored v Text colored Page 2 v Graphic black v Text black m Printer v Graphic YMC ink Resin K ink v Text YMC ink Resin K ink Setup 101 ...

Страница 102: ...g Only ISO Card m Application software v Graphic colored v Text black m Printer v Graphic none v Text none m Inline Encoding v Non contact IC encode data NIC v Contact IC encode data IC v ISO track 1 magnetic encode data ISO Setup 102 ...

Страница 103: ...ng ISO Card m Application software v Graphic colored v Text black m Printer v Graphic YMC ink v Text YMC ink Resin K ink m Inline Encoding v Non contact IC encode data NIC v ISO track 1 magnetic encode data ISO Setup 103 ...

Страница 104: ...inting JIS Card m Application software v Graphic colored v Text black m Printer v Graphic YMC ink v Text YMC ink Resin K ink m Inline Encoding v Non contact IC encode data NIC v JIS2 magnetic encode data JIS Setup 104 ...

Страница 105: ...s over the card after loading Double sided Logical configuration of printer Eject Print Magnetic encode Contact IC encode Non contact IC encode Load Turns over the card after MG encoding Turns over the card after IC encoding Setup 105 ...

Страница 106: ...inting the card m IPv4 When connecting using the IPv4 address select IPv4 followed by clicking Find to search for the printer After clicking IPv4 you can search for the printer by directly entering the IPv4 address in the Printer List m IPv6 When connecting using the IPv6 address select IPv6 followed by clicking Find to search for the printer After clicking IPv6 you can search for the printer by d...

Страница 107: ...directly from the installed folder of the program Cautions v When a user logs in with administrator authority Administrators group the printer settings can be specified on the status monitor If a user logs in without administrator authority the printer settings appear in the read only mode and they cannot be specified on the status monitor m Windows XP Cautions v If a Windows Security Alert screen...

Страница 108: ...plays the counter value v Printer Select For selecting a printer For displaying and setting the network connection status v Security Lock For displaying and setting the security lock status v Others For performing test prints For downloading the firmware C Minimize button Minimizes the status monitor to an icon The icon is displayed in the taskbar Printer Status Tab Displays the printer s status I...

Страница 109: ...pace on the media m Card Quantity Displays the remaining card quantity as Enough or None Memo v If None is displayed replenish the cards accordingly For more details refer to Cards have run out A page 31 under Adjusting the Printer Settings m Ink Quantity Displays the remaining ink ribbon quantity in percentage in 50 different levels Cautions v The remaining quantity is an estimated value Differen...

Страница 110: ...ity of the ISO magnetic stripe The default setting is Hi Co m JIS Mode For specifying the coercivity of the JIS magnetic stripe The default setting is Lo Co m Power Control m Power saving interval The Power Saving mode helps to reduce power consumption when printing or operation is not performed over a specified time interval Select whether to disable the Power Saving mode or specify the time inte...

Страница 111: ...er is used Adjust the setting according to the actual environment v It may take a while for printing to start when the retransfer temperature is changed v There is only one standard retransfer temperature Altering the retransfer temperature on one side changes the temperature on the other side v The range of optimal values varies according to the Card Type You can change the card type in the Media...

Страница 112: ... speed is automatically set to the maximum value of 2 v The stronger the bend remedy force the less glossy the surface of the remedy side will be m Card Type The appropriate value varies according to the type of card used You can change the card type in the Media Setting Tab For more details refer to Card Type A page 112 in the Media Setting Tab m Update button Applies the selected value to the pr...

Страница 113: ...ther than None is displayed for the contact or non contact IC encoder it means the configuration supports installation of an IC encoder and is not an indication that an IC encoder has been installed v Consult our authorized dealers on how to install the IC encoder m Version Displays the firmware version of the printer and laminator If a laminator is not connected will appear m Counter Displays the...

Страница 114: ... confirmation dialog box C Click OK to register the printer for the entered IP address to the pull down menu m Deleting a printer You can select a printer and delete it from the pull down menu m Deleting printers for the IPv4 address A Select IPv4 followed by selecting the printer to delete from the pull down menu B Select Delete Printer from the pull down menu A deletion confirmation dialog box a...

Страница 115: ...ecify a static IP address as follows Click Details to set IPv6 Address Default Gateway and Subnet Prefix Length m Details button Displays the IPv6 Setting screen Set IPv6 Address Default Gateway and Subnet Prefix Length m Security Setting For setting items related to the IPSec of Ethernet LAN The settings are displayed in the read only mode when connection is established via Ethernet LAN The setti...

Страница 116: ...er the password for the printer certificate file and click OK 4 Select CA Certificate for Download Type and click Select 5 Select a certification authority certificate file and click Write 6 Click the Close button on the IPSec Setting screen v IPSec setting for the printer is complete after closing the screen m Sync Time clicking the Sync Time button sends out the current time of the PC to the pri...

Страница 117: ...ion panel of the printer You can specify different values for these items The password for the status monitor supports alphanumeric characters Security Lock A page 20 m Update button Applies the selected value to the printer m Refresh button Displays the printer settings on the screen Others Tab This tab enables you to perform test prints and download the firmware Memo v For printers connected via...

Страница 118: ... data 8 unit code 32760 6 5 Non contact IC encoding data 8 unit code 32760 7 6 String denotes ISO track 1 magnetic encoding data 7 unit code 69 8 7 String denotes ISO track 3 magnetic encoding data 7 unit code 69 9 8 String denotes ISO track 1 magnetic encoding data AAMVA standard 6 unit code 79 10 9 String denotes ISO track 3 magnetic encoding data AAMVA standard 6 unit code 79 A Make sure that t...

Страница 119: ... 1 0 1 1 0 0 1 1 1 1 0 0 0 1 0 0 1 1 0 1 0 1 0 1 1 1 1 0 0 1 1 0 1 1 1 1 0 1 1 1 1 b7 b6 b5 0 1 2 3 4 5 6 7 8 9 A B C D E F 0 0 0 0 1 1 1 1 0 0 1 1 0 0 1 1 0 1 0 1 0 1 0 1 0 1 2 3 4 5 6 7 A Range of usable text characters for 7 unit code B Range of usable text characters for 6 unit code C Range of usable text characters for 4 unit code D Tilde character Hexadecimal 7E v The start sentinel and end ...

Страница 120: ...ng card loading Remove the card according to the procedure for the Error Code Jam Hopper 90 A page 46 13 0x01039100 Card jam near the card turn over unit Remove the card according to the procedure for the Error Code Jam TurnOver 91 A page 47 14 0x01039200 Card jam near the magnetic encoder Remove the card according to the procedure for the Error Code Jam MG 92 A page 49 15 0x01039300 Card jam near...

Страница 121: ...in the range of operating ambient temperature turn off the power and consult our authorized dealers 39 0x0104F800 The temperature of the thermal head is too high Turn off and on the power again If the same problem recurs turn off the power and consult our authorized dealers 40 0x0104RRRR A hardware error has occurred 41 0x01051A00 Printer command is incorrect Please consult our authorized dealers ...

Страница 122: ...ct IC encoding program is not found Please consult our authorized dealers 11 0x10000302 Unable to establish communication with the non contact IC encoder 12 0x10000303 An error has occurred during non contact IC encoding data writing Check the card specifications 13 0x10000401 User program is not found Please consult our authorized dealers 14 0x10000403 An error is returned for the user program 15...

Страница 123: ...t is inside the MAC address printing area top right or bottom left corner Position the image so that the printing area of the YMCK ink does not overlap with that of the MAC address If the Number of retransfer film panels is set to 2 panels the printer will print the YMCK image MAC Address Position A page 92 A part of the image is not printed v If the Number of retransfer film panels in the UV ink ...

Страница 124: ...CX 7000 Card Printer LST1006 002A ...

Отзывы: