- 9 -
2. Information
1
)
Activate “Operation Button Guide
①
” by pressing any operation buttons but the
Standby (Power) button
_
2)
Press the “
MENU
” button.
3)
Select “
INFORMATION
” on “MENU 1/2”, and press the “
OK
” button.
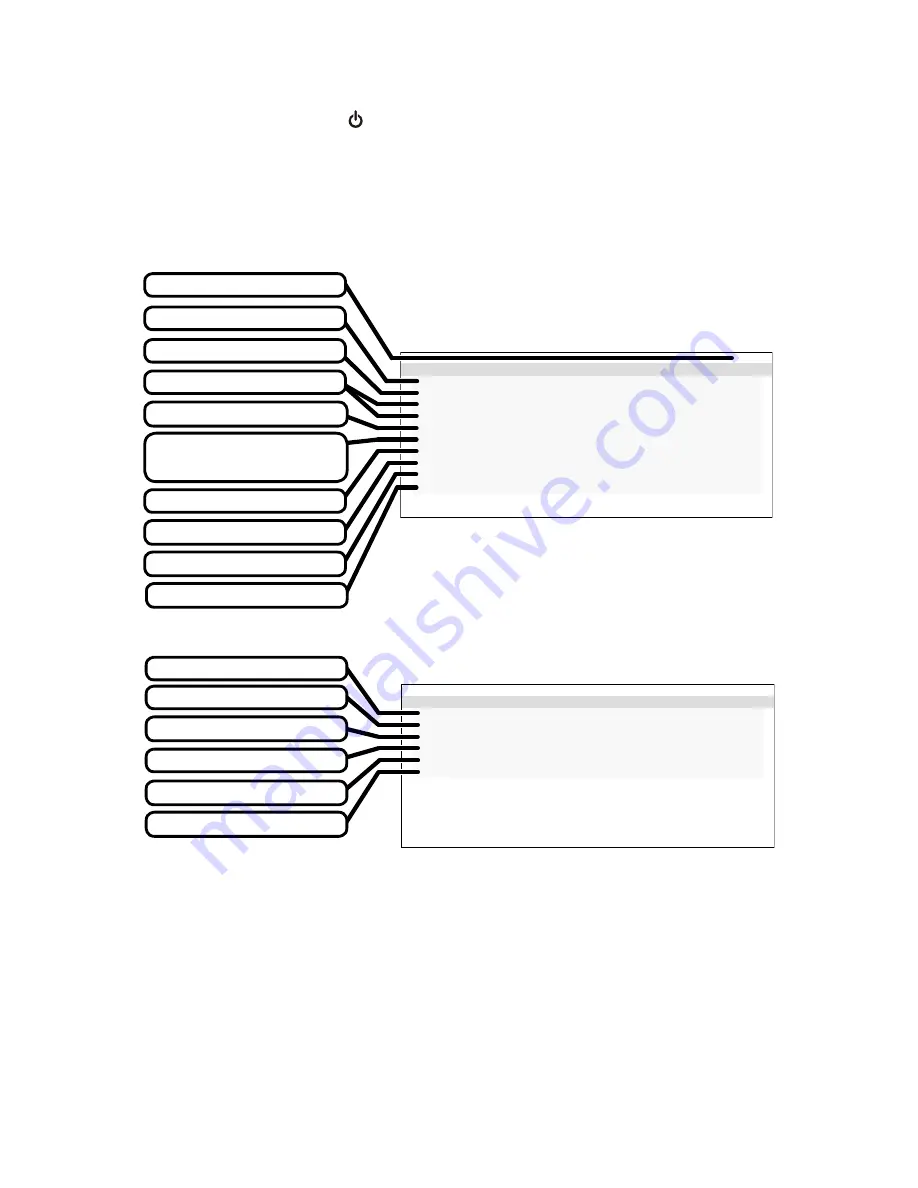
And then, the following OSD “INFORMATION 1/2” appears as below.
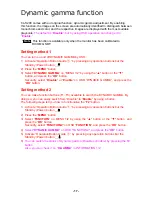
The OSD page switches between "INFORMATION 1/2" and "INFORMATION 2/2" by
pressing the "▼" button or the "▲" button.
2 M P
I N F O R M A T I O N
1 / 2
M O D E L
:
C L - S 2 0 0
S E R I A L
: * * * * * * * * * * * *
V S P U
: R e v . A
M P U
: R e v . A
A C T T I M E : 9 9 9 9 9 H
L A S T C A L : 9 9 9 9 9 H
E D I D : L a n d s c a p e
D - G A MM A
: D i s a b l
e
A U T O - T E X T : D i s a b l
e
H - S E N S O R
: D i s a b l
e
INFORMATION 1/2
Model
Total operating hours
Operating hours since
the last calibration
EDID
Maintenance information
Serial number
Dynamic gamma adjustment
Resolution
Auto text mode
Human presence sensor state
2 M P
I N F O R M A T I O N
2 / 2
T - P A T T E R N :
A A P M T G 1 8 - O I Q
D P : E n a b l e
U S B P O W : A u t o
F U N C - 1 : T E S T P A T T E R N
F U N C - 2 : D Y N A M I C G A M M A
F U N C - 3 : D i s a b l e
INFORMATION 2/2
Test Pattern Type
F3 (Disable)
Output setting for USB
Setting for DisplayPort
F2 (Dynamic Gamma)
F1 (Test Pattern)
In the case of the sample as above,
F1 button is for ON/OFF of “TEST PATTERN”
F2 button is for ON/OFF of “DYNAMIC GAMMA”
F3 button is unavailable.


