background image

21

3 Familiarising yourself with the control options

Precondition

: Your IMPRESSA is ready for operation.


T

Open the cover of the programming buttons.

  O  T

 Press the P button 

until

 WATER HARDNESS appears.


T

Press the + or - button several times until INFORMATION is 
shown.

  O  T

 Press the P button to enter the programme item.

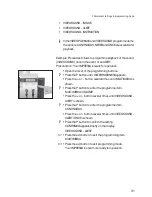
TOTAL  and  the  overall  number  of  preparations  are  dis-
played.


E

Press the + or - button several times to view the various items 
of information.

  0  T

 Press the exit button to exit the programming item.

INFORMATION

  0  T

 Press the exit button to exit programming mode.

Your IMPRESSA is once more ready for operation.

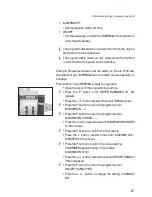
With the individual counter (counter button 

9

) you can track your 

consumption over a specific period of time which you can specify. 
This counter can be reset to zero at any time.

Precondition

: Your IMPRESSA is ready for operation.


T

Open the cover of the programming buttons.

  9  T

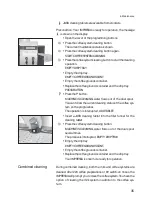
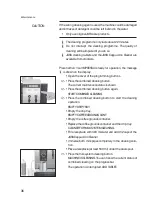
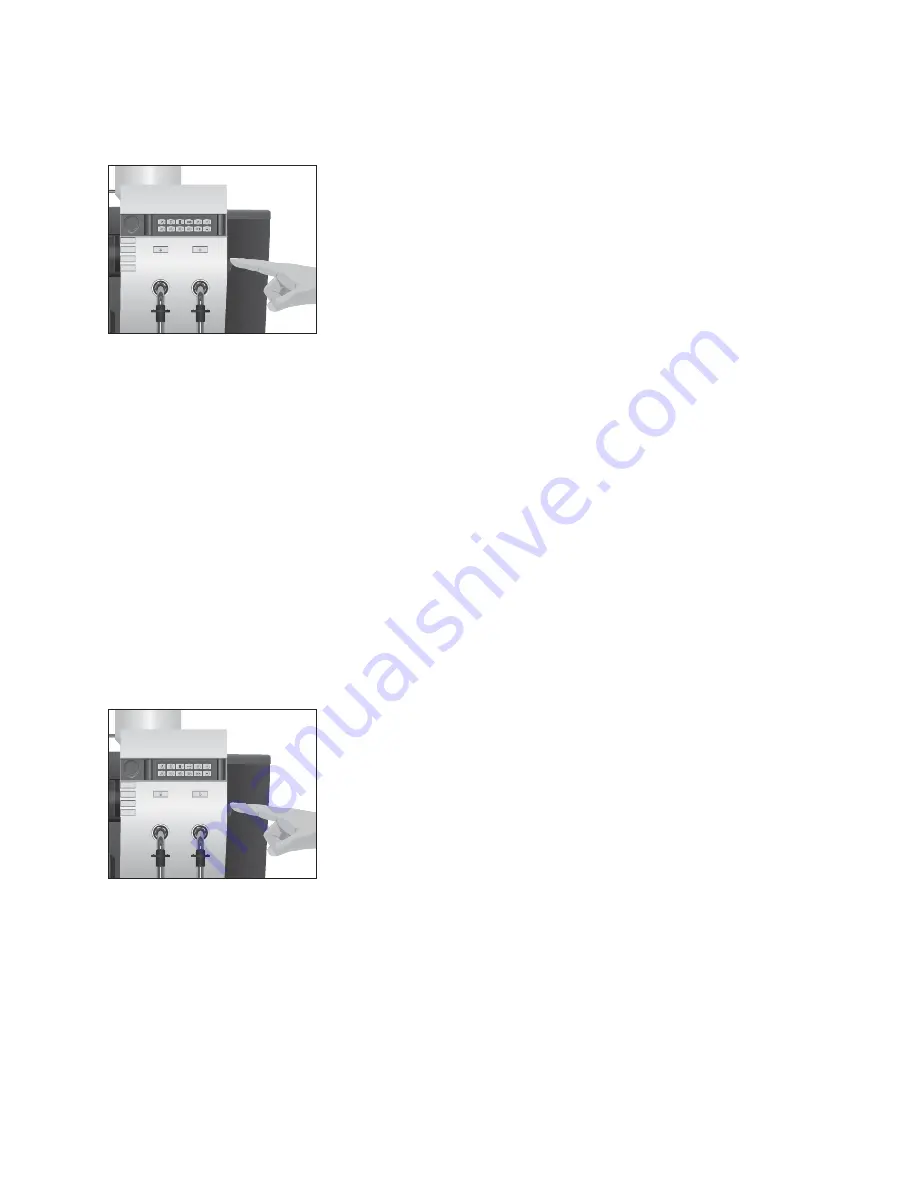
 Press the counter button 

until

 an acoustic signal is given.

1 COFFEE and the number of preparations are displayed.


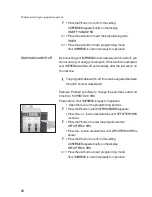
E

Press the + or - button several times to view the respective 
number of prepared products.

  0  T

 Press the exit button.

COUNTER DELETE / NO


T

Press the + or - button to change the setting to YES.

  O  T

 Press the P button to reset the counter.

DELETED appears briefly on the display.
Your IMPRESSA is once more ready for operation.

Resetting the counter 

Содержание IMPRESSA X9 Win

Страница 1: ...using themachineread theinstructionsfor use J UR AType657 The IMPR ESSA Manual has been awarded the seal of approval by the independent German Technical Inspection Agency T VS D dueto its easy to unde...

Страница 2: ...ining and adjusting thedegreeof water hardness 1 4 Adjusting thegrinder 1 6 S witching on 1 7 S witching off standby 1 7 3 F amiliarising yourself with thecontrol options 1 8 Preparation at thetouch o...

Страница 3: ...ual spout 33 Milk system cleaning 33 Coffeesystem cleaning 34 Combined cleaning 35 Changing thefilter 37 Descaling themachine 38 Cleaning thebean container 40 Descaling thewater tank 40 7 Display mess...

Страница 4: ...nd power cable back of machine 4 Dual spout height adjustable 5 Milk pipes 6 Coffeegroundscontainer 7 Filler funnel for cleaning tablet 8 Cover for programming buttons 9 Water tank with cover 1 0 Hot...

Страница 5: ...on Milk coffeebutton Milk button Theproductsareshown on thedisplay 3 Programming buttons Q On off button Filter button Descaling button 9 Counter button O Pbutton button c R insebutton 6 Milk system c...

Страница 6: ...smell of burning unplugthemachineimmediately from themainssupply and contact theJ UR Aservicecentre Z If the power cable for this machine is damaged it must be repaired either directly by J UR A or by...

Страница 7: ...re a jet of water may beused Z Only connect the machine to a power supply in accordance with the information on the rating plate The rating plate is located on the rear of your IMPR ESSA Further techn...

Страница 8: ...A X9 Win you will become a master at preparing exciting coffeespecialities you will beaBarista Y oucandownloadtheshort operatinginstructionsforyourmachine from theJ UR Awebsite www jura com The IMPRES...

Страница 9: ...kindsof applications Z Simpleoperation with Smart Lead Smart Lead theinter active J UR A user guidance with visual and audio features guides personnel through all operating and care steps This makes...

Страница 10: ...oblem Simply generatecodegroups Z Customisable The setting options of the IMPR ESSA X9 Win arejust asvariedasthewishesof our customers Themachine can therefore be equipped with a number of different a...

Страница 11: ...mall pot macchiato milky coffee hot water steam 2x U Grinder selection or rinsebutton all buttonscan be arranged to preference Z Blocking products Z Setting thefilter capacity Z Assigning code groups...

Страница 12: ...fore have theoptionof usingtwotypesof coffeebeans Thecover of thebean container also actsasan aromapreservation cover Thiswill ensure that your coffeebeansretain their aromafor longer Coffee beans whi...

Страница 13: ...theMUL TIMEDIALANGUAGEoption TIMEHOURS T Pressthe or button several timesto set thehours TIMEHOURS1 2 00 Example O T PressthePbutton to confirm thehour setting TIMEMINUTES1 2 00 Example T Pressthe or...

Страница 14: ...contacts section on thelast pageof theseinstructions Y our IMPR ESSA no longer has to be descaled if you are using the CLAR ISfilter cartridge E TheCLAR ISfilter cartridgemust beinstalled for thefirst...

Страница 15: ...xample Tochangethewater hardnessfrom 1 6 dHto25 dH pro ceed asfollows Precondition Y our IMPR ESSAisready for operation T Open thecover of theprogramming buttons O T Press the P button until WATER HAR...

Страница 16: ...t afinesetting for alight roast U If thefinenessof grind istoo fine thecoffeeonly dripsfrom thecoffeespout Z Select acoarsesetting for adarker roast U If the fineness of grind is too coarse the coffee...

Страница 17: ...c T Presstherinsebutton to start therinseoperation MACHINEISR INSING water flowsout of thedual spout The operation stops automatically Y our IMPR ESSA is ready for operation When you switch your IMPR...

Страница 18: ...t settingsin programming mode E Y ou can stop the machine at any time while a coffee or milk speciality or hot water isbeing prepared To do this pressany button Prepareyour favouritecoffeespeciality a...

Страница 19: ...sand specify theweekdayson which IMPR ESSAshould switch on and off automatically OFFAFTER OFFAFTER HRS 0 5 HRS 9HRS T Set thenumber of hoursafter which theIMPR ESSAshould switch off automatically SWIT...

Страница 20: ...ESSO POWDER AMOUNTisshown O T PressthePbutton to enter theprogrammeitem 1ESPR ESSO POWDERAMOUNT T Press the or button several times to select the powder amount O T PressthePbutton to confirm thesetti...

Страница 21: ...mode Y our IMPR ESSAisoncemoreready for operation With theindividual counter counter button 9 you can trackyour consumption over a specific period of time which you can specify Thiscounter can berese...

Страница 22: ...on Y our IMPR ESSAisready for operation T Placean espresso cup under thedual spout T Pressthe1espresso button Coffee preparation then begins Y ou can follow the current status of preparation on the pr...

Страница 23: ...operation E Tenminutesafter milkisprepared thedual spout isautomat icallyrinsed Thisrinsingoperationisannounced byanacous ticsignal Thesetting can bechanged by aJ UR Aservicetech nician Y ou can prepa...

Страница 24: ...rationstopsautomaticallywhenthepre set amount of water isreached Y our IMPR ESSAisoncemoreready for operation Thereisadanger of scalding from hot steam T Avoid direct contact with theskin Precondition...

Страница 25: ...programmeitem SELE CTPR ODUCT T Pressthe1espresso button 1ESPR ESSO WATERAMOUNT T Pressthe buttonseveral timesuntil 1ESPR ESSO POWDER AMOUNTisshown O T PressthePbutton to enter theprogrammeitem POWDER...

Страница 26: ...econdition Y our IMPR ESSAisready for operation T Open thecover of theprogramming buttons O T Press the P button until WATER HAR DNESS 1 6 dH appears T Pressthe or button several timesuntil TIMEisshow...

Страница 27: ...en thecover of theprogramming buttons O T Press the P button until WATER HAR DNESS 1 6 dH appears T Pressthe or button several timesuntil TIMERisshown O T PressthePbutton to enter theprogrammeitem MAC...

Страница 28: ...programmableswitch off timecan beadjusted between 0 5 and 9 hoursor deactivated Example Proceed as follows to change the automatic switch off timefrom 5 0 HRSTO2 0 HRS Precondition Y our IMPR ESSAisre...

Страница 29: ...ay SPR ACHEDE UTSCH 0 T Presstheexit button to exit programming mode Y our IMPR ESSAisoncemoreready for operation Y oucanchangetheunit of theamount of water from ml to oz and thetimeformat to 24 HRS o...

Страница 30: ...Cisshown O T PressthePbutton to enter theprogrammeitem SWITCH ONR INSE AUTOMATIC T Pressthe or button to changethesetting to MANUAL O T PressthePbutton to confirm thesetting CONFIR MEDappearsbriefly o...

Страница 31: ...hePbutton until WATERHAR DNESSappears T Press the or button several times until MUL TIMEDIA is shown O T PressthePbutton to enter theprogrammeitem MUL TIMEDIA VOLUME T Press the or button several time...

Страница 32: ...on appears after heating or this is automatically started When the IMPR ESSAisswitched off a rinse operation isautomati cally initiated In programming modeyou can makeasetting to stipulatewhether thes...

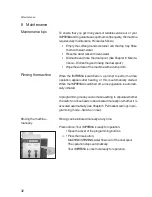
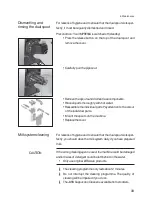
Страница 33: ...r of theindividual parts T Mount thespoutson themachine T R eplacethecover For reasonsof hygieneand to ensurethat thedual spout worksper fectly you should clean themilk system daily if you haveprepare...

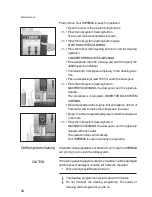
Страница 34: ...The procedure is interrupted WATER FOR MILK SYSTEM CLEANING T R insethereceptaclethoroughly fill it withapprox 400ml of fresh water and immersethemilk pipesin thewater T Emptytheotherreceptacleandplac...

Страница 35: ...lows out of the dual spout Y ou can follow thecurrent cleaning statusof thecoffeesys tem on theprogressbar Theoperation isinterrupted ADDTABLET T Insert a J UR A cleaning tablet into the filler funnel...

Страница 36: ...bined cleaning button Thecurrent maintenancestatusisshown 8 T Pressthecombined cleaning button again STAR TCOMBINEDCLEANING 8 T Press the combined cleaning button to start the cleaning operation EMPTY...

Страница 37: ...thedrip tray EMPTYCOFFEEGR OUNDSCONT T Empty thecoffeegroundscontainer T R eplacethecoffeegroundscontainer and thedrip tray Y our IMPR ESSAisoncemoreready for operation After 50 litres of water have...

Страница 38: ...ally promptsyou to descaleit when necessary Thedegreeof calcification dependson thedegreeof hardnessof your water If thedescaling agent comesinto contact with theskin or eyes this can causeirritation...

Страница 39: ...rt thedescaling operation EMPTYDR IPTR AY T Empty thedrip tray EMPTYCOFFEEGR OUNDSCONT T Empty thecoffeegroundscontainer T R eplacethecoffeegroundscontainer and thedrip tray SOL VENTINTANK T R emoveth...

Страница 40: ...n container from timeto time Danger of injury to thefingerswhen thegrinder isrunning T S witch the machine off with the on off button Q before per forming any work on thegrinder T S witch themachineof...

Страница 41: ...41 6 Maintenance T Fill thewater tank with fresh cold water and reinsert...

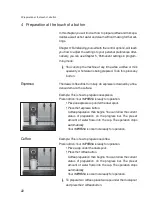
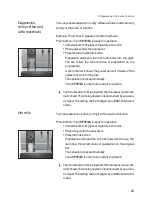
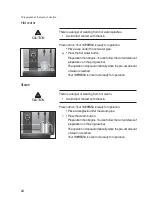
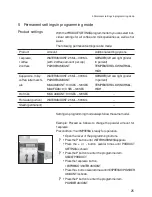
Страница 42: ...Chapter 2 Preparing and using for thefirst time Filling the bean container FILLWATER TANK Thewater tank isempty Y ou cannot prepareany coffee products hot water or milk products T Fill thewater tank S...

Страница 43: ...to start arinseoperation or continueastarted maintenance programme T Presstherinsebutton to start rinsing or to continuethemain tenanceprogramme COFFEESPOUTMISSING Thecover of thedual spout is either...

Страница 44: ...cepartner who will be ableto deactivatetheCLAR IS filter cartridge FILLBEANSisdisplayed although thebean container hasbeen filled Thegrinder isnot yet com pletely filled with beans T Prepareacoffeespe...

Страница 45: ...se instruc tions Problem Cause Result Action ER R OR2or ER R OR4 is displayed If themachinewasexposed to thecold for along period of time heating isdisabled for safety reasons T Warm up themachineat r...

Страница 46: ...of water flowsfrom thehot water pipeand the steam pipe The operation stops automatically The IMPR ESSAwill switch itself off 3 T Turn your IMPR ESSAoff at thepower switch Thenext timeyouusethemachine...

Страница 47: ...oiseemitted Lp 70 dB A Marksof conformity A S Power consumption in standby mode 4 2Wh Pump pressure 2x staticmax 1 5 bar Water tank capacity 5 0 l Bean container capacity 2x 650 g Coffeegroundscontain...

Страница 48: ...and adjusting thedegreeof water hardness 1 4 Display 5 Messages 42 Display messages 42 Disposal 46 Drip tray 4 Drip tray 4 Dual spout 4 Dismantling and rinsing 33 E Environmentally neutral disposal 46...

Страница 49: ...ode 25 Product settings 25 Timeand weekday 26 Timeformat 29 Unit of water amount 29 Prompt to takeaction Symbolsused 8 Proper use 6 R R esetting thecounter 21 R insing Dual spout 33 Machine 32 S Safet...

Страница 50: ...50...

Страница 51: ...51...

Страница 52: ...Wereservetheright to maketechnical changes The illustrations used in the IMPR ESSA X9 Win Manual show the IMPR ESSA X9 Win Platinum Y our IMPR ESSA could incorporate minor changes Y our opinion isimp...

Отзывы: