


4.
Type
Yes
to accept the agreement, and then press
Enter
.
5.
Enter a new CLI admin password to change the default password and then press
Enter
.
NOTE:
The password must be at least eight characters long.
6.
Reenter the new password and then press
Enter
.
Juniper Networks Advanced Threat Prevention window appears.
NOTE:
By default, the JATP700 appliance is shipped with the All-In-One configuration. You can change the
configuration to your desired form factor by following the instructions from Step
to Step
.
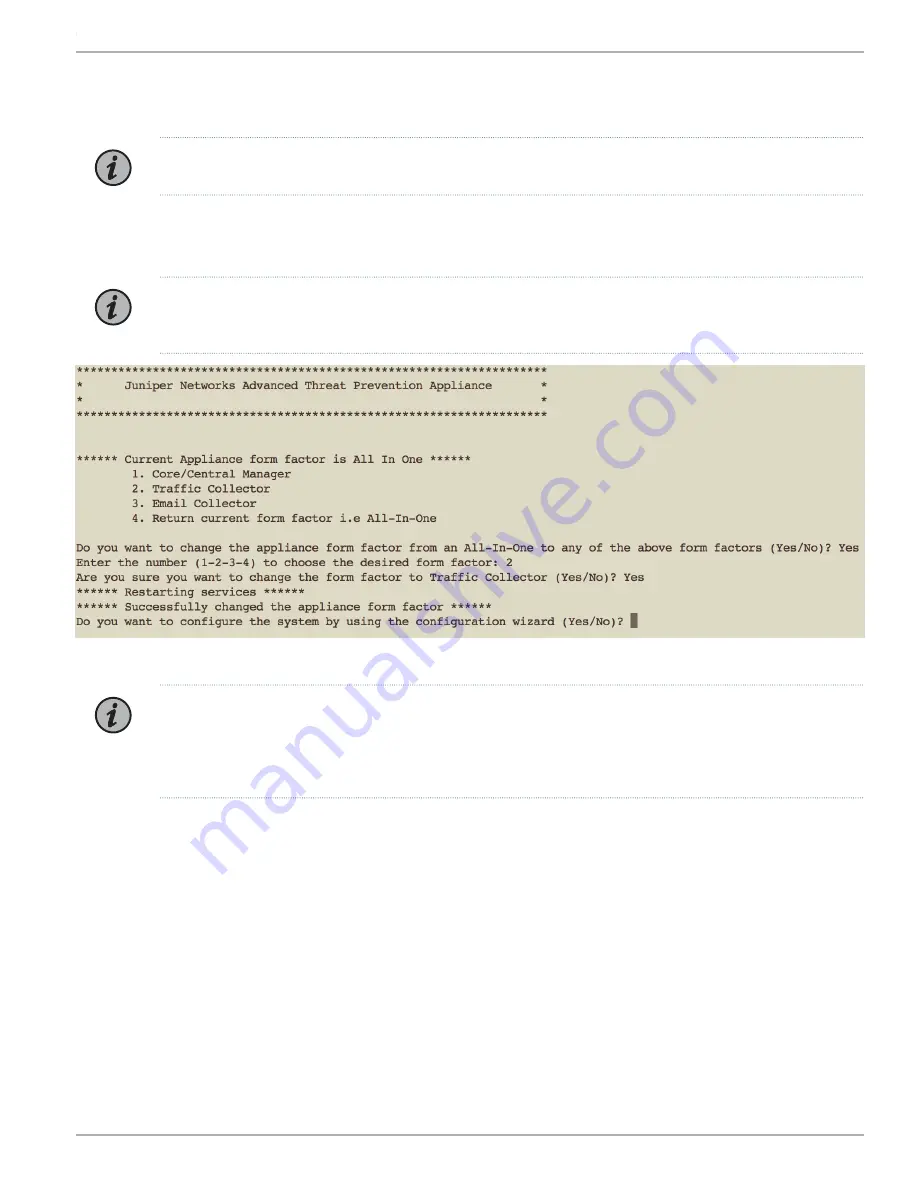
7.
Type
Yes
if you want to change the appliance form factor.
NOTE:
If you type
No
, then:
a. Type
Yes
to confirm that you do not want to change the appliance form factor.
b. Proceed to Step
8.
Enter a number from 1-4 to choose your desired form factor. For example, enter
2
to change the All-In-One to Traffic Collector
form factor.
9.
Type
Yes
to reconfirm to change the current form factor of the appliance.
Services are restarted and a successful confirmation message displays about the change of the form factor.
10.
Type
Yes
to configure the system by using the configuration wizard.
5
Copyright © 2018, Juniper Networks, Inc.
How to Set Up Your JATP700 Appliance


