Published: 13.06.2018
Copyright by Joy-IT
10
3
10.1“ HDMI LCD
5. Usage with a BeagleBone Black
5.1 Device Connection
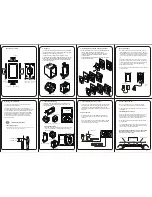
1. Connect the LCD to the HDMI interface of the BeagleBone using an HDMI-microHDMI cable (sold
separately).
2. Connect the touch interface of the LCD to the "Host" USB interface of the BeagleBone with a type A-
microUSB cable. (The BeagleBone has a "Host" and a "Slave" USB interface. This LCD should be
connected to the "host" interface.
3. Connect the "Power Only interface" of the LCD with a 5V 2.5A adapter. This should be equipped with a
type A-microUSB cable.
5.2 Installation
If the LCD is used as a normal screen, you only need to load the last Angstrom image file onto the
BeagleBone Black without making any further settings.
The BeagleBone will then read in the parameters of the 10.1 inch HDMI LCD and automatically set the
resolution to 1280x800.
If the LCD is used as a touch monitor, you must install
this Image-File
:
1. Download the compressed image file to your PC, after extraction you will receive a file with the
extension .img.
2. Connect a micro SD card to your PC and format it with the
SD Formatter
program.
3. Start the
Win32DiskImager
program and select the downloaded image file in the first step, then click
the "Write" button to write file to the card.
4. When the image file is written to the micro SD card, you can insert the card into the BeagleBone Black.
It will automatically use the operating system on the card. After a short time you will see the graphical
interface.
Note: If the eMMC of the BeagleBone Black has an operating system installed, you should start the
BeagleBone Black from the micro SD card. Do not release the start button until the "User LEDs" start
flashing.
Содержание RB-LCD10
Страница 1: ...3 10 1 HDMI LCD...


