SECTION 2 - PROCEDURES
3121804
– JLG Lift –
2-7
6.
Remove the cylinder rod from the holding fixture.
7.
Position the cylinder barrel in a suitable holding fix-
ture.
IMPORTANT
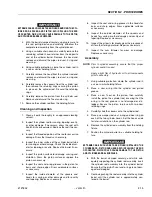
EXTREME CARE SHOULD BE TAKEN WHEN INSTALLING THE
CYLINDER ROD, HEAD, AND PISTON. AVOID PULLING THE ROD
OFF-CENTER, WHICH COULD CAUSE DAMAGE TO THE PISTON
AND CYLINDER BARREL SURFACES.
8.
With barrel clamped securely, and while adequately
supporting the rod, insert the piston end into the
barrel cylinder. Ensure that the piston loading o-ring
and seal ring are not damaged or dislodged.
9.
Continue pushing the rod into the barrel until the cyl-
inder head gland can be inserted into the barrel cyl-
inder.
10.
If applicable, secure the cylinder head retainer using
a suitable chain wrench.
11.
After the cylinder has been reassembled, the rod
should be pushed all the way in (fully retracted) prior
to the reinstallation of any holding valve or valves.
12.
If applicable, install the cartridge-type holding valve
and fittings in the port block using new o-rings as
applicable.
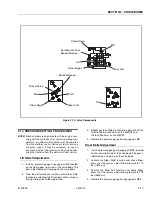
Figure 2-2. 330CRT Lift Cylinder
Содержание 330CRT
Страница 1: ...Service Maintenance Manual Model 330CRT 400CRT 3121804 April 7 2004 ...
Страница 2: ......
Страница 8: ...TABLE OF CONTENTS iv JLG Lift 3121804 This page left blank intentionally ...
Страница 12: ...SECTION 1 SPECIFICATIONS 1 4 JLG Lift 3121804 Figure 1 1 Torque Chart ...
Страница 20: ...SECTION 2 PROCEDURES 2 6 JLG Lift 3121804 Figure 2 1 Arms and Platform Positioning and Support Cylinder Repair ...
Страница 22: ...SECTION 2 PROCEDURES 2 8 JLG Lift 3121804 Figure 2 3 400CRT LIft Cylinder ...
Страница 54: ...SECTION 3 TROUBLESHOOTING 3 12 JLG Lift 3121804 Figure 3 3 Hydraulic Schematic Sheet 1 of 2 ...
Страница 55: ...SECTION 3 TROUBLESHOOTING 3121804 JLG Lift 3 13 2792397 E Figure 3 4 Hydraulic Schematic Sheet 2 of 2 ...
Страница 56: ...SECTION 3 TROUBLESHOOTING 3 14 JLG Lift 3121804 This page intentionally left blank ...
Страница 57: ......

