Page 5 • JL Audio, Inc., 2016
Continued on Next Page
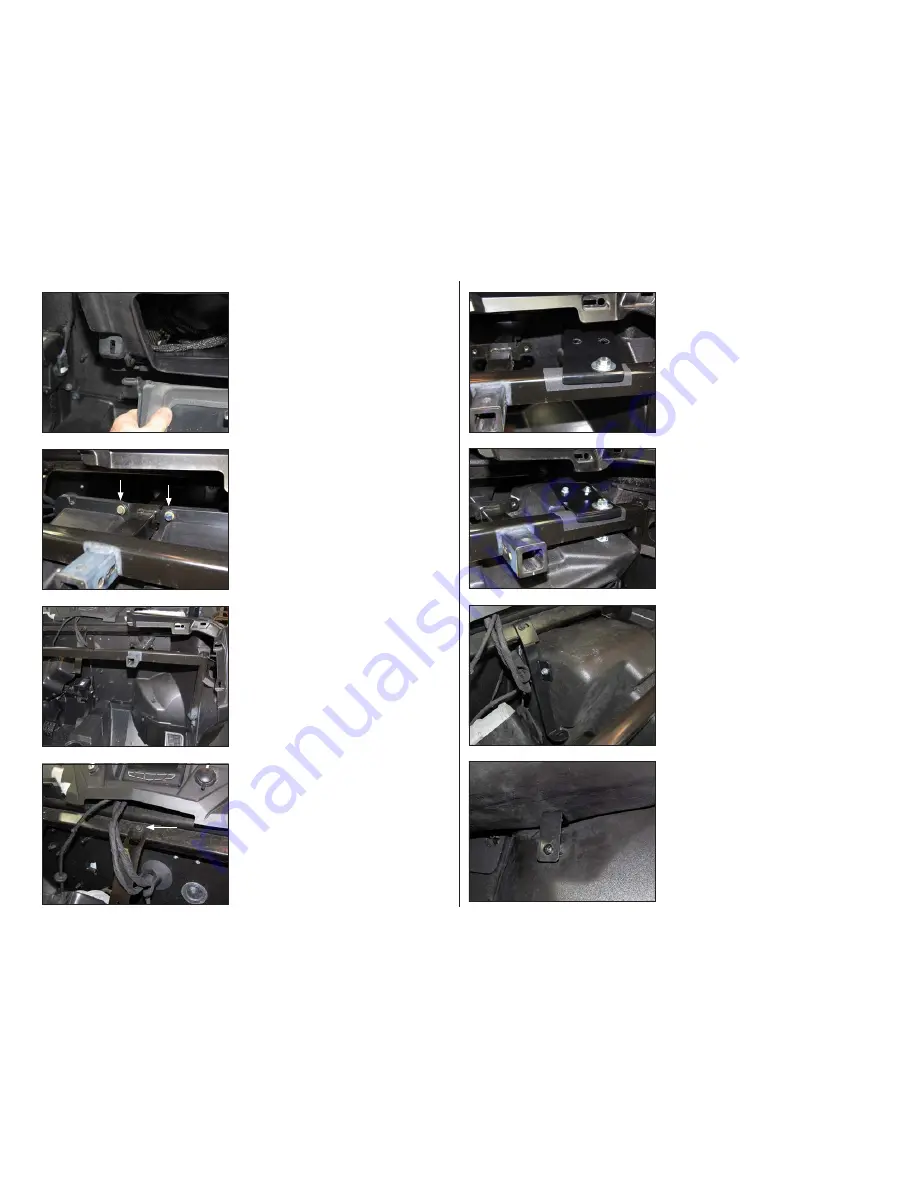
S T E P 24
Thread a 1/4 - 20 x 1” Serrated Flange Bolt
through the hole in the short side of the
Bottom Bracket, into the threaded insert on
the bottom of the enclosure, and hand tighten.
Secure the Bottom Bracket to the factory
mounting point in the vehicle using a #12 x 3/4”
Phillips Pan Head Screw and 1/4” Flat Washer as
shown, and hand tighten.
S T E P 23
Secure the Side Bracket to the frame using the
factory bolt removed in
Step 20
, and hand
tighten. Thread a 1/4 - 20 x 1” Serrated Flange
Bolt through the hole in the Side Bracket, into
the threaded insert in the side of the enclosure,
and hand tighten.
S T E P 22
Connect speaker cable to the barrier strip
on the side of the enclosure, and lift the
Stealthbox® into position as shown. Thread
a pair of 1/4 - 20 x 1” Serrated Flange Bolts
through the holes in the Top Bracket, into the
threaded inserts in the top of the
enclosure, and hand tighten.
S T E P 21
Secure the Top Bracket to the frame as shown
using a 3/8 - 16 x 1-1/4” Serrated Flange Bolt,
3/8” Serrated Spring Lock Washer, and a 3/8”
Flat Washer above the bracket, and a 3/8” Flat
Washer and 3/8 - 16 U-Nut below the frame,
and hand tighten.
S T E P 20
Remove the indicated bolt on the factory
bracket, and remove the bracket. This bracket
will not be reinstalled.
S T E P 19
Pictured is the vehicle with the dash panel and
glove compartment removed.
S T E P 18
Remove the two indicated bolts from the top
of the glove compartment, and remove the
glove compartment from the vehicle.
S T E P 17
Open the glove compartment, unclip the door,
and remove the door from the vehicle.
SB-POL-RZG2/10TW3 INSTR_SKU# 011446


