7
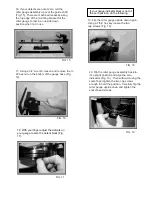
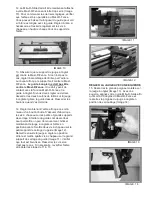
. Using the 1/4”-20 square nuts from the
parts bag, slide two square nuts into the
bottom T-slots on the back of the fence. You
will need two nuts for the large clamping
bracket and two nuts for the small bracket
on the opposite end of the shaft (Fig. 6).
FIG. 5
MOUNTING THE MITE-R-SLIDE ASSEMBLY
6
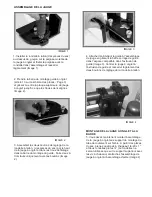
. Using two of the 1/4”-20 x 1-1/4” cap
screws and two 1/4” flat washers attach
each of the shaft mounting brackets to each end
of the shaft (Fig. 5) using the
3/4” x 1-1/4”
tapped mounting blocks. Now position the Mite-
R-Slide resting against the Mast-R-Fence.
Position the Mite-R-Slide assembly so the sub-
fence on the miter fence backs up to the edge of
the table top for maximum cross cutting
capacity.
FIG. 9
FIG. 6
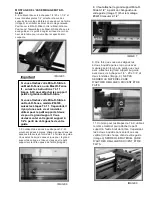
9. Once you have the square nuts aligned,
and you have measured depending on the
fence you have, attach the large clamping
bracket to the fence with two
of the 1/4” -
20 x 3/4
” cap screws and two washers (Fig.
8). DO NOT TIGHTEN HARDWARE AS
FINE ADJUSTMENTS NEED TO BE
MADE.
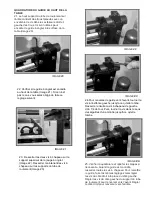
11. As in steps 7 thru 9 use the same
hardware to attach the small clamping
bracket at the other end of the shaft, however,
the square nuts will run vertically (one in each
track of your fence (Fig. 9). DO NOT
TIGHTEN HARDWARE AS FINE
ADJUSTMENTS NEED TO BE MADE.
FIG. 8
If you are attaching your Mite-R-Slide
to a Mast-R-Fence or Mast-R-Fence II
follow instructions 7 through 11
(Fig.
6 and Fig. 9) to attach the Mite-R-
Slide large and small brackets.
If you are attaching your Mite-R-Slide
to a Rout-R-Fence, model #04100,
follow steps 7 through 11, however,
there is only one screw and washer
used for the small bracket and two
screws for the large bracket. You will
want to mount your large bracket 2-
1/2” from the left side of your fence.
FIG
.
7
Important
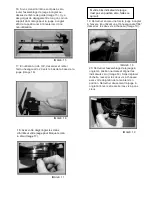
8. You will want to attach the Mite-R-Slide
large bracket 3-
1/2” from the left side of
your fence. (Fig. 7) (For mounting #04010
measure 2-
1/2”
Содержание Mite R Slide
Страница 17: ......


