background image

BATTERY NOTE AND CARE 


Danger of explosion if the battery is replaced incorrectly.    Replace only with the same type battery. 


Only use a good quality known brand battery to ensure the longest life and best performance. 


If the unit is not used for an extended period of time, remove the battery.  An old or leaking battery  

can cause damage to the remote and may void the warranty. 


Do not dispose of batteries in fire. Batteries may leak or explode. 


Do not try to recharge batteries that are not intended to be recharged; they can overheat, rupture and 

leak (Follow battery manufacturer’s directions). 


Only an adult should replace the battery. 


permost position. 


S

RD 

te the Dock 90 degre

st pos

ned at an ang

y

onscreen


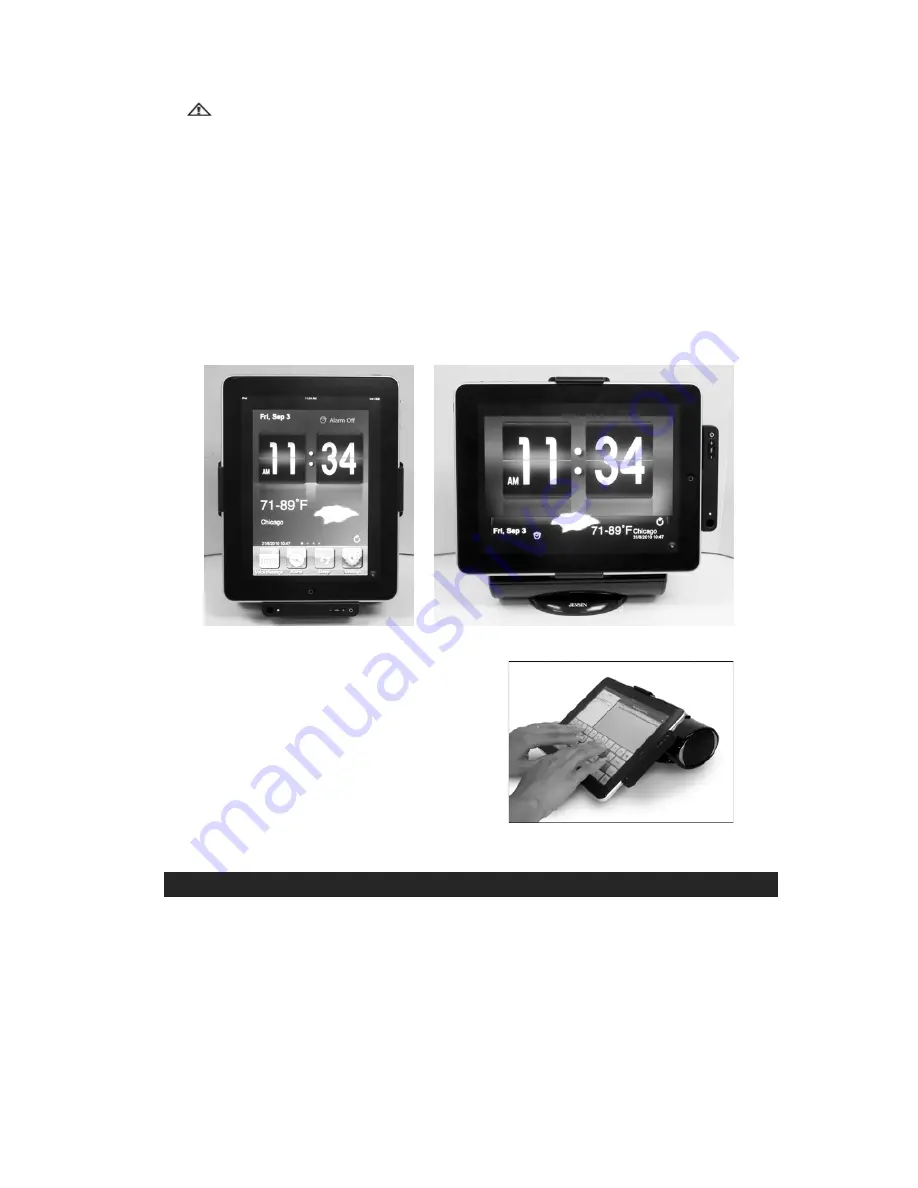
SETTING UP THE DOCK FOR COMFORTABLE VIEWING AND TYPING 

VIDEO BROWSING MODE 

1. 

Dock your iPad, iPhone or iPod touch while the dock is in in portrait mode.    Rotate the Dock 90 
degrees counterclockwise for landscape mode if needed. 

2. 

Adjust the Base Hinge until the iPad Support Arm locks in the up

3. 

Adjust the viewing angle by tilting the iPad Dock forward or back. 


Portrait 

Mode 

ING THE iPad ONSCREEN KEYBOA

Dock your iPad and rota
counterclockwise to landscape mode. 

Lock the Support Arm into its lowe

angle the dock as shown to the right. 
The iPad screen will be incli
about 41 degrees allowing you to t


Landscape 

Mode 

es 

ition and 

le of 

pe using the 


U

1

2

3

 keyboard. 


   Onscreen Typing Mode 


WORKING WITH AN APPLE iP

RECHARGING YOUR APPLE DEVICE 

ven if the Dock is in standby

ad / iPhone / iPod   

ne or iPod is docked onto the Docking Con

E
th

 mode, once your iPad, iPho

nector, 

e charging will start automatically.   

LISTENING TO MUSIC ON YOUR APPLE DEVICE 

This unit works with all models of iPad, iPhone, iPod touch, iPod

 classic up to 

120GB. 
1. 

Dock your Apple device carefu

2. 

Press the Power Butto

green Power Indicator will 


 nano, iPod Video and iPod

lly and securely onto the Docking Connector. 

n on the main unit or remote to turn on the unit.    The 

light solid. 

3. 

Select the “iPod” function from the main screen on the iPad, iPhone or iPod touch or “Music” on iPod to 

access your music library. 


5

Содержание JiPS-250i

Страница 1: ...G SPEAKER STATION for iPad iPod and iPhone JiPS 250i USER MANUAL iPod iPhone iPad not Included PLEASE READ THIS USER MANUAL COMPLETELY BEFORE OPERATING THIS UNIT AND RETAIN THIS BOOKLET FOR FUTURE REF...

Страница 2: ...installation and use and keep these instructions handy for future reference Take special note of all warnings listed in these instructions and on the unit 1 Read these instructions All the safety and...

Страница 3: ...r relocate the receiving antenna Increase the separation between the equipment and receiver Connect the equipment into an outlet on a circuit different from that to which the receiver is connected Con...

Страница 4: ...n the unit to normal status in case it exhibits abnormality during operation 10 Video Out Jack Connect the composite input jack of your TV set to this terminal for viewing movies videos or Youtube vid...

Страница 5: ...e base unit and the remote will continue to work when using the optional Rocker Application GETTING STARTED POWER SUPPLY SOURCES This Docking Speaker System operates using the included AC Adaptor with...

Страница 6: ...the Base Hinge until the iPad Support Arm locks in the up 3 Adjust the viewing angle by tilting the iPad Dock forward or back Portrait Mode ING THE iPad ONSCREEN KEYBOA Dock your iPad and rota counter...

Страница 7: ...gh quality audio output from e built in stereo speakers 2 If you are using the iPod nano iPod classic or iPod video you need to turn on the T manually from the video setting menu of your iPod 3 For th...

Страница 8: ...gure 6 0 The dock can also be rotated to view the Of Video On Off Button when th ds the IR Sensor on the base will change how the video is d The video can be switched between the Video out default and...

Страница 9: ...g speakers 1 Use an audio cable not included with one 3 5 mm stereo plug on both ends 2 Plug one end of the cable into the AUX IN Jack on the back of the main unit and the other end into the Line out...

Страница 10: ...gently to avoid damaging the internal mechanical parts and hinges TROUBLESHOOTING GUIDE Symptom Possible Problem Solution AC Adaptor is not plugged into a wall outlet or the connector is not plugged...

Страница 11: ...and maintain the environment through responsible recycling Please visit us at for more information on or to find a recycler in your area Spectra s green initiatives 90 DAY LIMITED WARRANTY AND SERVIC...

Страница 12: ...urchase dated cash register receipt so that we may lish your eligibility for warranty service and repair of the unit without cost Also include a note with a ription explaining how the unit is defectiv...

Отзывы: