


ENGLISH
USER MANUAL
JB SYSTEMS
®
5/9
LED FAN RGB
•
The DMX-protocol is a widely used high speed signal to control intelligent light equipment. You need to
“daisy chain” your DMX controller and all the connected units with a good quality balanced cable.
•
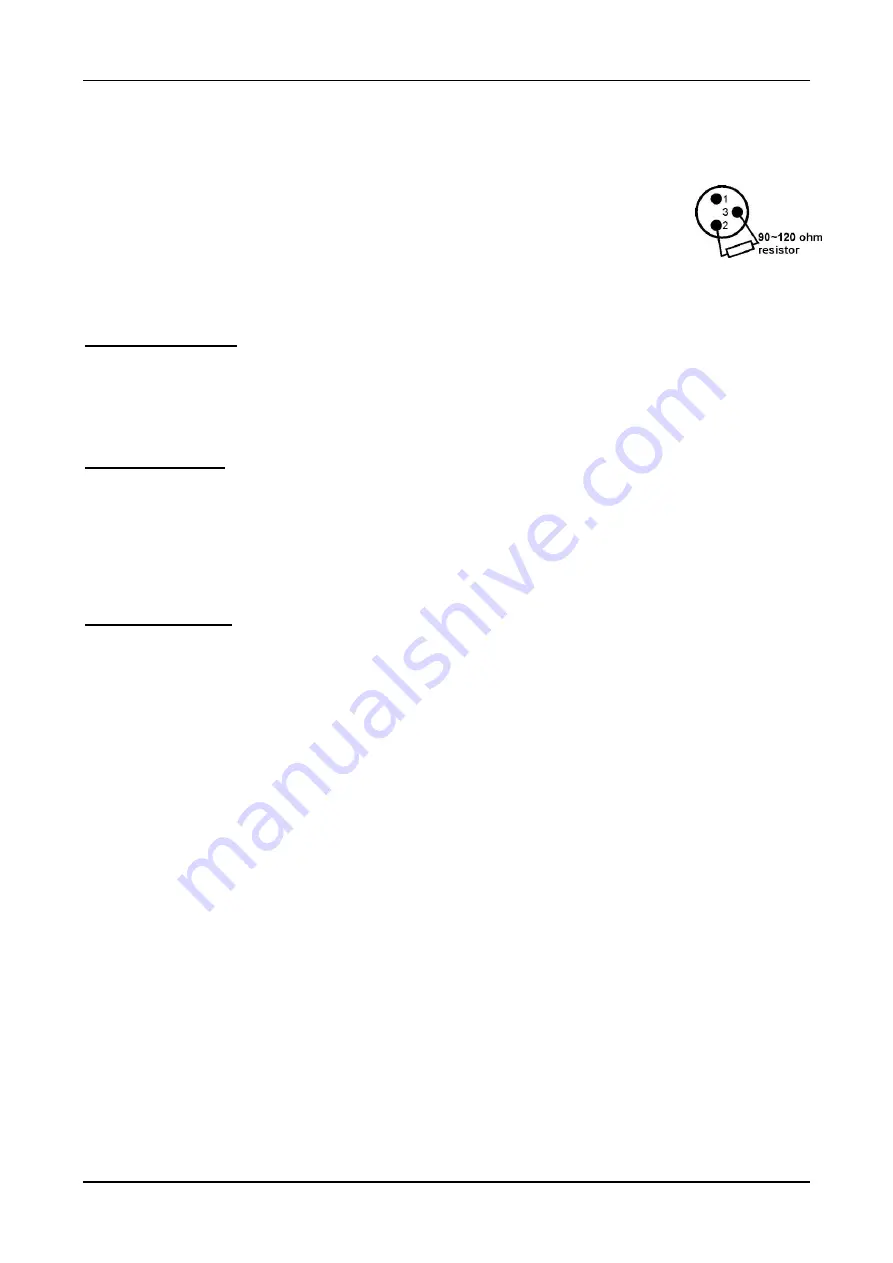
To prevent strange behavior of the light effects, due
to interferences, you must use a 90Ω to 120Ω
terminator at the end of the chain. Never use Y-
splitter cables, this simply won’t work!
•
Make sure that all units are connected to the mains.
•
Each light effect in the chain needs to have its proper start address so it knows which
commands from the controller it has to decode. In the section HOW TO SETUP you
will learn how to set the DMX addresses. If for example you use the 4 channel DMX
mode, a possible address setup could be: unit1 = 001 ~ unit2 = 005 ~ unit3 = 009 ~
unit4 = 013 ~ etc.
HOW TO SETUP:
DMX Address Setting
Used to set the start address in a DMX setup.
•
Press the [MENU] button until [
Axxx]
(A followed by 3 numbers) is shown on the display.
•
Press [ENTER] to access the function settings
•
Use the DOWN and UP buttons to change the DMX address.
•
Once the correct address is shown on the display, press the [ENTER] button to confirm.
DMX Channel Mode
The unit has 3 different DMX channel modes. With this function you can choose the DMX mode you
want to use. Refer to the DMX-charts to see the differences.
•
Press the [MENU] button until
[ChAn]
is shown on the display.
•
Press [ENTER] to access the function settings
•
The channel mode will now appear on the display (4Ch
– 8Ch or 11Ch)
•
Use the DOWN and UP buttons if you would like to change the working mode
•
Press the [ENTER] button to confirm
AUTOMATIC Modes:
Used to set an automatic Chase Mode at a constant speed or to activate the sound mode.
•
Press the [MENU] button until
[Auto]
is shown on the display.
•
Press [ENTER] to access the function settings
•
Use the DOWN and UP buttons to browse the automatic programs:
•
[Sound] :
Sound activated automatic mode.
o
Press [ENTER] if you want to activate this mode
•
[FAdE]
: Automatic Color Fade mode
o
Press [ENTER] if you want to activate this mode
o
SPxx (SP followed by 2 numbers) will appear on the display. This is the speed of the
program.
o
Use the DOWN and UP buttons to change the speed (SP50 = slowest, SP00 = max. speed)
o
Press [ENTER] to confirm your setting
•
[ChCL]
: Automatic Color Changer mode
o
Press [ENTER] if you want to activate this mode
o
SPxx (SP followed by 2 numbers) will appear on the display. This is the speed of the
program.
o
Use the DOWN and UP buttons to change the speed (SP50 = slowest, SP00 = max. speed)
o
Press [ENTER] to confirm your setting
•
[Stro]
: Automatic Strobe mode
o
Press [ENTER] if you want to activate this mode
o
SPxx (SP followed by 2 numbers) will appear on the display. This is the speed of the
program.
o
Use the DOWN and UP buttons to change the speed (SP50 = slowest, SP00 = max. speed)
o
Press [ENTER] to confirm your setting
•
[FACh]
: Automatic Macro Color Change mode (2 separate sections)
o
Press [ENTER] if you want to activate this mode
o
SPxx (SP followed by 2 numbers) will appear on the display. This is the speed of the
program.
o
Use the DOWN and UP buttons to change the speed (SP50 = slowest, SP00 = max. speed)
o
Press [ENTER] to confirm your setting


