26
Mechanical Adjustment
MODEL: AirThread 2000D
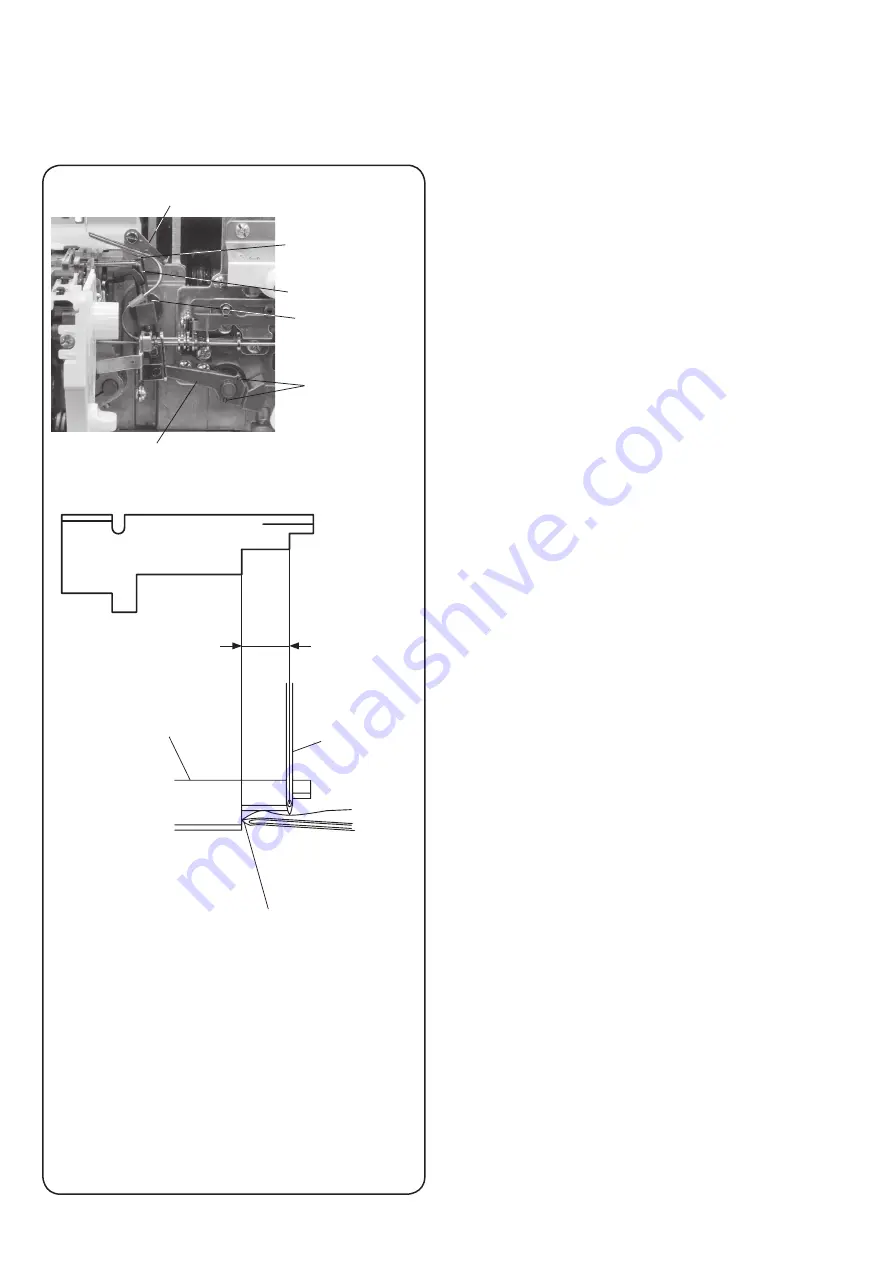
To adjust the leftmost position of the upper looper
When the upper looper is at the leftmost position, the distance (front view) between the center of right needle and the
tip of the upper looper should be 7.8 to 8.2 mm.
To check:
NOTE:
Adjust the position of the tip of the upper looper, after
adjusting the position of the tip of the upper looper (Refer
to page 25).
1. Remove the front cover.
2. Remove the left needle.
3. Attach an HAx1 SP #14 needle as the right needle.
4. Set the upper looper to the leftmost position by turning
the handwheel toward you.
5. Place the plate gauge on the tip of the upper looper
and the left side of the right needle (as shown in the
figure) to check the position of the tip of the upper
looper.
If adjustment is required, adjust the position as
follows.
To adjust:
1. Loosen the setscrews (2 pcs.). Adjust the position of
the tip of the upper looper by moving the upper looper
driving arm up or down.
2. Make sure not to move the upper looper driving arm
to the rear or the front. Otherwise, the upper looper
shaft may not move smoothly. Move the upper looper
driving arm slightly up and down to check it moves
smoothly; and partially tighten the setscrew.
3. Check the timing of the upper looper and the lower
looper, and the clearance between the needle and the
upper looper (Refer to pages 27 and 28.)
4. Tighten the setscrews (2 pcs).
5. Attach the left needle.
6. Attach the front cover. (Attach the other exterior
parts.)
Spreader
Upper looper shaft
Upper looper driving arm
Upper surface of
the upper looper
shaft guide
Setscrew
Lower edge of
the upper looper
Gauge
Gauge
Right needle
Upper looper tip
8mm


