15
2SWLF0DJQLÀHU
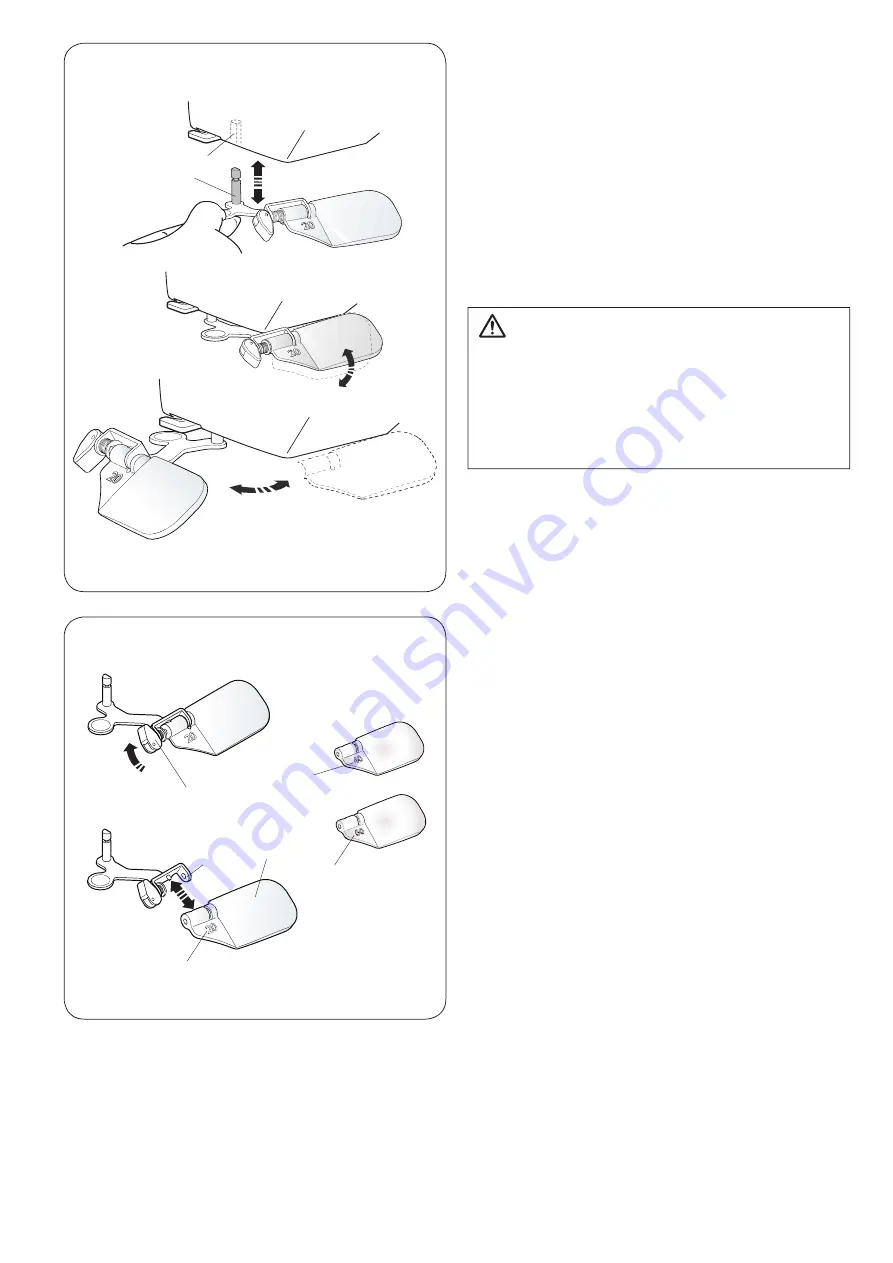
8VHWKHPDJQLÀHUWRJHWDODUJHUYLHZRIWKHQHHGOHDUHD
$WWDFKLQJWKHPDJQLÀHU
+ROGWKHNQREZLWK\RXUÀQJHUVDQGLQVHUWWKHSLQLQWRWKH
hole in the bottom of the face cover.
3XVKWKHPDJQLÀHUXSXQWLOLWVQDSVWRÀW
$GMXVWWKHDQJOHWRJHWWKHEHVWYLHZ
q
Pin
w
Hole
5HPRYLQJWKHPDJQLÀHU
,IWKHPDJQLÀHULVQRWLQXVHWXUQLWWRWKHOHIWRXWRIVLJKW
or pull it down to remove.
CAUTION:
'RQRWXVHRUOHDYHWKHPDJQLÀHULQWKHGLUHFWVXQOLJKW
RWKHUZLVHLWPD\FDXVHDÀUHRUEXUQ
'RQRWORRNDWWKHVXQWKURXJKWKHPDJQLÀHUDVLWFDQ
damage your eyes.
Do not hit or exert excessive force on the optic
PDJQLÀHUDVWKLVPD\FDXVHGDPDJHZKHQLWLV
attached.
5HSODFLQJWKHPDJQLÀHU
To remove the lens, push or pull the lever
q
to the
opposite side to draw the pin out of the lens.
Remove the lens from the metal.
To attach the lens, insert it into the metal part
e
as
illustrated.
Push or pull the lever
q
WRWKHRSSRVLWHVLGHWRÀ[WKH
lens.
Higher numbers
r
LQGLFDWHVVWURQJHUPDJQLÀFDWLRQ
q
Lever
w
Lens
e
0HWDOSDUW
r
Number
q
w
q
e
w
r
r
r
Содержание 5300QDC
Страница 1: ...Instruction Book...
Страница 79: ...77 Stitch Chart...
Страница 80: ...78 Stitch Chart...
Страница 81: ......
Страница 82: ...Version 1 00 3 12 2019...
Страница 83: ......
Страница 84: ...809 851 223 EN...


