


56
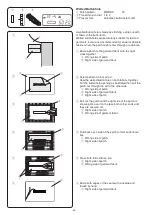
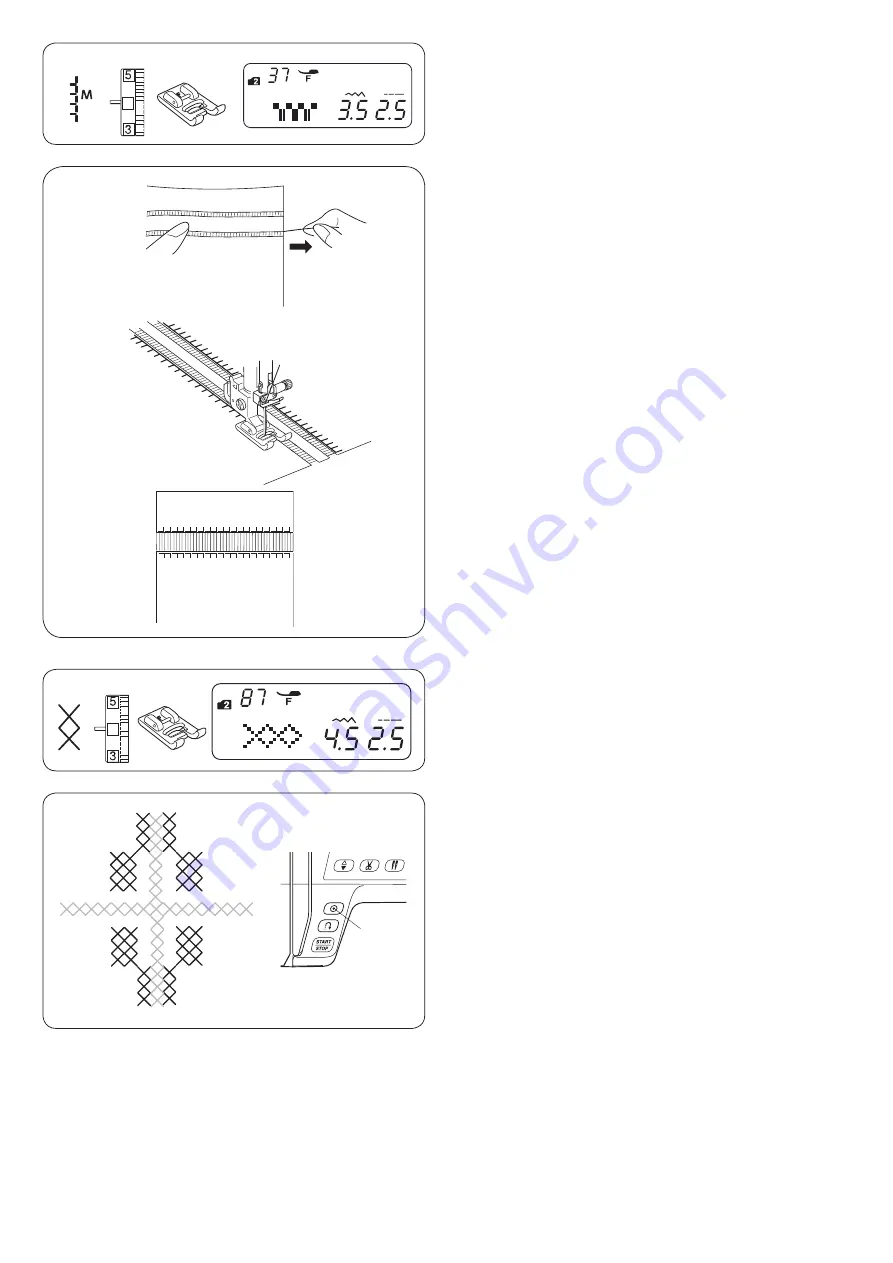
Drawn work uses the same method as fringing. Choose
a firm, woven fabric like linen where threads can be
removed easily.
z
Carefully cut the fabric on the grain. Determine the
width of the drawn work and remove one strand of
yarn or fabric thread at each end.
z
x
c
x
Sew down the left side, guiding the fabric so the right
hand stitches fall in open space. After finishing the left
side, turn the fabric around 180°. Sew down the other
side.
c
Remove the yarn or fabric threads between the
stitching.
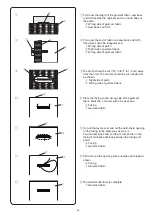
Drawn Work
q
Stitch pattern:
MODE 2:
37
w
Thread tension dial: 1 to 4
e
Presser foot:
Satin stitch foot F
4
w
e
q
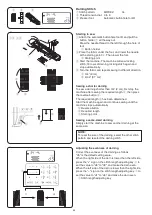
You can make cross stitch designs with these patterns, in
half the time it would take if embroidered by hand.
Use a plain close woven fabric such as linen or wool
flannel. If you use light weight fabric, apply a tear away
backing for support.
Sew from the center of the design outward.
If you press the auto-lock button before sewing, the
machine will sew one unit of the cross stitch and stop
automatically.
q
Auto-lock button
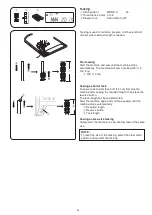
Cross Stitch
q
Stitch pattern:
MODE 2:
87
w
Thread tension dial: 3 to 6
e
Presser foot:
Satin stitch foot F
* The stitch patterns 88-90 in mode 2 can also be used.
4
w
e
q
q
Содержание 5270QDC
Страница 1: ...Instruction Book...
Страница 79: ...77 Stitch Chart...
Страница 80: ...78 Stitch Chart...
Страница 81: ......
Страница 82: ......
Страница 83: ...Version 1 00 27 11 2019...
Страница 84: ...809 851 153 EN...