


Page 12
ENGLISH
Jandy
®
Pro Series Water Feature Pump
|
Installation and Operation Manual
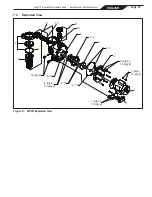
7.
Replace the lid with locking ring on the pump
housing. Align 'START' with the ports and turn
the lid's locking ring clockwise until 'LOCKED'
aligns with the ports.
Hand-tighten
the lid to
make an air tight seal.
Do not use any tools to
tighten the lid.
NOTE
Zodiac Pool Systems, Inc. recommends having a
qualified service technician or electrician properly
disconnect the electrical wiring at the switch or junction
box. Once the power is removed, loosen the two (2)
unions and store the pump indoors. For safety, and to
prevent entry of contaminants, reinstall all conduit and
terminal box covers.
4.
When the system is reopened for operation, have
a qualified service technician or electrician make
sure all piping, valves, wiring, and equipment
are in accordance with the manufacturer’s
recommendations. Pay close attention to any
filter and electrical connections.
5.
The pump must be primed prior to starting; refer
to
Section 4.1, Start-up
.
8.
Verify that all valves have been returned to the
proper position for normal operation.
9.
If a filter is installed in the system, open the
pressure release valve on the filter, and make sure
it is clean and ready for operation.
10. Turn on the power to the pump. If a filter is
installed in the system, when all the air has been
evacuated from the filter, close the filter pressure
release valve.
5.2 Winterizing Pump
CAUTION
The pump must be protected when freezing
temperatures are expected. Allowing the pump
to freeze will cause severe damage and void the
warranty.
CAUTION
Do not use antifreeze solutions in the pool, spa, or
hot tub systems! Antifreeze is highly toxic and may
damage the circulation system. The only exception
to this is Propylene Glycol. For more information, see
your local pool/spa supply store or contact a qualified
swimming pool service company.
1. Drain
all
water from the pump, system
equipment, and piping.
2.
Remove the two (2) drain plugs and store them
in a safe place. Reinstall them when the cold
weather season is over.
Do not lose the o-rings.
3.
Keep the motor covered and dry. Do not cover
the pump with plastic. This creates condensation
that will damage the pump.
Place side with two ribs into lid groove.
Figure 2. Cross Section of Lid Seal
Содержание WFTR
Страница 2: ......
Страница 23: ...Page 23 ENGLISH Jandy Pro Series Water Feature Pump Installation and Operation Manual NOTES...