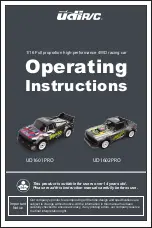
background image

15

Mit dieser Funktion wird die Lenkung, die Richtungssteuerung 
durchgeführt. Bei einer Drehung des Steuerrades, müssen die Rä-
der der Vorderachse in die entsprechende Richtung ausschlagen. 
Wenn das Rad nach rechts gedreht wird, müssen, wie im oberen 
Bild zu erkennen, die Räder nach rechts ausschlagen. Im nebenste-
hendem Bild ist der Ausschlag für eine Linkskurve zu sehen.

Mit dem entsprechenden Umschalter (6) im Programmierfeld lässt 
sich, wenn notwendig, die Laufrichtung umpolen. Für ein feinfühli-
geres Steuern kann mit dem Dual-Rate Taster eine Dual-Rate Funk-
tion vorgegeben werden. Eine Drehung am Lenkrad in der Nähe 
der Neutralposition führt nur zu relativ geringen Servoausschlägen. 
Der gesamte Servoweg steht aber z.B. für Wendemanöver kom-
plett zur Verfügung.

Mit dieser Funktion werden die Vor- und Rückwärtssteuerung so-
wie die Geschwindigkeit gesteuert. Wenn der Steuergeber nach 
hinten gezogen wird, bewegt sich das Fahrzeug nach vorn, wie auf 
dem nebenstehenden Bild dargestellt.

Wenn der Steuergeber nach vorn gedrückt wird, wie auf dem 
unteren Bild dargestellt, bremst das Fahrzeug zuerst ab und fährt 
dann rückwärts. Voraussetzung für diese Steuerung ist allerdings 
ein elektrisch angetriebenes Fahrzeug, mit einem entsprechenden 
Speed-Controller.

Lenkung
Steering

Gassteuerung
Trottle Lever

Steuerung des Modells  


      Operating The Model

This function is used to steer the model and turning the steering 
wheel will make the models wheels to turn in the relevant direc-
tion. Turning the wheel to the right will make the models wheels 
turn to right when viewed from above as illustrated.  Moving the 
wheel to the left will cause the wheels to turn to the left.

By operating the relevant switch (6) on the programming panel the 
direction in which the steering moves can be reversed if required.  
In addition, the transmitter is equipped with a Dual Rate function.  
When this function is activated the wheels of the model will move 
less relative to the movement of the transmitters steering wheel 
around the middle position.  This will allow the model to be steered 
with more precision however if this function is used the total throw 
will still be available for tight cornering when the steering wheel is 
moved to the end of it’s range.

This function is used to control the models speed both forwards 
and in reverse as shown in the illustration to the left.  If the lever is 
pulled back towards the transmitter grip the model will accelerate 
forwards.

If the lever is pushed away from the transmitter grip the model will 
first brake and then accelerate in reverse.  This is providing that 
the model is fitted with a Speed Controller which supports these 
functions. 

Содержание Tiger EP BL 2,4 GHz

Страница 1: ...Montieren Sie den Kit nur an Pl tzen au erhalb der Reichweite von Kinder Beachten Sie Vorsichtsma nahmen beim Zusammenbau des Modells Sie sind f r diese Modell montage und f r einen sicheren Betrieb...

Страница 2: ...Firma JAMARA e K sowohl eine Kontrolle der Handhabung die Einhaltung der Montage und Betriebshinweise so wie der Einsatz des Modells und dessen Wartung nicht m g lich ist kann von uns keinerlei Haftun...

Страница 3: ...switched on first and then the model power supply connected To turn the model off re verse the procedure It is illegal to operate radio controlled models without third party liability insurance You mu...

Страница 4: ...ragen bez glich der Konformit t wenden Sie sich bitte an unseren Service Jamara e K Manuel Natterer Am Lauerb hl 5 D 88317 Aichstetten Tel 49 0 7565 9412 0 Fax 49 0 7565 9412 23 www jamara com info ja...

Страница 5: ...rding conformity to our service department at Jamara e K Manuel Natterer Am Lauerb hl 5 DE 88317 Aichstetten Tel 49 0 7565 9412 0 Fax 49 0 7565 9412 23 www jamara com info jamara com Further informati...

Страница 6: ...and fully understand the instructions before commencing assembly When assembling this kit tools including knives are used Extra care should be taken to aviod personal injury Read and follow the instr...

Страница 7: ...an and dry thoroughly in a dry shaded area Switch on receiver Switch is located under the body Inspect operation using transmitter before run ning Adjust steering servo and trim so that the model tuns...

Страница 8: ...eassemble them correctly referring to the inst ruction Fetten Apply grease Das Auto an einem anderen Ort fahren lassen oder Quarze tauschen Try a different location to operate your model ben Sie solan...

Страница 9: ...electrical shock and or damage to the products reculting from a short circuit insulate connections with heat shrink tubing or elektrical tape Before running vehicle check that battery wiring and plug...

Страница 10: ...bdeckung ber einen DSC Port kann der Sender direkt mit einem PC bzw einem Notebook verbunden werden Dazu ben tigen Sie ein optio nal zu erwerbendes USB Adapterkabel Damit kann der Sender am Simulator...

Страница 11: ...obald die Zellen voll aufgeladen sind Achtung W hrend des Ladevorgangs Batteriefachdeckel ffnen If you use NiCad or NiHm rechargeable cells for your transmitter ensure that the cells are fully charged...

Страница 12: ...ten Sie ber die Lade buchse laden bitte Bat teriefachdeckel ffnen Dies dient der K hlung F G 2 4 GHz Antenne Empf nger 2 4 GHz Antenna Receiver Side View 1 Programming Box 2 2 4 GHz Antenna 3 Steering...

Страница 13: ...Bindevorgang dar und kennzeichnet die einzelnen Elemente die bedient werden m ssen As with all modern 2 4GHz R C systems the receiver must be bound to the transmitter to ensure that the receiver will...

Страница 14: ...l the throttle of transmitter and keeps the servo or ESC in the braking or flameout position and hold on d Press the setting button the LED will be flash for 3 seconds see on pict left e The setting i...

Страница 15: ...rechenden Speed Controller Lenkung Steering Gassteuerung Trottle Lever Steuerung des Modells Operating The Model This function is used to steer the model and turning the steering wheel will make the m...

Страница 16: ...en Sie daf r ein optimales Steuerger t Simulatoreinsatz Using A Simulator DSC Buchse Adapterkabel Zum USB Port des PC s Notebooks The CCX 2 4 Car transmitter can also be used to operate a computer sim...

Страница 17: ...a fire or to cause injury by burning The Speed ESC s are designed exclusively for use with rechargeable batteries never connect the ESC to a stabilised power supply At all times the ESC should be pro...

Страница 18: ...sidered to be live and as such care must be taken at all times as the motor could suddenly start to turn which could cause injury Do not connect the battery pack until immediately before you intend to...

Страница 19: ...o program the controller By using the throttle control of your transmitter By using a programming card which must be purchased sepa rately Before you use the controller for the first time it has to be...

Страница 20: ...us die durch den fehlerhaften Umgang mit den NiMh Zellen entstehen Bei unsachgem er Verwendung des Akkus kann dieser explo dieren und oder brennen Es besteht Brand oder Ver tzungs gefahr berladen zu h...

Страница 21: ...r any damage caused by or to its products which is caused by failing to follows these instruc tions The incorrect use of these cells can lead to an explosion and or fire Risk of injury Over charging t...

Страница 22: ...leunigt das Fahrzeug wenn Sie den Regler in die andere Richtung dr cken bremst der Wagen ab Beim erneuten dr cken der Bremse f hrt der Wagen R ckw rts After carefully unpacking the model check that al...

Страница 23: ...be Front gear assembly diagram 50 5078 50 5075 50 5073 50 5071 50 5074 50 5072 50 5085 50 5076 07 9989 Montage Heckgetriebe Rear gear assembly diagram 50 5078 50 5075 50 5074 50 5073 50 5024 50 5022 5...

Страница 24: ...inschlag nicht unter Spannung stehen aber auch nicht herausfallen k nnen Die u ere Kunststoff Inbusschraube 505080 dient nur zum sichern des Achsschenkels auf der Kugelkopfschraube Diese sollte auf ke...

Страница 25: ...25 Montage Assembly Montage Heckgetriebe Rear shaft assembly 50 5054 50 5097 50 5087 50 5054 07 9989 50 5082 07 9996 50 5028 Montage Sto d mpfer Shock assembly 50 5064...

Страница 26: ...26 Montage Assembly Montage Lenkservo und Radioplatte Buffer assembly 50 5027 50 5093 Montage Servo Saver Buffer assembly 50 5029 50 5029...

Страница 27: ...n Front lower back damper plante 50 5089 Rammschutz vorn oben Front damper plate body post 50 5090 Radachse vorn hinten Wheel axle 50 5091 Antriebswelle Drive shaft 50 5022 Hauptzahnrad Main gear 50 5...

Страница 28: ...15 Reifen und Felgen Wheels 50 5098 Sto d mpferhalter Shock tower 50 5064 Sto d mpfer Shock set 50 5103 Karosserie Body 50 5099 Querlenker vorn oben Front upper suspension set 50 5040 Querlenkerhalter...

Страница 29: ...mount set 50 5030 Antriebswelle Central shaft 50 5080 Kugelkopfmutter Ball head nut 50 5024 Getriebewelle Rear main gear 50 5101 Chassis Chassis 50 5032 Akkuhalter Battery case 14 0058 Akku 6N 2000SC...

Страница 30: ...cross screw 50 5057 M3 12 Rundkopfschrauben Umbrella head machine cross screw 50 5047 2 5 E Clip 2 5 E clip 50 5048 M3 10 Blechschraube Round head selftapping cross screw 50 5053 M3 6 Senkkopfschraub...

Страница 31: ...g 4000mAh 2N 30C Art Nr Ord No 08 1790 Speedregler Flash 2000 Speed Flash 2000 Art Nr Ord No 14 8058 Akkupack Battery Sun Power 5000 6N 7 2V Art Nr Ord No 09 0092 Hochstrom Stecker Buchse High current...

Страница 32: ...en Fachh ndler Ihr Fachh ndler _______________________________________________ _______________________________________________ _______________________________________________ _________________________...

Отзывы: