4
DE
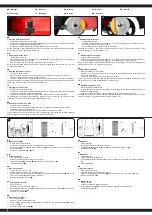
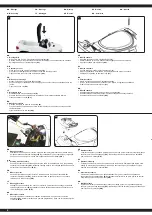
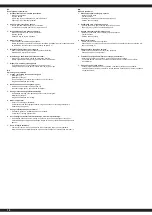
1. Montage der Bremsscheiben
• Legen Sie die Karosserie auf die Seite.
• Stecken Sie die Bremsscheibe auf die Achshalterung (1) und richten Sie so aus, dass die Nuten
mit denen der Achshalterung übereinstimmen.
• Drücken Sie jetzt die Bremsscheibe auf die Halterung bis sie einrastet.
Achten Sie darauf, die Bremsscheiben richtig zu positionieren. Die hinteren Bremssättel schauen
nach vorne (1a), die Vorderen nach hinten (1b).
GB
1. Mounting the brake discs
• Lay the body on its side.
• Place the brake disc on the axle bracket (1) and align the grooves with those of the axle bracket
align with those of the axle bracket.
• Now press the brake disc onto the holder until it clicks into place.
Be sure to position the brake discs correctly. The rear brake calipers face forward (1a), the front
ones face backward (1b).
FR
1. Montage des disques de frein
• Posez le corps sur le côté.
• Placez le disque de frein sur le support d‘essieu (1) et alignez-le de manière à ce que les
rainures correspondent à celles du support d‘essieu.
• Appuyez maintenant sur le disque de frein sur le support jusqu‘à ce qu‘il s‘enclenche en place.
Veillez à positionner correctement les disques de frein. Les étriers de frein arrière sont tournés vers
l‘avant (1a), les étriers avant sont tournés vers l‘arrière (1b).
IT
1. Montaggio dei dischi fren
• Posizionate la carrozzeria di lato.
• Posizionare il disco del freno sul supporto dell‘assale (1) e allinearlo in modo che le scanalature
coincidano con quelle del supporto dell‘assale.
• Ora premere il disco del freno sul supporto fino a quando non si incastra in posizione.
Fare attenzione a posizionare correttamente i dischi dei freni. Le pinze dei freni posteriori sono
rivolte in avanti (1a), quelle anteriori sono rivolte all‘indietro (1b).
ES
1. Montaje de los discos de freno
• Ponga la carrocería de lado.
• Coloque el disco de freno en el soporte del eje (1) y alinéelo de manera que las ranuras
coincidan con las del soporte del eje.
• Ahora presiona el disco de freno en el soporte hasta que encaje en su lugar.
Tenga cuidado de colocar los discos de freno correctamente. Las pinzas de los frenos traseros
están orientadas hacia adelante (1a), las delanteras hacia atrás (1b).
CZ
1. Montáž brdových kotoučů
• Otočte karoserii na bok
• Umístěte brzdový kotouč na držák nápravy (1) a vyrovnejte jej tak, aby se drážky na kotouči
pokrývaly s drážkami na držáku nápravy.
• Nyní zatlačte kotouč na držák, dokud se nezaskočí.
Následně se ujistěte, že jsou brzdové kotouče správně umístěny. Třmeny zadní brzdy by měly
směřovat dopředu (1a), přední dozadu (1b).
PL
1. Montaż tarcz hamulcowych
• Połóżcie ciało na jego boku.
• Umieścić tarczę hamulcową na wsporniku osi (1) i wyrównać rowki z rowkami na wsporniku osi.
• Teraz wciśnij tarczę hamulcową na uchwycie, aż zatrzaśnie się na swoim miejscu.
Należy zwrócić uwagę na prawidłowe ustawienie tarcz hamulcowych. Zaciski hamulca tylnego są
skierowane do przodu (1a), przedniego do tyłu (1b).
NL
1. Remschijven installeren
• Draai de carrosserie op de zijkant.
• Plaats de remschijf op de asdrager (1) en stel deze zo af dat de groeven van de remschijf in lijn
met de asdrager liggen.
• Druk nu de remschijf zo op de beugel dat deze vastklikt.
Zorg ervoor dat de remschijven goed zijn afgesteld. De achterste remklauwen moeten naar voren
zijn gericht (1a), de voorste remklauwen naar achteren. (1b).
SK
1. Montáž brzdových kotúčov
• Otočte karosériu vozidla na bok.
• Umiestnite brzdový kotúč na držiak nápravy (1) a nastavte ho tak, aby sa drážky kotúča kryli s
drážkami držiaka nápravy.
• V tomto momente je potrebné, aby ste zatlačili kotúč na držiak tak, aby sa zaistil.
Následne sa uistite, či sú brzdové kotúče umiestnené správne. Zadné brzdné strmene by mali
smerovať dopredu (1a), predné strmene smerom dozadu (1b).
1
1a
1b
DE
- Montage
GB
- Assembly
FR
- Montage
IT
- Montaggio
ES
- Montaje
CZ
-
Montáž
PL
-
Montaż
NL
- Installeren
SK
-
Montáž
DE
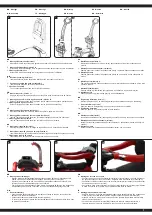
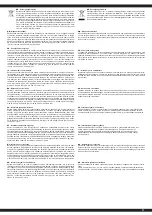
2. Montage der Räder
•
Drehen Sie die Karosserie um.
•
Entfernen Sie den Splint und die Unterlegscheibe von der Achse.
•
Stecken Sie die Räder
(A)
und Unterlegscheiben
(B)
auf die Achsen auf und sichern Sie mit
einem Splint
(C)
.
•
Stecken Sie die Radkappen
(D)
auf.
GB
2. Wheel assembly
•
Turn over the vehicle body.
•
Remove the splint and the washer from the axle.
•
Insert the wheels
(A)
and shim
(B)
to the axle, fix it with cotter pin
(C)
.
•
Lock the wheel cap
(D)
.
FR
2. Montage des roues
•
Tourner le Push Car à l’envers.
•
Retirez la goupille fendue et la rondelle de l‘axe
•
Maintenant vous pouvez engager la roue
(A)
. De l’extérieur placez une rondelle
(B)
sur l’axe
ainsi qu’un circlips
(C)
pour sécuriser l’ensemble.
•
Engagez le carénage de roue
(D)
.
IT
2. Montaggio della ruote
•
Girare il scooter.
•
Rimuovere il clip e la rondella dall’asse.
•
Adesso potete inserire la ruote
(A)
e dall’esterno viene inserito una rondella
(B)
e fissata con
un gancio di sicurezza
(C)
•
Premere i copriruota
(D)
ES
2. Montaje de las ruedas
•
Gire el correpasillo.
•
Remover el clip y la arandela del eje.
•
Ahora cologar la ruedas
(A)
y desde el exterior se tiene que poner una arandelas
(B)
y fijarla
con un clips
(C)
.
•
Presione la tapa de la ruedas
(D)
.
CZ
2. Montáž kol
• Otočte karosérii.
• Demontujte závlačku a podložku z nápravy.
• Nasaďte kola
(A)
a podložky
(B)
na nápravy a zajistěte je závlačkou
(C)
.
• Namontujte krytky
(D).
PL
2. Montaż kół
• Odwróćcie ciało.
• Zdjąć sworzeń i podkładkę z osi.
• Zamontować koła
(A)
i podkładki
(B)
na osiach i zabezpieczyć sworzniem zabezpieczającym
(C)
.
• Załóż kołpaki
(D)
.
NL
2. Wielen installeren
• Draai de carrosserie om.
• Verwijder de pen en de sluitring van de as.
• Plaats de wielen
(A)
en de sluitringen
(B)
op de assen en zet ze met de pin
(C)
vast.
• Monteer wieldoppen
(D)
.
SK
2. Montáž kolies
• Otočte karosériu.
• Vytiahnite závlačku a podložku z nápravy.
• Kolesá
(A)
a podložky
(B)
nasaďte na nápravy a zaistite ich závlačkou
(C)
.
• Namontujte puklice
(D)
.
A
B
2
B
D
D
C
A
C


