17
Beginning Cab Installation
Lowering the cab.
Begin lowering the cab carefully onto the tractor, guiding the
rear mounts between the tanks. Ensure that fuel and oil filler spouts clear the cab
side panels. Ensure that the heater hose does not become pinched under cab.
Lower the cab until the cab mounts are resting on the rubber isolators in the front
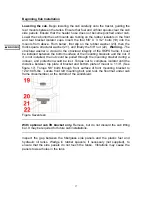
and rear bracket isolator cups. Insert the four 5/8” X 3 1/2” bolts (19) into the
mounts from above. From below, first slip on the rubber washer (20), then the
thick square structural washer (21), and finally the 5/8” nut (22).
Warning
-
The
structural washer is crucial to the structural integrity of the ROPS frame. It must
be installed between the bottom surface of the mounting brackets and the nut. If
it is not installed, the nut could be pulled through the mounting bracket during a
rollover, and protection would be lost.
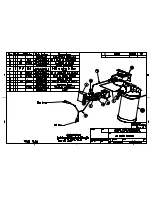
Torque nut to compress isolator until the
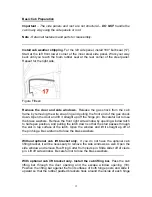
distance between top plate of bracket and bottom plate of mount is 1 1/8”. (See
figure 17). Torque 5/8” bolts through front surface of front mounting bracket to
120-180 ft-lbs. Locate front left mounting bolt, and tuck the floormat under cab
frame crossmember, at the bottom of the windshield.
Figure Seventeen
——————————————————————————————————
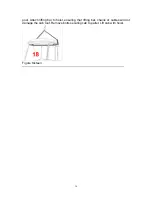
With optional cab lift bracket only.
Remove, but do not discard the cab lifting
bar. It may be required for future cab installations.
——————————————————————————————————
Inspect the gap between the fiberglass side panels and the plastic fuel and
hydraulic oil tanks. Wedge in rubber spacers, if necessary (not supplied), to
ensure that the side panels do not touch the tanks. Vibrations may cause the
panels to wear holes in the tank.


