background image

9

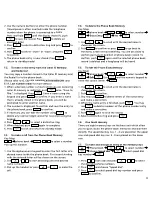
5. Press 

 / 

 to display either ”On” or ”Off” and 

press 

 to confirm. For ”Key”, select from  

”Pattern 1-3” or ”Off” and press 

6. Press 

 to exit and return to standby mode.

d .6 .  diAl mode 

You can set your phone to use either ”Tone” or ”Pulse” 
dialing. The pre-set setting is ”Tone” dialling, where you 
will hear a tone beep each time you dial a number. Most 
modern exchanges and switchboards use ”Tone” dialling, so 
you should not need to change this setting. Only change it if 
your service provider or switchboard uses ”Pulse” dialling. 

Key Map:


Setting base


Additional


dial 

Mode


   select 

tone/pulse


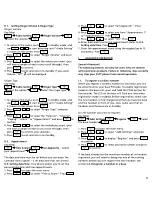
1. Press 

  to access the main menu. 

. Press 

 / 

 to select ”Setting Base”. Press 

3. Press 

 / 

 to select ”Additional”. Press 

4. Press 

 / 

 to select ”Dial Mode”.Press 

The current setting is displayed. 

5. Press 

 / 

 to select either ”Tone” or ”Pulse”. 

Press 

 to confirm.

6. Press 

 to exit and return to standby mode.

d .7 .  tone dialling Switch-over

If you have set your phone to use ”Pulse” dialling, you can 
switch temporarily to ”Tone” dialling for the duration of a 
call: 
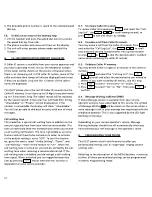
During off-hook state, press and hold 

 ”D” will be 

displayed. Any digits entered after the ”D” will be dialled 
using tone dialling.

d .8 .  prefix dialling

If you need to add a prefix to the number for a long distance 
call, or if you need to add your saved area code to the 
number, do the following: 

Key Map:


Setting base


Additional


prefix dial


   enter the number   

1. Press 

 to access the main menu. 

. Press 

 / 

 to select ”Setting Base”. Press 


3. Press 

 / 

 to select ”Additional”. Press 

4. Press 

 / 

 to select ”Prefix Dial”.Press 

The current setting is displayed. 

5. Enter the number using the number keypad or press 

 to clear. Press 

 to confirm.

6. Press 

 to exit and return to standby mode.

d .9 .  Call barring

When switched on, Call Barring prevents calls from being 
made to a specific number, area code or international code.

Key Map:


Setting base


Call barring


enter the number   

   select 

on/off


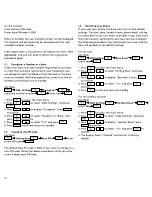
1. Press 

 to access the main menu. 

. Press 

 / 

 to select ”Setting Base”. Press 


3. Press 

 / 

 to select ”Call Barring”. Press 

4. Enter the number using the number keypad or 

 to 

clear. Press 

 to confirm.

5. Press 

 / 

 to select ”On” or ”Off”. Press 


to confirm.

6. Press 

 to exit and return to standby mode.

e . 

norMAl operAtion

e .1 . using an optional headset

An optional headset can be used as an alternative method to 
make a call and this is especially useful for long calls.

Connect the headset cord to the headset jack on the back of 
the base unit. When the headset is not in use, simply press 
the 

 button to toggle the headset mode and return to 

normal handset or speaker phone mode.

Caution

The headset jack type is .5 mm pin. Please contact your 
local supplier for compatible headset. Using other headsets 
may damage the unit.

e .2 .  to make a call 

Using the handset:

1. Pick up the handset. The display will show the handset 

icon  .

. Use the keypad to enter the number you wish to dial.
3. Hang up the handset when finished.

Содержание 50

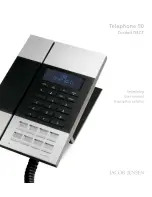
Страница 1: ...Telephone 50 Corded DECT Vejledning User manual...

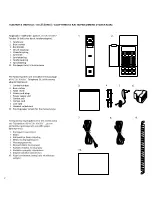
Страница 2: ...7 Samleledning 8 Telefonledning 9 Spiralledning 10 Printpapir s lv til kviktasterne The following items are included in the package of JACOB JENSENTM Telephone 50 with country adaptor optional 1 Cord...

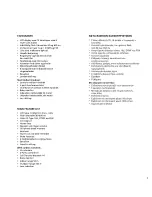
Страница 3: ...erence kald Overf rsel af samtale mellem h nds t Baby monitor Indend rs r kkevidde 50 meter Udend rs r kkevidde 300 meter Lav str ling Main feature list LCD type 14 digit X 3 line icons Flash selectab...

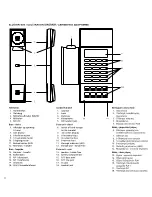
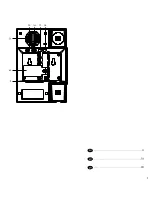
Страница 4: ...RJ11 telefonstik 17 Str mstik 18 Stik til hovedtelefoner Corded handset 1 Earpiece 2 Hook 3 Mute key 4 Microphone 5 RJ9 handset jack Base unit front 6 Switch off and hanger for the handset 7 LCD scre...

Страница 5: ...13 14 5 18 17 16 15 DK 6 UK 22 GR 40...

Страница 6: ...six different handsets can be registered to a single base unit to perform function of a mini PABX system which offers you functions of intercom and call transfer between handsets In addition its buil...

Страница 7: ...he coiled cord to the handset and plug the other end into the RJ9 jack of the base station Note If desktop placement is preferred please mount the table stand first 3 Connect the combo cord to the RJ4...

Страница 8: ...4 Install a new or replace the old battery pack as indicated on the diagram below 5 Mount the battery compartment door again Important Notice To obtain the best battery performance the back up batter...

Страница 9: ...ormat Message Waiting Indicator Depending on your operator s service this symbol turns on when a voice message is left in your message box registered with the telephone operator Flashes while connecti...

Страница 10: ...the key to unmute On the base station Push this button to access the menus To enter Mute Internal call Sound Enhancer Flash Redial In programming mode press this button to confirm a setting To enter...

Страница 11: ...ndby While the phone rings press and hold this button for three seconds to turn off the ringer temporarily Press to get a new line or press to answer a waiting call if your tel ephone company offers t...

Страница 12: ...g on country and telephone operator usually every caller ID memory will be stored with its incoming date and time information It is not necessary to set the date time for use of this DECT phone in cou...

Страница 13: ...nal Prefix Dial enter the number 1 Press to access the main menu 2 Press to select Setting Base Press 3 Press to select Additional Press 4 Press to select Prefix Dial Press The current setting is disp...

Страница 14: ...e speaker phone mode 3 To switch to the handset pick up the handset The speaker phone or headset will turn off E 6 Volume The speaker handset and headset volume are set independently using or in the r...

Страница 15: ...s T50 If you have got extra cordless handsets registered to your base unit refer to the section E 19 E 14 To make an internal call between the base unit and a cordless handset You may make intercom fr...

Страница 16: ...e baby monitor function the first step is to register one cordless handset to the base unit Once the handset is registered to the base you can turn on the baby monitor function as follows Key Map Baby...

Страница 17: ...e first letter of a desired name inside the phone book First record starting with the entered letter will be shown on the screen 2 Use to start browsing until the desired name is shown 3 Pick up the h...

Страница 18: ...will be alerted by the call waiting tone when receiving a second external call If the call waiting tone is disabled you do not get a call waiting tone signal When activated you can toggle between the...

Страница 19: ...Press to select Time Alarm Press 3 Press to select Set Appointm Press 4 Press to select one from Appointment 1 to Appointment 5 Press 5 Press to select On Press 6 Enter date and time for the appointme...

Страница 20: ...o standby I 3 Changing the PIN code Key Map Setting Base Base PIN enter a new PIN code The default Base Pin code is 0000 If you want to change to a new PIN code follow the above procedures while you e...

Страница 21: ...put on hook In some telephone systems when the first phone on the same telephone line is used all other telephones are electrically disconnected A1 Try to connect another telephone to the telephone so...

Страница 22: ...em for emergency call purpose in case of power failure When using your telephone equipment basic safety precautions should always be followed to reduce the risk of fire electric shock and injury to pe...

Страница 23: ...being disposed of as general household waste and have to be collected separately Please ask you dealer about current means of disposal O EC declaration of conformity Hereby Bell Xpress A S declares t...

Отзывы: