M A I N T E N A NC E
Page 43
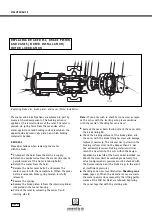
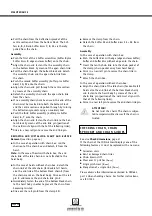
Renewing grease lubrication of motor.
The grease packing in the rotor chambers is sufficient
for approx. 250 hours of normal operation.
Note:
The rotor chambers only emptied by approx.
60 %. In this condition, refilling must be performed.
The retaining rings
11
and Vyon washers
12
must be
removed in order to refill the chambers. Then fill the
lubricant chambers with high-performance lubricant
(JDN Art. no 11901) without forming cavities.
Use new Vyon washers to close off the lubricant
chambers and secure these using retaining rings.
A S S E M B LY W I T H A D D I T I O N A L
B A S I C M O T O R L U B R I C AT I O N
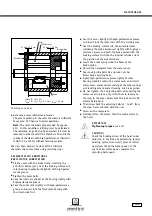
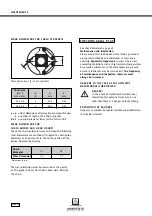
Fit the cover with the brake lining, inserting the
anti-twist device (pin). Coat the braking surface and
rotor bearing (needle bush) lightly with high-perfor-
mance grease.
Tighten the cover bolts.
Coat the internal cylinder of the housing lightly with
high-performance grease.
Coat the entire rotor lightly with high-performance
grease and insert into the front rotor bearing with
the clutch side first.
Coat the vanes lightly with high-performance grease
and insert into the rotor slots with the starting aids.
Coat the braking surface and the outer diameter
including the brake piston seal lightly with high-per-
formance grease and push the brake piston with the
braking surface first into the internal cylinder; note
the position of the eccentric bore.
Insert the brake springs into the bores of the
brake piston.
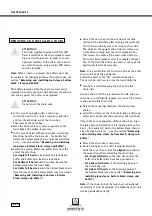
Detach the nameplate from the motor cover.
Loosen adjusting bolts
13
and lock nuts
14
.
Screw back adjusting bolts.
Apply high-performance grease lightly to rotor
bearing (needle bush)in the motor cover and install
motor cover, ensure correct seating of the brake springs
and locating pins to motor housing and brake piston.
Do not tighten the 4 adjusting bolts after bolting the
motor cover in place, only screw them in loosely to
the stop in the cover. Screw back the lock nuts suffi-
ciently beforehand.
Then screw back the adjusting bolts 45° to 60° from
the stop, hold, and lock with the nuts.
Screw on the nameplate.
Initially fasten the motor, then the control valve to
the hoist.
AT T E N T I O N !
Tightening torques
, see E-list.
C AU T I O N !
Check the braking action of the hoist under
load (run in the brake by performing several
hoisting cycles, then assess) prior to initial
operation. Check the motor power. In the
event of low motor power, regulate the
adjusting bolts again.
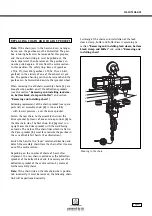
Checking vane wear
Vane
Rotor
Cylinder liner
Brake piston
V2 max. = 0,2 mm
•
•
•
Brake disc
•
V1 max. = 0,2 mm
R
•
Lmax = R – (V1 + V2)
Lmin = R – (V1 + V2) – 0,3 mm = Lmax – 0,3 mm
L
L h
Содержание PROFI 10 Ti
Страница 1: ...J D N O P E R A T I O N M A N U A L A I R H O I S T S 16 10 6 3...
Страница 58: ...NOTES Page 58...

