27
C
ONNECTING
DC P
OWER
C
HAPTER
8
E
LECTRICAL
W
IRING
7.
Connect the Neutral from the first power source to the PWR2 V-/N terminal screw.
To keep the wires from pulling loose, use a small flat-blade screwdriver to tighten the wire-clamp screws
on the front of the terminal block connector.
8.
After wiring is completed, reinsert the transparent plastic finger safe cover back onto the face of
the terminal block.
9.
Connect pin 12 to the ground of the chassis.
8.3. Connecting DC Power
C
ONTEXT
:
This section explains how to connect the RAPTOR to a DC power supply.
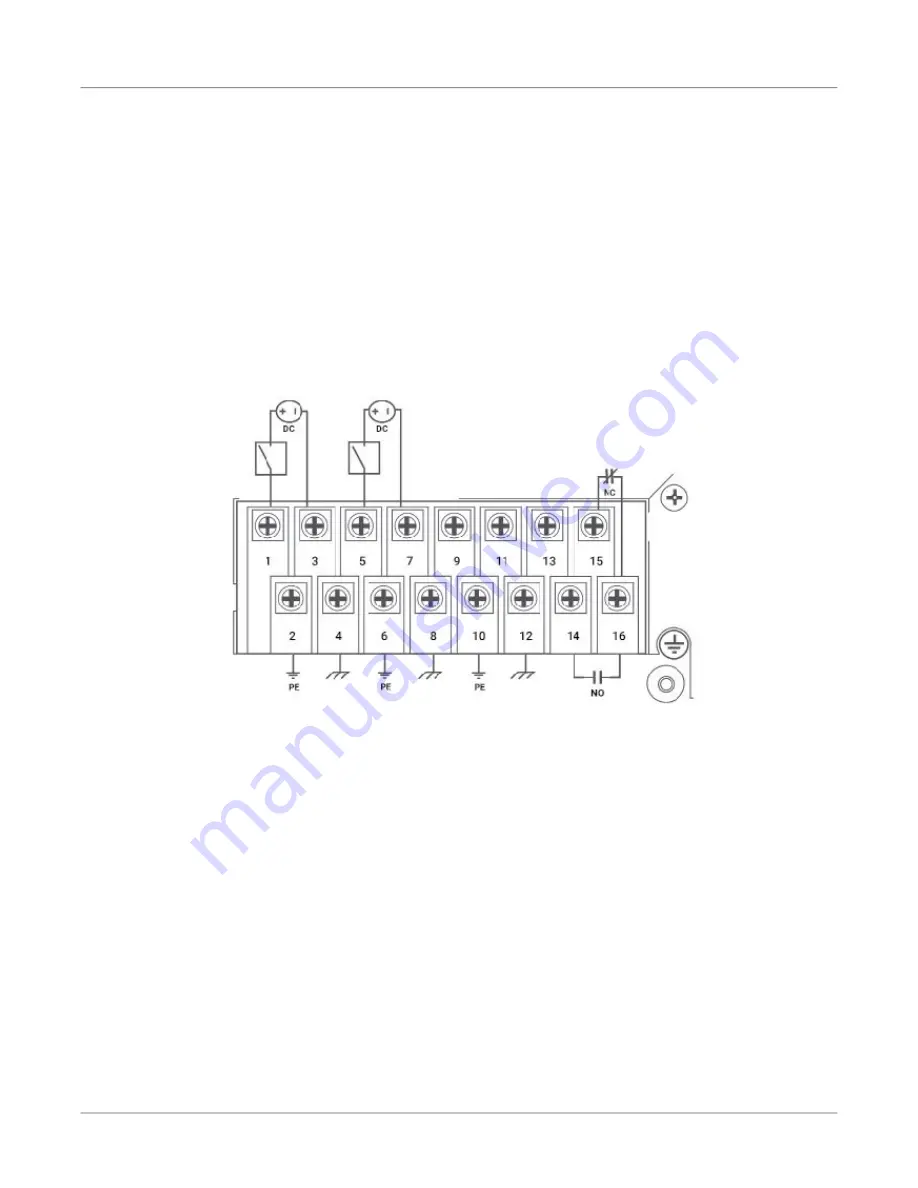
Figure 2:
DC Wiring Diagram
For 100-240 VDC rated equipment, an appropriately rated DC circuit breaker must be installed.
•
The specification for HV DC breaker is 5 A, 2P, 300 VDC (min) Circuit breaker, Thermomagnetic or
equivalent type. A recommended option for this circuit breaker is: Model No.
CX2-B0-14-450-22A-13G, Molded Case Circuit Breaker, 2 P, 5 A, 250/500 VDC.
•
Wire gauge sizing is to be selected with appropriate design as per the Electrical code for a 60 W,
1-phase device.
Equipment must be installed according to applicable local wiring codes and standards.
With the power source turned off, refer to figure
and perform the following steps:
For a DC Power Supply in PS1, carry out steps 1 through 2.
1.
Connect the positive wire from the power source to the positive/live (+/L), screw #1, terminal on
the terminal block.
2.
Connect the negative wire from the power source to the neutral/negative (-/N), screw #3, terminal
on the terminal block.


