Installation
WARNING!
Only trained electrical installers or competent persons
should install this product. Incorrect installation could lead
to personal injury or death and/or damage to property.
Ensure the electrical regulations specific to your region are
observed, and observed wiring colour conventions.
Ensure the cameras power supply is connected via a
suitably rated fuse or circuit breaker.
Switch off the power supply you are working on whilst
installing the camera, until the product is correctly installed.
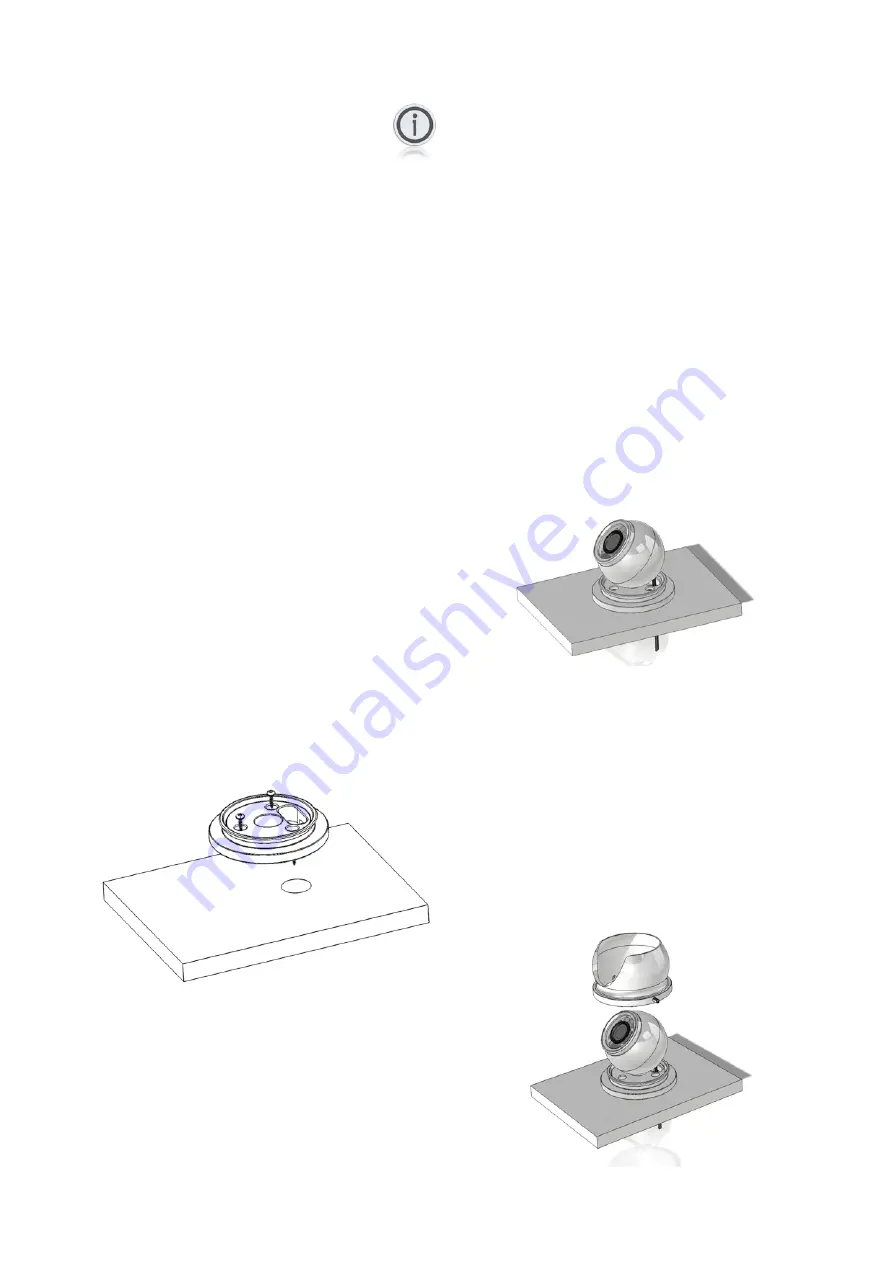
Step 1:
Offer base into desired mounting position and mark off
screw hole positions and cable entry position through the
mounting surface.
TIP!
Power up camera and check to ensure you have the
desired field of view prior to drilling any holes and mounting
the camera in place.
Step 2:
Fit the camera base into position. Drill pilot holes
appropriate for the fixings you are using, and then screw
base into place, observing caution not to splinter or
damage the surface if fitting onto a GRP surface.
Step 3:
Present your cables to the camera through the cable entry
hole you’ve just drilled. If you have a PoE version of the
camera, this will just be a single CAT5 cable. If you have a
non PoE version, you will need a CAT5 cable and 2 cores
18AWG for the DC power. Ensure terminations are
sufficiently protected from any moisture ingress. Details on
how to fit the waterproof plug are on the next page.
Step 4:
Fit the field installable water resistant RJ45 back-shell over
the CAT5 cable and terminate the RJ45 connector in
accordance with T568B wiring specifications. Refer to
Page 8 for further details.
Step 5:
Plug your RJ45 jack into the cameras RJ45 socket. Make
sure the fit is good and you hear the connects ‘click’ into
place. Now ensure the water resistant back shell is
tightened into place.
Step 6:
Slide the ‘slack’ cable from the camera back through the
hole in your panel, ensuring connectors are still in tact and
sit the inner dome onto the protective foam / rubber ring
on the base.
Step 7:
Place the cowling over the inner dome and move into
position. The cowling will fit over the inner dome and push
up to the base. Once in position, carefully tighten the grub
screws until they lightly hold the inner dome in position.
Now power up the camera and check you have achieved
the desired field of view. If any adjustments are required,
loosen the grub screws to make the necessary
adjustments, lightly tighten and then check again. Repeat
until you have the desired field of view. Once you are
happy with the cameras position, tighten the grub screws.
Iris Innovations
IRIS460 User Guide v2.01 May 2018


