7
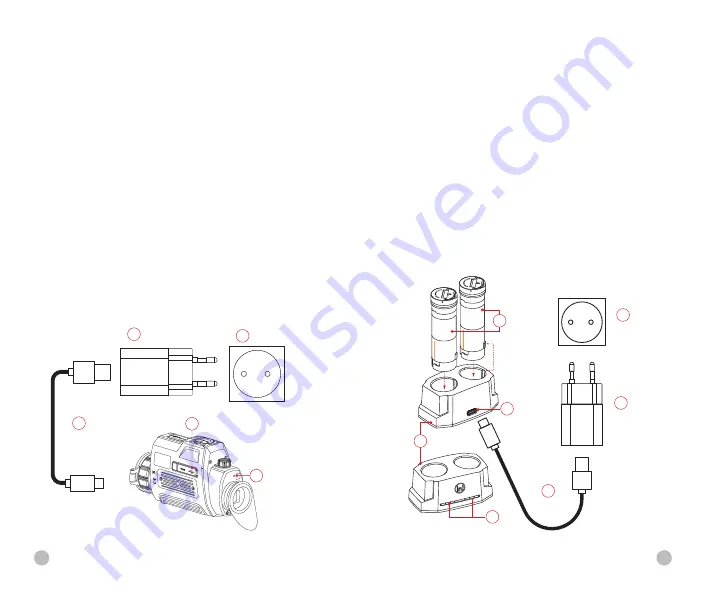
Method 2: Charging with Battery Charger
l
Align the positioning block
(A)
of the battery pack
(8)
with
the groove
(B)
of the battery charger
(15)
, and insert the
battery pack
(8)
into the battery charger
(15)
.
l
Connect the plug of the USB Type-C cable
(18)
to the USB
connector of the power adapter
(19)
. Plug the power
adapter
(19)
into a socket 100-240V
(20)
(110V for US).
l
Connect the other end of the USB cable
(18)
to the Type-C
port
(16)
of the battery charger
(15)
.
l
After finishing the above steps, the LED indicator
(17)
on the
battery charger
(15)
will display the battery charge state.
l
After the battery is fully charged, remove the battery pack
from the battery charger.
LED Indicator
Battery
Charger
16
100-240V
Power
Adapter
Socket
Type C
Port
17
19
20
USB Cable
18
15
B
A
A
B
8
Battery
Pack
Method 1: Charging with Type-C Port
l
Align the orange vertical line on the battery pack with the
white triangle symbol next to the battery compartment on
the Finder II, and install the battery pack into the battery
compartment of the product. For details, see
Battery Pack
Installation
.
l
Connect the Type C end of the data cable
(18)
to the Type
C port
(13)
of the product.
l
Connect the other end of the data cable
(18)
to the power
adapter
(19)
that comes with the product, or connect to
another USB power socket with a rated output voltage not
exceeding 5V.
l
Plug the adapter
(19)
into a 100-240V power socket
(20)
for charging.
l
when charging, the LED indicator will change to red.
LED indicator displaying the current status of the device
USB Cable
18
100-240V
Socket
20
Power
Adapter
19
13
Type C Port
12
LED
Indicator
6


