background image

Using the ScreenPlay TV Link DX Player Features

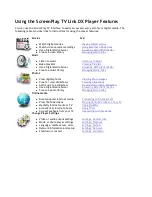
Playing Digital Movies

With ScreenPlay TV Link DX connected to your TV and your home network, you can easily play 
digital movies and video files from any of the following locations:

z

Network volumes 

z

Connected USB storage devices (such as flash or external hard drives) 

z

A computer or NAS with Digital Media Server 

z

A local computer equipped with Windows Media 11 and UPnP activated 

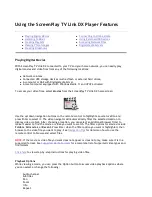
To access your video files, select 

Movies

 from the ScreenPlay TV Link DX home screen:

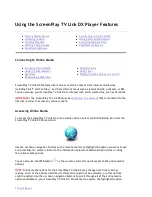
Use the up/down navigation buttons on the remote control to highlight a source location and 
press Enter to select it. The video navigator will automatically filter the selected location to 
display video content. After choosing a location, you can select an additonal browser filter to 
make it easier to find the movie or video you want to watch. The filter options for Movies include 

Folders

All movies

, or 

Recent

. Press Enter when the filter option you want is highlighted, then 

browse to the video file you want to play. See 

Navigation Tips

 for details on how to use the 

remote control to browse and select files.

NOTE:

 If the movie or video file you want does not appear or does not play, make sure it is in a 

supported format. See 

Supported Media Formats

 for a complete list of supported video types and 

file formats. 

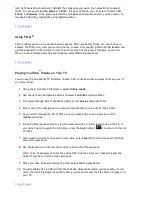
Click here

 to view step-by-step instructions for playing video files.

Playback Options

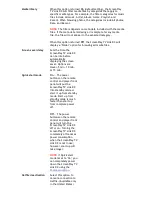
While viewing a movie, you can press the Option button to access video playback options where 
you can select or change the following:

Audio channel
Subtitles
Pan
Zoom
Info
Repeat

z

Playing Digital Movies

z

Listening to Music

z

Creating Playlists

z

Viewing Photo Images

z

Creating Slideshows

z

Connecting to Online Media

z

Using External USB Devices

z

Accessing Network Files

z

Digital Media Servers

Seite 35 von 65

27.06.2011

file:///C:/975415%20tvlinkdx-html-en/tvlinkdx-html-en/consolidated/printall.html

Содержание ScreenPlay

Страница 1: ...ified z DLNA certified Must be supported by the TV Used automatically if the TV supports it and the ScreenPlay TV Link DX is connected via HDMI with Auto setting NOTE It may be a criminal offense under applicable copyright laws to make unauthorized copies of copyright protected material including videos films broadcasts and non original sound and video recordings This equipment should not be used ...

Страница 2: ...eo and audio L R z Optical Audio S PDIF Supported video output resolutions depend on the connection used An HDMI connection supports the following resolutions 480p 60 Hz 576p 50 Hz 720p 50 Hz 720p 60 Hz 1080i 50 Hz 1080i 60 Hz 1080p 23 976 Hz 1080p24 fps 1080p50 fps 1080p60 fps Auto CAUTION The ScreenPlay TV Link is not intended for in car entertainment use Unstable power or vibration may damage t...

Страница 3: ... connection The package does not include a network router or hub top of page Network Client Requirements When the ScreenPlay TV Link is connected to a network client computers on the network must use one of the following operating systems z Microsoft Windows XP Windows Vista Windows 7 all versions z Mac OS X version 10 4 10 6 top of page Format Requirements External USB devices connected to the Sc...

Страница 4: ...ONSUMER ENGAGED IN A PERSONAL AND NON COMMERCIAL ACTIVITY AND OR WAS OBTAINED FROM A VIDEO PROVIDER LICENSED TO PROVIDE AVC VIDEO NO LICENSE IS GRANTED OR SHALL BE IMPLIED FOR ANY OTHER USE ADDITIONAL INFORMATION MAY BE OBTAINED FROM MPEG LA L L C SEE HTTP WWW MPEGLA COM THIS PRODUCT IS LICENSED UNDER THE VC 1 PATENT PORTFOLIO LICENSE FOR THE PERSONAL AND NON COMMERCIAL USE OF A CONSUMER TO i ENCO...

Страница 5: ...pport and Download site at www iomega com support You may download the corresponding source code when source code distribution is required from the Iomega web site at www iomega com support To locate the download page for open source code select your Iomega product and your operating system Scroll down the page to the search field and enter open source In addition you can also obtain a copy of the...

Страница 6: ...rk then complete first time setup It doesn t matter if you connect to your network first or your TV first It will be easiest to set up your ScreenPlay TV Link DX if it s connected to both before you power it up the first time top of page z Installation Overview z Package Contents z Safety Information z Connectors and Indicators z Connecting to a TV z Connecting to a Network z First Time Startup z ...

Страница 7: ...p of page z Installation Overview z Package Contents z Safety Information z Connectors and Indicators z Connecting to a TV z Connecting to a Network z First Time Startup z Power Down Disconnect z Settings Iomega ScreenPlay TV Link DX Remote Control with QWERTY Keyboard Power Supply Composite AV Cable HDMI Cable Iomega 802 11n WiFi Adapter ...

Страница 8: ...TV Link DX and its accessories away from heat sources Safety Ratings top of page z Installation Overview z Package Contents z Safety Information z Connectors and Indicators z Connecting to a TV z Connecting to a Network z First Time Startup z Power Down Disconnect z Settings z Device Input Rating DC 12 volt z Power Supply Input Voltage 100Vac 240Vac z Power Supply Output Voltage 12VDC 6 z Power Su...

Страница 9: ...HDTV or high definition Home Theater System Outputs standard enhanced or high definition video plus multi channel audio surround sound 5 Optical audio connector Outputs optical audio signal Connect to a receiver using an optical audio cable not included 6 Ethernet connector Use for wired network connection Ethernet cable not included 7 USB 2 0 host port Use to connect an Iomega WiFi adapter or ext...

Страница 10: ...remote are available only when the ScreenPlay TV Link DX is connected to a TV Some functions are not supported by all playable file types 3 Power access LED LED glows blue when the ScreenPlay TV Link DX is powered up blinks when the ScreenPlay TV Link DX is loading or accessing files blinks once when the ScreenPlay TV Link DX receives a command from the remote control Glows solid red when the Scre...

Страница 11: ...terface supports standard enhanced or high definition video plus multi channel digital audio on a single cable connection This connection option is supported only on high definition HD TVs 1 Connect the HDMI cable to the back of the ScreenPlay TV Link DX 2 Connect the other end of the HDMI cable to the HDMI input connection on the TV set top of page Composite Video Connection Composite video is co...

Страница 12: ...r to the Right R audio input connection on the TV set top of page Optical Audio Connection The ScreenPlay TV Link DX includes an optical audio connector for high quality digital audio output You will need to obtain an optical audio cable to connect the ScreenPlay TV Link DX to an AV amplifier receiver with a digital audio decoder NOTE You will get multi channel sound effect only if the audio sourc...

Страница 13: ...he same time An Ethernet connection will provide the best results when playing videos from your network Wired Network Use a standard Ethernet cable to connect the ScreenPlay TV Link DX to a network router hub or switch Ethernet cable not included or Connect the ScreenPlay TV Link DX to the Ethernet port on a networked computer NOTE A network hub or router is recommended for a wired network connect...

Страница 14: ...y media files stored on your network volumes You will also be able to use the online media features See Using Player Features for additional information NOTE If you need to enter a username and password to login to a network volume you can use either the virtual keyboard on the ScreenPlay TV interface or the QWERTY keyboard on the remote control The password can use any combination of numbers lett...

Страница 15: ...y Computer or Windows Explorer to browse the ScreenPlay DX and copy files from your network volumes onto the ScreenPlay DX Connecting to the ScreenPlay DX from a Mac 1 Select the Settings icon on the ScreenPlay home screen 2 Use the up down navigation buttons to highlight Network and press Enter 3 Select Network setup and press Enter 4 Note the IP address assigned to the ScreenPlay DX 5 On a Mac c...

Страница 16: ... your TV and change the input setting as needed to receive input from the ScreenPlay TV Link DX 5 When the ScreenPlay setup wizard appears on the TV screen select your language and press the Enter button on the remote control 6 Select the aspect ratio needed for your TV screen 16 9 for wide screen display or 4 3 for full screen 7 Select ON for Quick Start Mode if you want the ScreenPlay TV Link DX...

Страница 17: ...ttings Network Network setup to configure a network connection later on See Network Setup for detailed instructions NOTE If your network is secure the virtual keyboard will appear so you can enter your password You can enter text using the virtual keyboard interface or the QWERTY keyboard on the remote control When you are finished press Enter 9 When the setup wizard is finished press Enter to aut...

Страница 18: ...n to the list of functions press the Back button Audio Video Video Output z Installation Overview z Package Contents z Safety Information z Connectors and Indicators z Connecting to a TV z Connecting to a Network z First Time Startup z Power Down Disconnect z Settings z Audio Video z Playback z System z Network z Shutdown z File Management z Eject USB device Select the AV connection you are using ...

Страница 19: ...io output Stereo RCA red white audio connection Digital Optical audio connection Subtitle mode On Display subtitles when supported by the selected video Off Do not display subtitles Subtitle font size 24 28 32 36 40 44 48 or 52 pixels Additional Encoding Western Europe ISO Central Europe Windows 1250 Central Europe ISO Traditional Chinese Big5 Simplified Chinese GB18030 Japanese Shift JIS Korean E...

Страница 20: ...lenames For photos this option will show a thumbnail of each image file For music this option will display the album cover for each music track DivX DRM VOD Registration Displays the registration code to use when registering your ScreenPlay TV Link DX for DivX Video on Demand Register at http vod divx com Deactivation Turns off DivX registration Language Select the language for the user interface ...

Страница 21: ...ScreenPlay TV Link DX can be idle before automatically displaying the screen saver Options are Never 5 min 10 min or 15 min Quick start mode On The power buttons on the remote control and player front panel will put the ScreenPlay TV Link DX into standby mode or start it up from standby mode Start up from standby mode is much faster than start up from complete power off Off The power buttons on th...

Страница 22: ...ga_HD Use the virtual keyboard or the remote control if you want to change the name Media server This option applies only to the ScreenPlay DX with internal storage The media server option is off by default Shared folder When this option is on default setting an external USB device connected to the ScreenPlay TV Link DX will appear as a shared volume on the network Select Off if you do not want to...

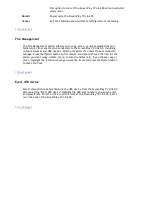
Страница 23: ...or move highlight the location where you want the items and press the Option button to place the files top of page Eject USB device Select this option to safely disconnect a USB device from the ScreenPlay TV Link DX After selecting Eject USB device highlight the USB port number you want to eject and press Enter Ports 1 and 2 are on the front of the ScreenPlay TV Link DX port 3 is on the back of th...

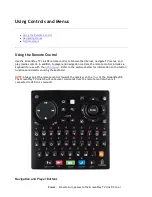
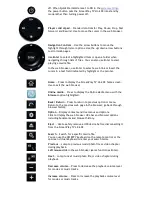
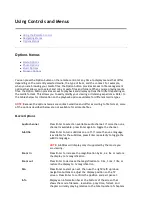
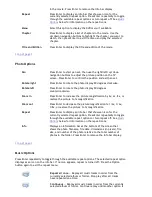
Страница 24: ...the remote control includes a keyboard for use with the web browser Refer to the sections below for information on the button functions and details on using the keyboard NOTE Always point the remote control towards the receiver on the front of the ScreenPlay DX The ScreenPlay TV Link DX will not accept commands from the remote control when is it connected to USB on a computer Navigation and Player...

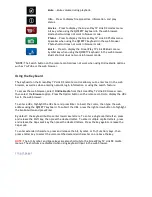
Страница 25: ...dia Press to display the Online Media menu with the Browser option highlighted Back Return Press to return to previous option or menu Return to the previous web page in the browser go back through browser history Option Display context sensitive menus and options Click to display the web browser URL bar and browser options including bookmarks and browser history Eject Use to safely remove a USB de...

Страница 26: ...letter To enter multiple capital letters press and release the Caps Lock key then press the desired letters Press the key again to release the Caps Lock To enter extended characters press and release the Alt Symbol or Fn Function keys then press a letter key to select the color matched extended character on or above the key NOTE The Alt Symbol and Space keys are also shortcuts to the ScreenPlay TV...

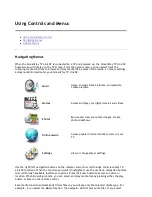
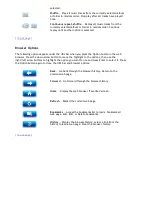
Страница 27: ... you want is highlighted use the up down navigation buttons to scroll through available locations or options Press the Enter button to select an option or location When browsing content you can select and play media fles by pressing either the play button or Enter on the remote control Each media function automatically filters files so you will see only the selected media type For example if you s...

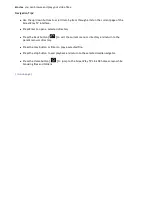
Страница 28: ...r to open a selected directory z Press the Back button to exit the current menu or directory and return to the parent menu or directory z Press the play button or Enter to play a selected file z Press the stop button to end playback and return to the selected media navigator z Press the Home button to jump to the ScreenPlay TV Link DX home screen while browsing files and folders top of page ...

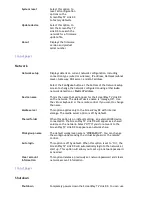
Страница 29: ...fer according to file format some of the options described below are not available for all media files Movie Options Audio channel Press Enter to select an available audio channel If more than one channel is available press Enter again to toggle the channel Subtitle Press Enter to turn subtitles on or off If more than one language is available for the subtitles press Enter repeatedly to toggle the...

Страница 30: ...osition on the TV screen Press Enter to confirm the position and exit pan set Rotate right Press Enter to rotate the photo display 90 degrees clockwise Rotate left Press Enter to rotate the photo display 90 degrees counterclockwise Zoom in Press Enter to increase the picture magnification by 2x 4x 8x or restore the picture to 1x magnification Zoom out Press Enter to decrease the picture magnificat...

Страница 31: ...ted album or folder in random order Stop play after all tracks have played once Continuous repeat shuffle Replay all music tracks from the currently selected album or folder in random order Continue replay until another option is selected Back Go back through the browser history Return to the previous web page Forward Go forward through the browser history Home Display the web browser Favorites sc...

Страница 32: ......

Страница 33: ......

Страница 34: ... Media Files Photos z View digital photos Viewing Photo Images z Create view slideshows Creating Slideshows z Add music to a slideshow Playing Music with a Slideshow z Use a Digial Media Server Accessing DMS UPnP DLNA z Create a photo library Managing Media Files Online media z Access popular Internet media Connecting to Online Media z View YouTube videos Playing YouTube Videos on Your TV z Mediaf...

Страница 35: ...it easier to find the movie or video you want to watch The filter options for Movies include Folders All movies or Recent Press Enter when the filter option you want is highlighted then browse to the video file you want to play See Navigation Tips for details on how to use the remote control to browse and select files NOTE If the movie or video file you want does not appear or does not play make s...

Страница 36: ...Windows Explorer to browse the disc Copy the entire VIDEO_TS folder from the DVD to the ScreenPlay TV Link DX To play the DVD movie navigate to the VIDEO_TS folder select the VIDEO_TS IFO file and press the play button NOTE If the DVD folder is incomplete you can still play back the VOB files directly Functions controlled by the IFO file such as the selection of subtitles chapters and angles will ...

Страница 37: ...to highlight a source location and press Enter to select it The music navigator will automatically filter the selected location to display audio content After choosing a location you can select an additonal browser filter to make it easier to find the music you want to watch The filter options for Music include Folders All music Artist Album Genre Playlist or Recent Press Enter when the filter opt...

Страница 38: ...playlist press the Option button then choose Select and press Enter 3 Once you have selected the tracks you want for the playlist navigate to the location on your ScreenPlay TV Link DX where you want to save the playlist NOTE You might find it helpful to create a folder called Playlists so you can save all of your playlists in a single location 4 Press the Option button then select Create new play...

Страница 39: ...rowse to the playlist you want and press the Play button to start playback 5 Press Play pause again to pause playback or press the Stop button to end playback During playback you can press the Option button to set options to repeat all tracks on the playlist or shuffle the play order Folder Playlists The ScreenPlay TV Link DX will automatically play all of the music tracks in a folder as a playlis...

Страница 40: ...t an additional browser filter to make it easier to find the photos you want to view The filter options for Photos include Folders All photos Date which will display the oldest photos at the top and Recent Press Enter when the filter option you want is highlighted then browse to select the photo you want to view Press the play button or Enter to display the photo on the TV If you use the play butt...

Страница 41: ... so you can also create slideshows by organizing your photos in folders as desired 1 Connect the ScreenPlay TV Link DX to a computer via USB or use a networked computer to access the ScreenPlay TV Link DX network share NOTE You can also create slideshows on an external USB device or network volume 2 Use your computer s operating system to browse to the location you want to store your slideshow for...

Страница 42: ...Pan Rotate right Rotate left Zoom in Zoom out Repeat Display an info bar See Photo Options for details on how to use these settings top of page Playing Music with a Slideshow You can easily add music to your slideshows simply by starting the music before you start the slideshow You can place the music tracks you want to use in the same folder as the slideshow photos or you can play music from anot...

Страница 43: ...navigate to the folder 8 Select the first photo image and press Play 9 If you want to repeat the photos or shuffle the display order press the Option button then press Enter repeatedly until the icon for the option you want displays on the info bar top of page ...

Страница 44: ...to select it Refer to the information below for additional instructions on using the online media options You can also use the WEB button on the remote control for quick access to the online media options NOTE Online media options for the ScreenPlay TV Link DX may change over time or across regions so all of the options described in this section might not be available or other options could be add...

Страница 45: ... control pad play pause stop fast forward rewind to move the cursor in the web browser z To select a web link use the player control pad to position the pointer over the link then press Enter or the left mouse click button to select the link NOTE The cursor will change from a pointer to a hand when it s over a valid link z The icons under the URL bar allow you to easily jump back to a previously v...

Страница 46: ... the down arrow button to highlight OK and press Enter 4 After you add the bookmark the URL bar will close automatically To go to a bookmarked site 1 From the ScreenPlay TV Link DX web browser Favorites screen press the Option button to display the URL bar and browser options 2 Press the down arrow button to go to the icons below the URL bar then use the right arrow button to highlight the Bookmar...

Страница 47: ... Use the up down navigation buttons to select YouTube and press Enter 3 To browse through lists of available videos select Movies and press Enter 4 Select one of the categories to browse and press Enter to see a list of video titles 5 As you scroll through the list of titles you can press Enter to see a preview of the highlighted video 6 Press the Play pause button to view the selected video in fu...

Страница 48: ......

Страница 49: ...e power from the USB bus For example you could connect one 2 5 portable hard drive plus a flash or pen USB drive and an Iomega WiFi adapter top of page Accessing Network Files You can use the ScreenPlay TV Link DX to play media files from your network on your TV Connect the ScreenPlay TV Link DX to your network and set up the network configuration See Connecting to a Network for more information O...

Страница 50: ...me local network The DMS can be either a computer or a network attached storage device with integrated Digital Media Server Once the network connection is established the ScreenPlay TV Link DX will list the media server as a source location for Movies Photos and Music files so you can browse and play media content as desired NOTE The ScreenPlay TV Link DX can be used as a digital media player for ...

Страница 51: ......

Страница 52: ...u are using the remote control for the first time install the included AAA batteries Make sure the batteries are oriented correctly z If you have used the remote control for some time the batteries could be depleted Try replacing them top of page TV screen resolution is not as high as expected If the ScreenPlay TV Link DX is connected to an HD TV via an HDMI cable it is recommended that you use th...

Страница 53: ...rate composite and component audio inputs Be sure that you have connected the correct one See Connecting to a TV for instructions z Check the audio output setting under the Audio Video options on the Settings page If the ScreenPlay is connected to an AV amplifier using an optical audio cable select Digital for the audio output z Check the volume setting on the TV or AV amplifier You will not be ab...

Страница 54: ...eft navigation buttons to highlight the Settings icon 2 Use the up down navigation button to hightlight System and press the Enter button 3 Select Language and press Enter 4 Scroll through the options to highlight the language you want to use 5 Press Enter to select the highlighted language 6 Press Home or the Back button to exit the Settings screen top of page Problems Playing Media Files Media f...

Страница 55: ...zable subtitle occurs when playing some DivX movies If the subtitle file is ANSI encoded text you need to manually set the subtitle language option to match the language used by the subtitle file Press the Option button on the remote control to display the options menu and select Subtitle Press Enter repeatedly to toggle the subtitle language When the language you want appears press the Option but...

Страница 56: ...hould see a message on the ScreenPlay TV Link DX TV display indicating Wifi device plug in z Make sure you have set up the wireless connection for the ScreenPlay TV Link DX See Network Setup for more information z Wait a few minutes and then try connecting to the ScreenPlay TV Link DX again See Mapping a Network Drive Letter to the ScreenPlay TV Link DX for detailed instructions z Try rebooting yo...

Страница 57: ...recognized on the network top of page ...

Страница 58: ...basic how to information z Up to date Iomega software and drivers z Advanced online support options such as 1 on 1 live chat and email z Electronic copies of Iomega product manuals z Information on telephone support options z Information on advanced technical service options such as data recovery z Warranty information and product return instructions Support options available may vary depending on...

Страница 59: ...onmental causes or damage arising from any cause or causes for which Iomega is not responsible such as exposure to abnormal temperatures shock power surges power outages improper power supply or damage caused while the product is being shipped from you to Iomega Your Iomega product may contain certain replaceable components such as hard drives or power supplies Refer to your product documentation ...

Страница 60: ...o Iomega along with proper identification a return authorization number obtained from the Iomega website or provided by the Iomega representative and proof of purchase Iomega will not protect recover or return data during warranty service so you should duplicate your data before shipment Limitations THE ABOVE WARRANTY IS EXCLUSIVE AND IN LIEU OF ALL OTHER WARRANTIES EXPRESS OR IMPLIED To the exten...

Страница 61: ...l not occur in a particular installation If this equipment does cause harmful interference to radio or television reception which can be determined by turning the equipment off and on the user is encouraged to try to correct the interference by one or more of the following measures z Reorient or relocate the receiving antenna z Increase the separation between the equipment and receiver z Connect t...

Страница 62: ...2004 108 EC 2009 125 EC for ScreenPlay TV Link DX and TV Link DX 2006 95 EC 2004 108 EC 1999 5 EC for WiFi adapter The Declaration of Conformity can be obtained by contacting Iomega or is available at www iomega com support ce EU Representative Iomega International SA H O Iomega Netherlands Hardwareweg 4 3821 BM Amersfoort NL The Netherlands top of page Waste Electrical and Electronic Equipment WE...

Страница 63: ...authority or the retailer where this product was purchased top of page Manufacturer Responsible Party Iomega Corporation 4059 South 1900 West Roy UT 84067 USA top of page ...

Страница 64: ...ch as Windows format the search will locate topics that contain either Windows or format Advanced Search To search for a specific phrase or group of words enter a plus sign followed by the word or phrase you want to locate When using the plus sign do not leave any space between it and the query string The search will then bring up topics that have all the words in the search query Example Windows ...

Страница 65: ......

Отзывы: