22
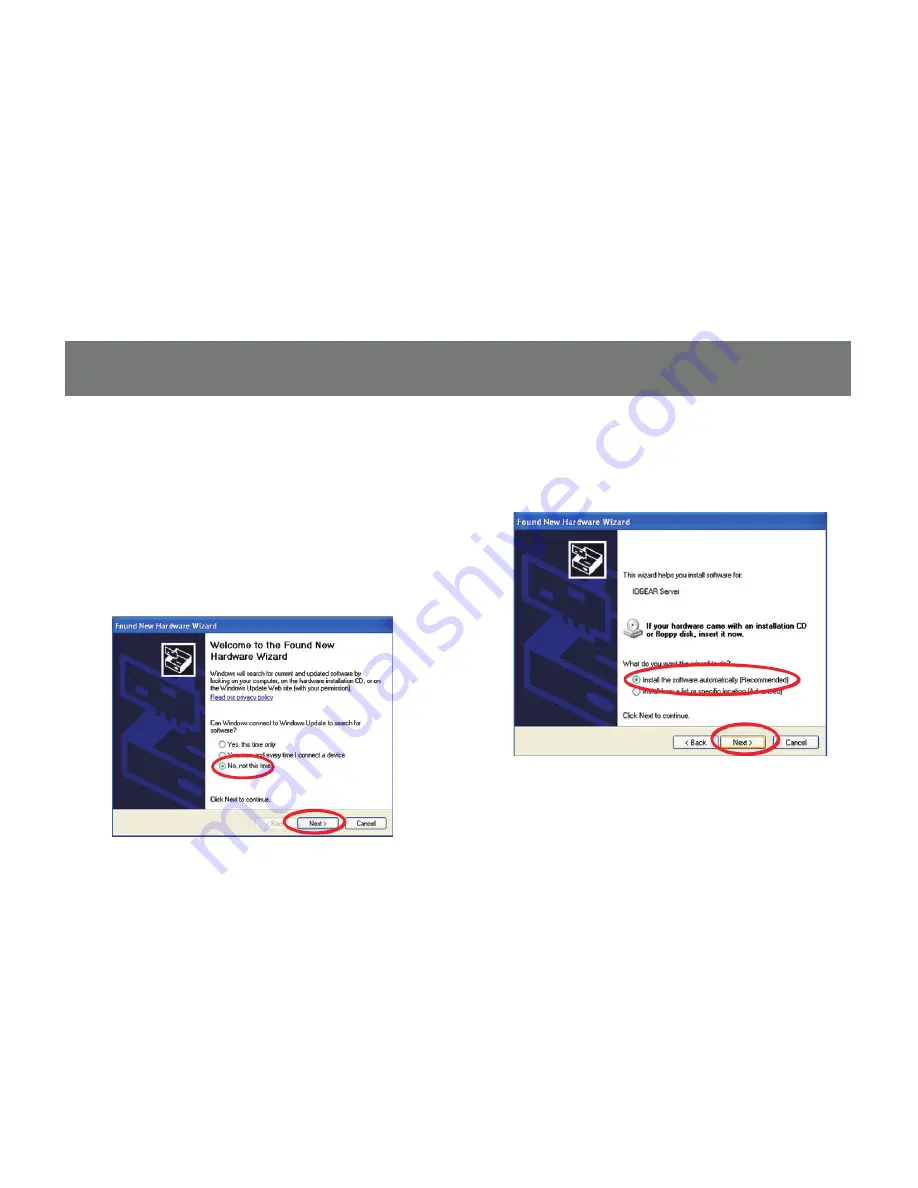
2. Once the IOGEAR utility is launched,
Windows will prompt you with a
“Found
New Hardware Wizard”
window. You will
need to complete the wizard so that you will
be able to use the DVI Net ShareStation on
your computer
Select
“No, not this time”
and click on
Next
to continue.
3. Click on
“Install the software automati-
cally (Recommended)”
and click
Next
to
continue.
Содержание DVI Net ShareStation GDIP201
Страница 1: ...1 Installation Installation Installation Guide DVI Net ShareStation GDIP201 PART NO M1048...
Страница 2: ...2...
Страница 7: ...7 2 Connect the DVI cable of the DVI monitor to the DVI port on the DVI Net ShareStation...
Страница 15: ...15 3 Right click on the CD ROM drive and select Explore 4 Double click on the DL_Driver folder...
Страница 17: ...17 7 The DisplayLink software is now installing...
Страница 19: ...19 3 When the installation completes click Finish to close the installation wizard...
Страница 27: ...27 4 After you have connected the GDIP201 the DisplayLink icon will show up in the taskbar as shown...
Страница 33: ...33 To adjust the refresh rate of the extended screen click on Advanced and then the Monitor tab...
Страница 36: ...36 3 Right click on the CD ROM drive and select Explore 4 Double click on the Vista folder...
Страница 40: ...40 3 Right click on the CD ROM drive and select Explore 4 Double click on the DL_Driver folder...
Страница 44: ...44 2 Click OK to start the installation process...
Страница 53: ...53 3 Once connected there will be a DisplayLink icon on the task bar...
Страница 58: ...58 To adjust the refresh rate of the extended screen click on Advanced and then the Monitor tab...
Страница 73: ...73...


