21
2.2 Configuration:
Note:
Basic knowledge of the DMX-512 standard is required!
2.2.1 Construction / installation:
The "SCANControl" can be used as a desktop device or built into a 19 "rack.
When installing in a rack, please note that the housing has a built-in fan if possible or that warm air can be drawn
off well. The device must be screwed firmly into the rack with M6 screws so that it cannot slip during transport.
Now connect the power supply to the "SCANControl" and then to the power supply.
2.2.2 Creation of a DMX chain:
DMX is the abbreviation for Digital Multiplex and enables the digital control of several DMX devices via a common
control line.
The connections between "SCANControl" and the devices must be made with 2-pin, shielded cables (DMX cable).
Microphone cables are not suitable for the transmission of DMX digital signals. 3-pin XLR connectors and
couplings serve as the connection.
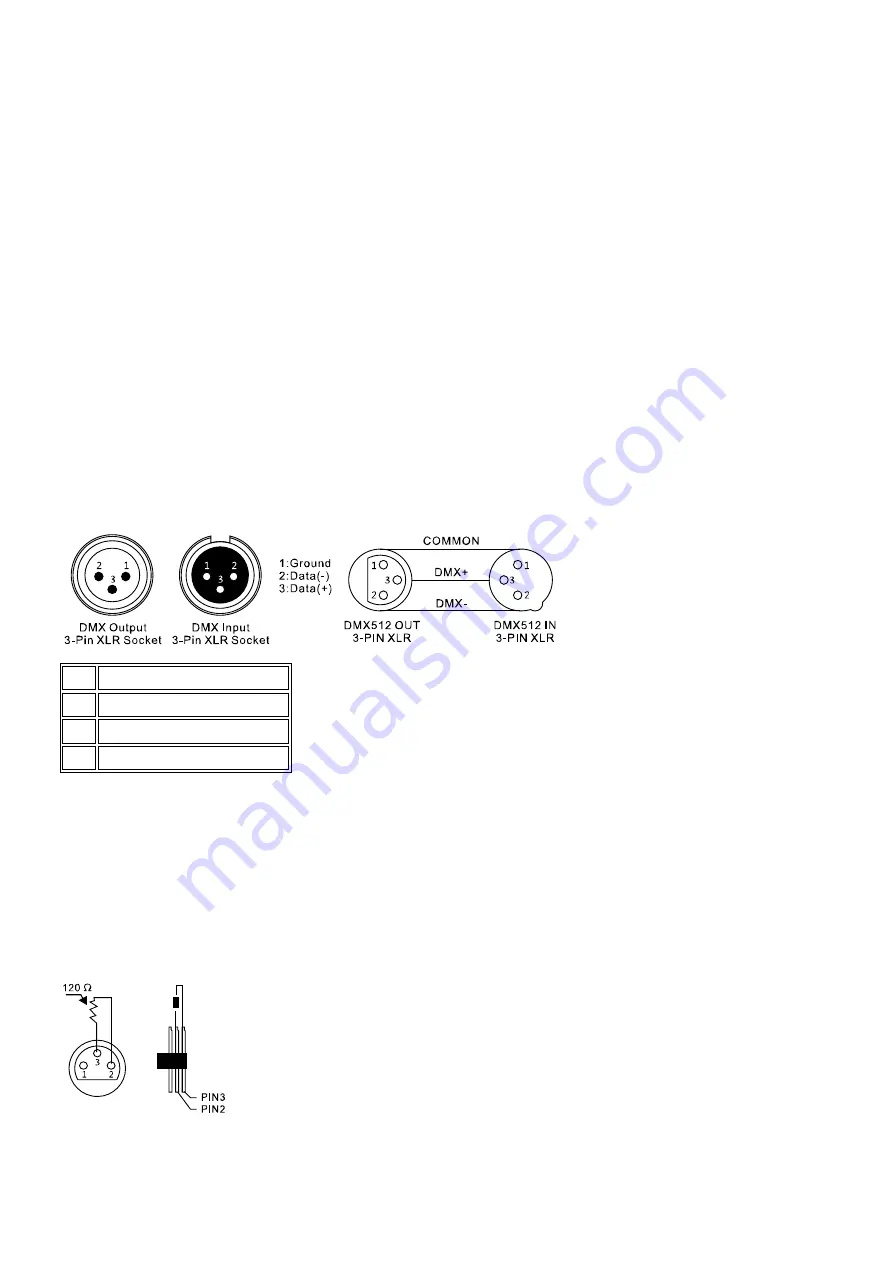
A three-pin XLR socket serves as a DMX output, a three-pin XLR plug serves as a DMX input.
PIN
3 pin international
1
Ground (shielding)
2
Signal inverted (DMX−)
3
Signal (DMX +)
Connect the DMX output of the DMX controller to the DMX input of the first DMX device. Connect the output of the
first DMX device to the input of the second and so on to form a series connection.
From a cable length of 300m or after 32 connected DMX devices, the signal should be amplified with the help of a
DMX splitter / repeater (e.g. Involight DMXS4, DMXS6 or DMXS8) to ensure error-free data transmission.
IMPORTANT: A terminating resistor should be connected to the last device in a DMX chain at the end of the chain.
DMX terminators are commercially available, but can also be built yourself. A 120 ohm resistor must be soldered
into an XLR connector between the two poles (+ and -).


