


INSTALLATION
18
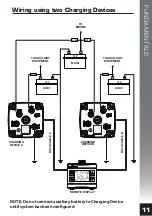
Connection and Configuration
A step-by-step guide
In some applications, the DCC Pro can be installed and connected straight out
of the box without any changes to the configuration. In other situations it is
necessary to change these defaults, a different battery type for example, as
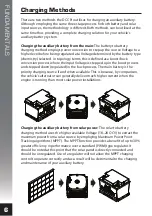
detailed below (see Charging Methods section on page 6 for explanation).
For safety reasons, the battery type and control mode can only be changed
during set-up (configuration mode) before the auxiliary battery is connected.
Of course, these selections can be changed at any time but the auxiliary battery
must be disconnected in order to do so.
In default state the configuration is based on a standard battery to battery
charging installation and assumes the following:
1. The auxiliary battery is a standard lead acid type (sealed or unsealed).
2. The system is not controlled by the vehicle’s ignition circuit.
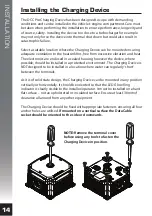
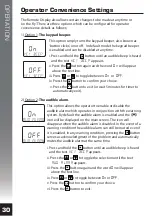
The Remote Display is initially used for configuring the Charging Device upon
installation. Most importantly the Remote Display allows for selection of
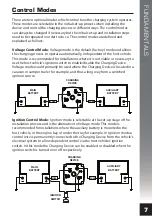
different battery types (chemistries) and the control mode, Voltage Sense or
Ignition Control (see explanation on page 7).
The following options are available for selection:
•
Standard Lead Acid
– displayed as
1
LEAD ACID
on the Remote Display
during set-up or
SLA
in short form.
•
Absorbed Glass Mat
– displayed as
2
AGM
on the Remote Display during
set-up and in short form.
•
Gelified Electrolyte
– displayed as
3
GEL
on the Remote Display during
set-up and in short form.
•
Lead Calcium
– displayed as
4
CALCIUM
on the Remote Display during
set-up or
LCA
in short form.
•
LiFePO4 Lithium
– displayed as
5
LFP BMS
on the Remote Display during
set-up and in short form.
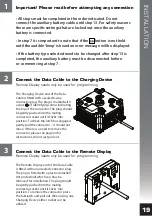
The following pages illustrate the step by step configuration process for
installing the Charging Device and Remote Display. If there is a need to
change the battery type and control mode, this process must be completed
in the order depicted for the DCC Pro to operate correctly.


