


IS-1500 User Guide
Thales Visionix, Inc.
MNL- 0024 (D)
Page 24 of 59
3.2
Connecting using sfStudio
Before using a custom fiducial constellation, it is best to first ensure the tracker has been setup correctly by attempting to track off
the default constellation using sfStudio. More information on the sfStudio program can be found in the Software section and in the
sfStudio User Guide (MNL-0020).
1.
If it is not already connected, plug in the InertiaCam to the host computer using the USB C cable included with the IS-1500 kit.
When the InertiaCam is plugged in, a blue light will appear for about one second before turning off again to indicate that the
InertiaCam has been successfully powered.
2.
A fiducial poster is included with the IS-1500 hardware kit. If the poster has been lost or damaged, it can be reprinted from a PDF
of this constellation found in the Documents folder of the software package, Fiducial Poster – 8.5 x 11.pdf. Lay the poster on a
flat surface with the fiducials facing the ceiling.
3.
Once the default fiducial constellation has been acquired and the InertiaCam connected, run sfStudio from the sfStudio subfolder.
(If the Windows installer has been used as in the Quick Start Guide, sfStudio can instead be run from the Windows Start Menu or
Programs list.)
4.
When sfStudio first loads, it will not yet be connected to the InertiaCam. This is indicated by the No Communication Tracking
State and associated grey icon, seen in Figure 18. Note that the Tracking Quality is also at 0% with a grey icon. Press the Connect
button to far left, also highlighted in Figure 18, to launch sfHub and initate a connection with the tracker.
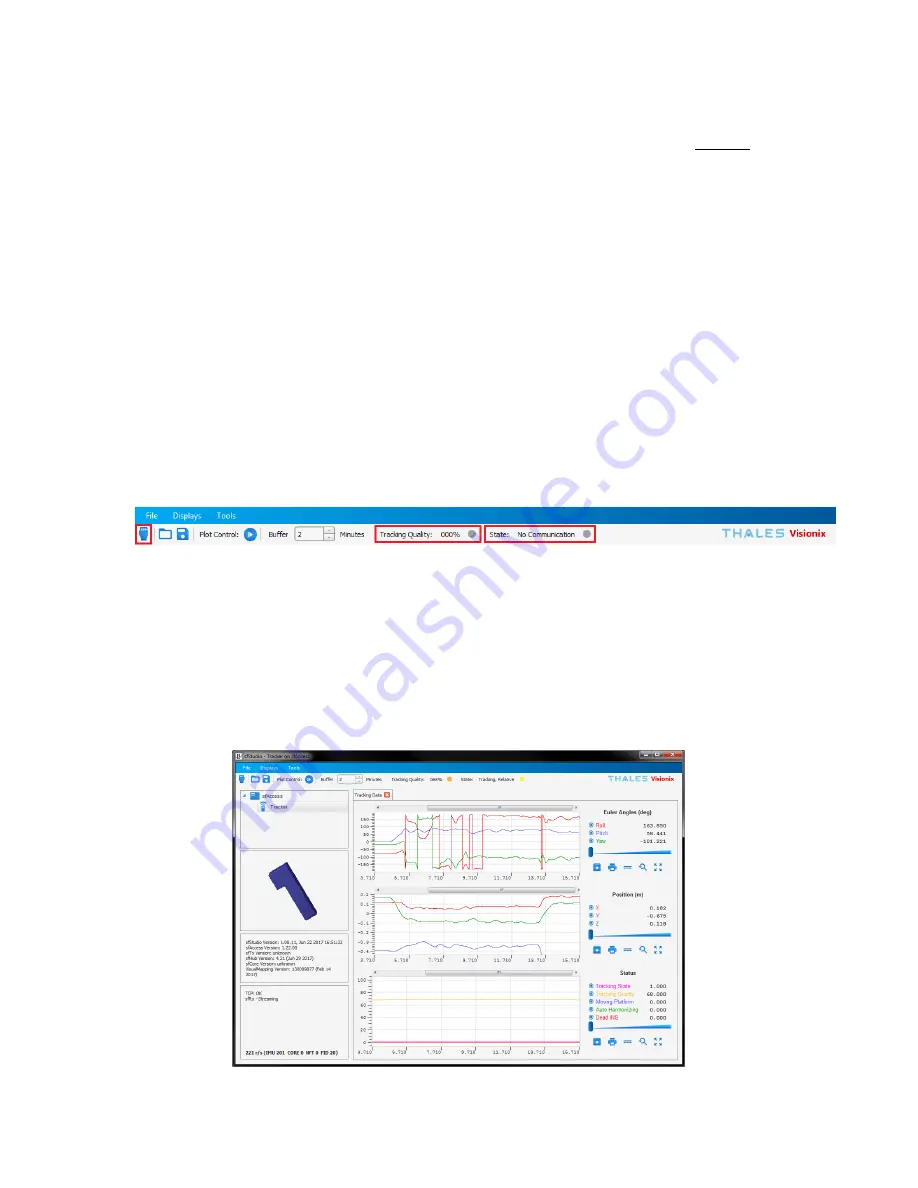
5.
A popup will come up that indicates the system is attempting to connect to the tracker. After about fifteen to thirty seconds, the
tracker should connect. A number of changes to the sfStudio GUI will take place after the tracker has successfully connected, as
seen in Figure 19. Primarily, the NFT Status will have changed from No Communication with a greyed out icon to Tracking, Relative
with a yellow icon. The Tracking Quality data will also populate accordingly, showing a 68% quality in the figure below.
Additionally, to the right, a blue 3D model of the InertiaCam will be present that responds to and show changes in orientation.
Towards the bottom left, blue text will display the data transfer rate in records per second (r/s). Figure 19 shows the tracker
connected and transferring 221 r/s. The Tracking Data tab will also be displayed and begin drawing graphs for orientation, position,
and status information.
Figure 19 – Tracking Data Display
Figure 18 – Main sfStudio Toolbar