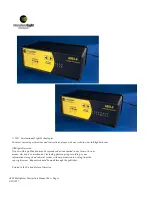
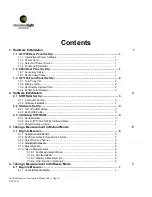
background image

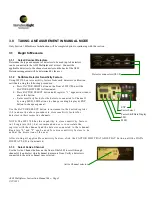
3.1.4

Sensitivity Factor Selection

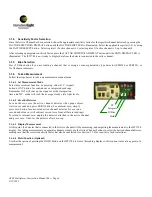
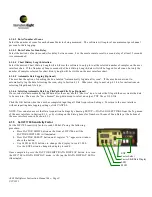
Once the Active Channel has been selected, chose the appropriate sensitivity factor for that specific channel/detector by pressing the
FACTOR SHIFT/DATA DISPLAY button until the FACTOR SHIFT LED is illuminated.  Select the applicable register (1-8) by using
the FACTOR SELECT button.  Select register 1 if active channel is 1, select register 2 if active channel is 2, up to channel 8.

After selecting appropriate sensitivity factor, press the FACTOR SHIFT/DATA DISPLAY buttno until the DATA DISPLAY LED is
illuminated.  The ILT1700 is now ready to display data from the detector connected to the active channel.  

3.1.5

Bias Selection

Press 5V Bias button if you are reading a channel that is using a vacuum photodiode type detector (SED240 or SED220), or
for flash measurements. 

3.1.6

Take a Measurement

Follow the steps below to take a measurement in manual mode.

3.1.6.1 Set Measurement Mode
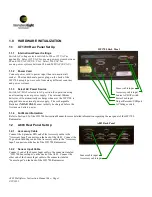
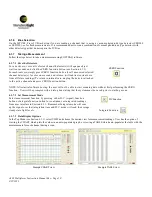
Select measurement function by pressing either D.C. (signal) 
button or INT button for continuous or integrated readings. 
Remember INT will sum up the signal over that integration 
time and D.C. mode will read the average steady state light levels

. 

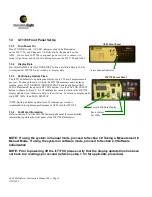
3.1.6.2 Zero the Detector
For a dark zero, cover the active channel detector with opaque object, 
wait ten seconds and press ZERO button. For ambient zero, simply
press zero button for uncovered active channel detector for over one 
second and release. (will subtract current zero from all future readings) 
To return to internal zero, unplug the detector attached to the active channel 
and press zero.  Uncover the detector after zero-ing.

3.1.6.3 Display Measurement
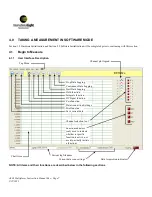
At this point, the detector that is connected to the Active Channel will be measuring, and outputting the measurement to the ILT1700
display.  For taking measurements on separate channels, simply use the Active Channel buttons to select the desired channel/detector,
making sure that the correct sensitivity factor has also been selected (see Section 3.1.4 for sensitivity factor selection).

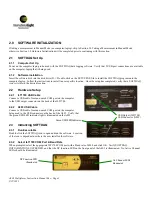
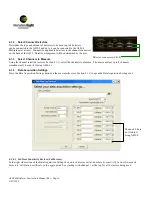
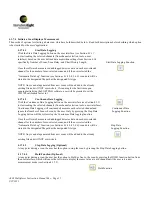
3.1.6.4 Hold Function (Optional)
User has the option of pressing the HOLD button on the ILT1700 to freeze the reading display with its current value at any point of a
measurement.  

A803 Multiplexer Instruction Manual Rev -

 Page 6

9/22/

2011

Integrate

DC

5V Bias

Hold

Содержание A803 Series

Страница 1: ...A803 INSTRUCTION MANUAL International Light Technologies Inc 10 Technology Drive Peabody MA 01960 Ph 978 818 6180 Fax 978 818 6181 Web www intl lighttech com...

Страница 2: ...blication may be reproduced or transmitted in any form or by any means electronic or mechanical including photocopying recording or any information storage and retrieval system without permission in w...

Страница 3: ...Set Up 3 2 2 1 ILT1700 USB Cable 3 2 2 2 A803 USB Cable 3 2 3 Initializing SOFTDAQ 3 2 3 1 Run Executable 3 2 3 2 Select ILT1700 COM Port Baud Rate 3 2 3 3 Enter Activation Code 4 3 Taking a Measureme...

Страница 4: ...ing Automatic Data Log FilePath File Type Optional 9 4 1 5 Set ILT1700 Sensitivity Factor 9 4 1 6 Bias Selection 10 4 1 7 Take a Measurement 10 4 1 7 1 Zerothe Detector 10 4 1 7 2 Set Measurement Mode...

Страница 5: ...NOTE The software associated with the A803 product is intended for use with the following operating systems Windows XP Windows Vista Windows 7 A803 Multiplexer Instruction Manual Rev Page iv 9 22 2011...

Страница 6: ...d before the first use on battery power 1 1 4 For More Information Refer to Section 2 2 of the ILT1700 Instruction Manual for more detailed information regarding the rear panel of the ILT1700 Radiomet...

Страница 7: ...n 2 4 or 8 readings per second which is the ILT1700 display update time Otherwise skip to the next step To return to display mode click SET 100 then DATA DISPLAY NOTE Setting a display update time of...

Страница 8: ...2 1 ILT1700 USB Cable Connect a USB cable from an unused COM port on the computer to the USB output connector on the back of the ILT1700 2 2 2 A803 USB Cable Connect a USB cable from an unused COM por...

Страница 9: ...t states YOUR SOFTWARE LICENSE IS SET TO EXPIRE IN 30 DAYS Select ENTER ACTIVATION CODE from the pop up box and enter the activation code which can be found on the outside of the installation disk Ver...

Страница 10: ...ng MSD LSD buttons to change reading display EXP button to change exponent Use the FACTOR SELECT button to increment to the desired register 1 8 and use the above procedure to store sensitivity factor...

Страница 11: ...gs Remember INT will sum up the signal over that integration time and D C mode will read the average steady state light levels 3 1 6 2 Zero the Detector For a dark zero cover the active channel detect...

Страница 12: ...ns A803 Multiplexer Instruction Manual Rev Page 7 9 22 2011 Top Menu Continuous Data Logging Start Data Logging Hold function Integrate function DC Signal function Zero function Data Acquisition Setti...

Страница 13: ...user can select up to 8 channels simultaneously to scan 4 if using A803 4 4 1 4 Data Acquisition Settings Press the Data Acquisition Settings button on the user interface see Section 4 1 1 to open th...

Страница 14: ...selects to automatically log the data after the scan use the Browse icon to select the file path the user wants the data to be saved in Then use the Save Format drop dwn menu to select an output TXT...

Страница 15: ...O function button NOTE After initial software bootup the user will not be able to start scanning data without first performing the ZERO function User will be prompted with a dialog box stating that th...

Страница 16: ...n the user interface see Section 4 1 1 to start reading the selected channels from channel selection tool on user interface Continuous Data Logging will continuously measure each selected channel and...

Страница 17: ...ing the specific scan data by pressing the Save Current Data button from the user interface see Section 4 1 1 After clicking the button the user will be prompted to name the file and select a file pat...

Отзывы: