44
Intermec EasyCoder PD4—Service Manual
Chapter 7—Print Mechanism
4
Use a straight-slot screwdriver to turn the screw at the top of the balance
boxes clockwise to increase the pressure or counterclockwise to decrease
the pressure. To set the pressure to factory default value, turn the screws
down completely and then 9 turns up (counterclockwise).
5
Engage the printhead and load the ribbon.
6
Test and readjust if necessary. (Hint! If you use direct thermal media you
will not have to load and remove the ribbon over and over again.)
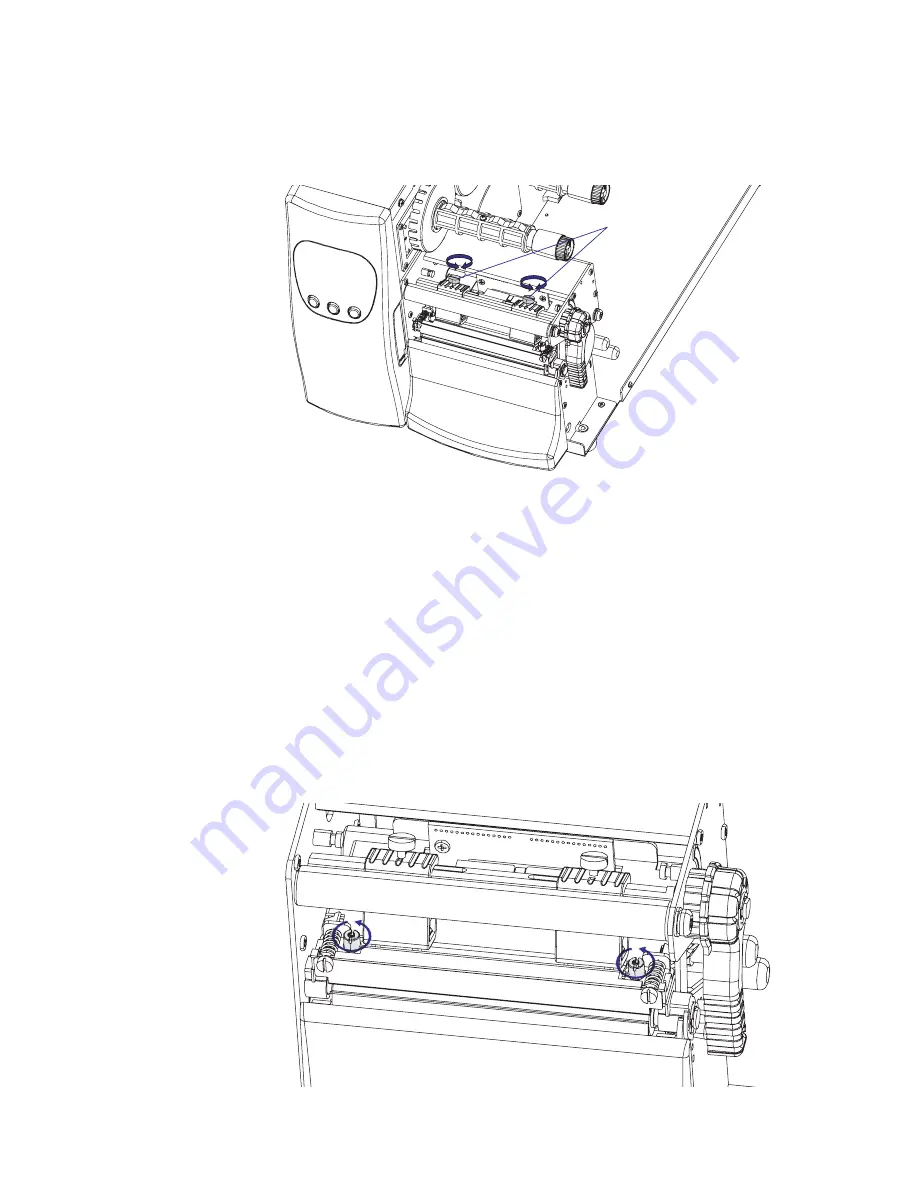
Printhead Dot Line Position
When using thick or stiff media, the printhead needs to be moved forward
so the dot line becomes exactly aligned with the top of the platen roller.
Obviously, the platen roller and printhead must also be completely in
parallel.
To perform this adjustment, follow
all
the steps below:
1
Open the top cover.
2
Remove the ribbon.
3
Important step!
Use a straight-slot screwdriver to turn the two screws at
the top of the printhead bracket counterclockwise a single turn.
Adjustment screws
Содержание EasyCoder PD4
Страница 1: ...Service Manual EasyCoder PD4 Bar Code Label Printer ...
Страница 4: ...iv Intermec EasyCoder PD4 Service Manual ...
Страница 24: ...14 Intermec EasyCoder PD4 Service Manual Chapter 2 Front Panels ...
Страница 36: ...26 Intermec EasyCoder PD4 Service Manual Chapter 5 Media Supply ...
Страница 58: ...48 Intermec EasyCoder PD4 Service Manual Chapter 7 Print Mechanism ...
Страница 66: ...56 Intermec EasyCoder PD4 Service Manual Chapter 9 Strip Module ...
Страница 72: ...62 Intermec EasyCoder PD4 Service Manual Chapter 10 Cutter ...
Страница 94: ...84 Intermec EasyCoder PD4 Service Manual Chapter 12 Main Board ...
Страница 110: ...100 Intermec EasyCoder PD4 Service Manual Chapter 14 Troubleshooting ...
Страница 113: ......


