23
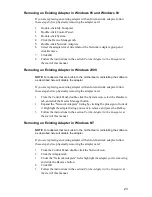
Removing an Existing Adapter in Windows 95 and Windows 98
If you are replacing an existing adapter with an Intel network adapter, follow
these steps before physically removing the adapter card:
1
Double-click My Computer.
2
Double-click Control Panel.
3
Double-click System.
4
Click the Device Manager tab.
5
Double-click Network Adapters.
6
Select the adapter driver listed below the Network Adapters group and
click Remove.
7
Click OK.
8
Follow the instructions in the section Put the Adapter in the Computer at
the start of this manual.
Removing an Existing Adapter in Windows 2000
NOTE: For adapters that are built-in to the motherboard, uninstalling the software
as described here will disable the adapter.
If you are replacing an existing adapter with an Intel network adapter, follow
these steps before physically removing the adapter card:
1
From the Control Panel, double-click the System icon, select the Hardware
tab, and click the Device Manager button.
2
Expand the “Network Adapters” listing by clicking the plus sign in front of
it. Highlight the adapter listing you want to remove and press the Del key.
3
Follow the instructions in the section Put the Adapter in the Computer at
the start of this manual.
Removing an Existing Adapter in Windows NT
NOTE: For adapters that are built-in to the motherboard, uninstalling the software
as described here will disable the adapter.
If you are replacing an existing adapter with an Intel network adapter, follow
these steps before physically removing the adapter card:
1
From the Control Panel, double-click the Network icon.
2
Click the Adapters tab.
3
Under the “Network Adapters” field, highlight the adapter you’re removing
and click the Remove button.
4
Click OK.
5
Follow the instructions in the section Put the Adapter in the Computer at
the start of this manual.
Содержание ETHEREXPRESS PRO/100
Страница 1: ...Installation Guide Intel PRO 100 Family of Adapters ...
Страница 2: ......
Страница 3: ...i Intel PRO 100 Family of Network Adapters Installation Guide April 2000 ...

