Intel
®
Solid-State Drive
4
Installation Guide
Intel
®
Solid-State Drive
Notebook Computers
1.
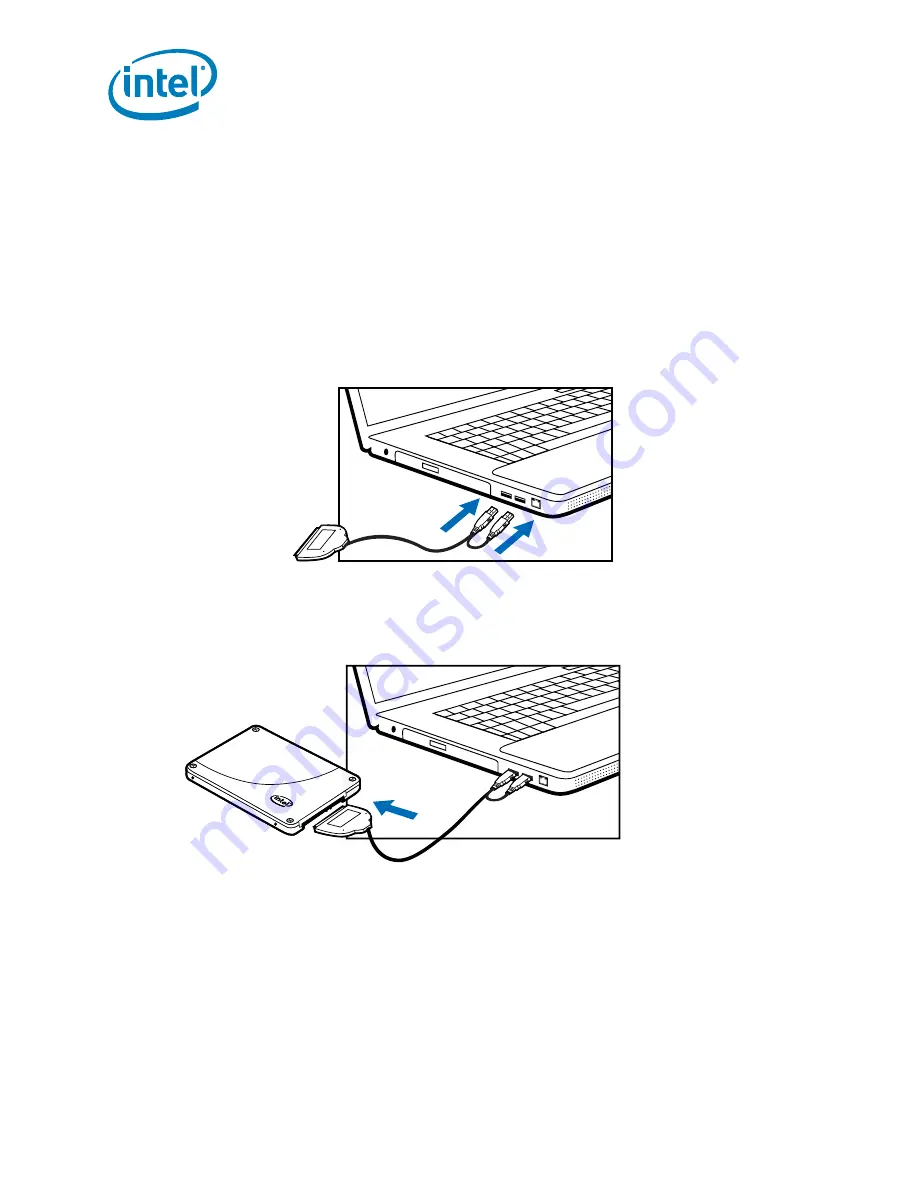
Connect the dual end of a USB-to-SATA cable to two available USB ports on the computer.
See
Figure 3
. You do not have to power off the computer.
Note:
If your computer contains a USB 3.0 port (indicated with a blue connector), connect
the blue end of the USB-to-SATA cable to the USB 3.0 port. If your computer does not
contain a USB 3.0 port, you can connect the cable to any USB port.
Figure 3. Connect USB-to-SATA cable to notebook
2.
Connect the single end of the USB-to-SATA cable to the Intel SSD. See
Figure 4
.
Figure 4. Connect USB-to-SATA cable to Intel SSD
3.
Power on the computer, if necessary, and wait for the operating system to recognize the
Intel SSD.
A message appears when the operating system recognizes the Intel SSD.
Note:
SATA devices may draw more power than some systems are capable of delivering
through USB ports. If the Intel SSD is not recognized, remove other USB devices
(external keyboards, printers, mice, scanners, etc). Keep these devices removed until
you have finished migrating your data from the old storage device to the Intel SSD. In
some cases, it may be necessary to purchase an externally powered USB-SATA device
or have your system data migrated by a professional.
The Intel SSD is now connected. Proceed to
“Migrate Your Data” on page 5
.


