Intel
®
Solid-State Drive
Installation Guide
3
Intel
®
Solid-State Drive
4.
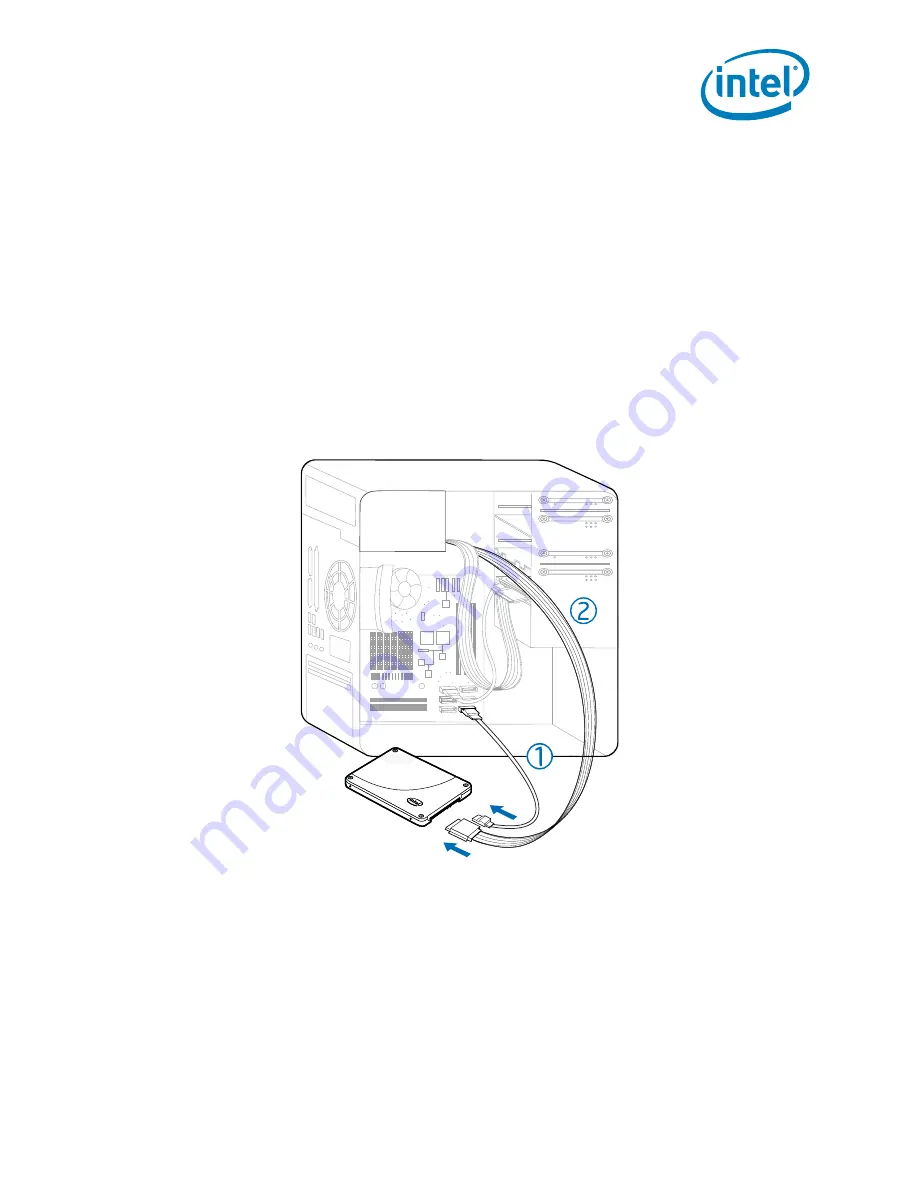
Connect one end of the SATA-to-SATA interface cable to a SATA interface connector or
SATA host adapter on your computer motherboard and connect the other end to the
Intel SSD. See
Figure 2
.
Note:
The SATA cable connectors are keyed to ensure correct orientation and contain a
locking bracket for securing in place. Insert cables gently. Do not use excessive force.
5.
Locate an available SATA power cable (connected to the internal computer power supply) and
connect it to the Intel SSD. See
Figure 2
.
Note:
Most computers have an available SATA power cable. If your computer does not have a
SATA power cable and instead uses a 4-pin power connector, use a SATA power adapter.
(The SATA power adapter comes with certain packages or can be purchased separately.)
Figure 2. Connect SATA interface and power cables
6.
Slide the connected Intel SSD with mounting adapter into an available 3.5-inch drive bay, or
secure the Intel SSD to the computer by inserting one screw in each of the side-mounting or
bottom-mounting holes.
7.
Power on the computer and wait for the operating system to recognize the Intel SSD.
A message appears when the SSD is recognized.
The Intel SSD is now connected. Proceed to
“Migrate Your Data” on page 5
.
1. SATA-to-SATA interface cable: Connect to SATA interface connector on computer motherboard and to Intel SSD.
2. SATA power cable (or SATA power adapter): Connect from power supply to Intel SSD.


