Intel
®
Solid-State Drive
2
Installation Guide
Intel
®
Solid-State Drive
SSD Handling Precautions
Observe the following before beginning the installation:
•
Keep the SSD in the protective anti-static container until you are ready to install.
•
Handle the SSD with care. Do not touch the gold connectors.
•
To minimize static electricity, touch the computer case before handling the SSD.
•
Do not remove the encasement or disassemble the SSD; these actions void the SSD warranty.
This step explains how to connect the Intel SSD to your computer in preparation for migrating
your data. Note that your current storage device remains installed until the final step of the
installation,
“Swap Your Drives” on page 8
.
Follow the steps for your platform:
—
“Desktop Computers”
(next section)
—
“Notebook Computers” on page 4
Desktop Computers
1.
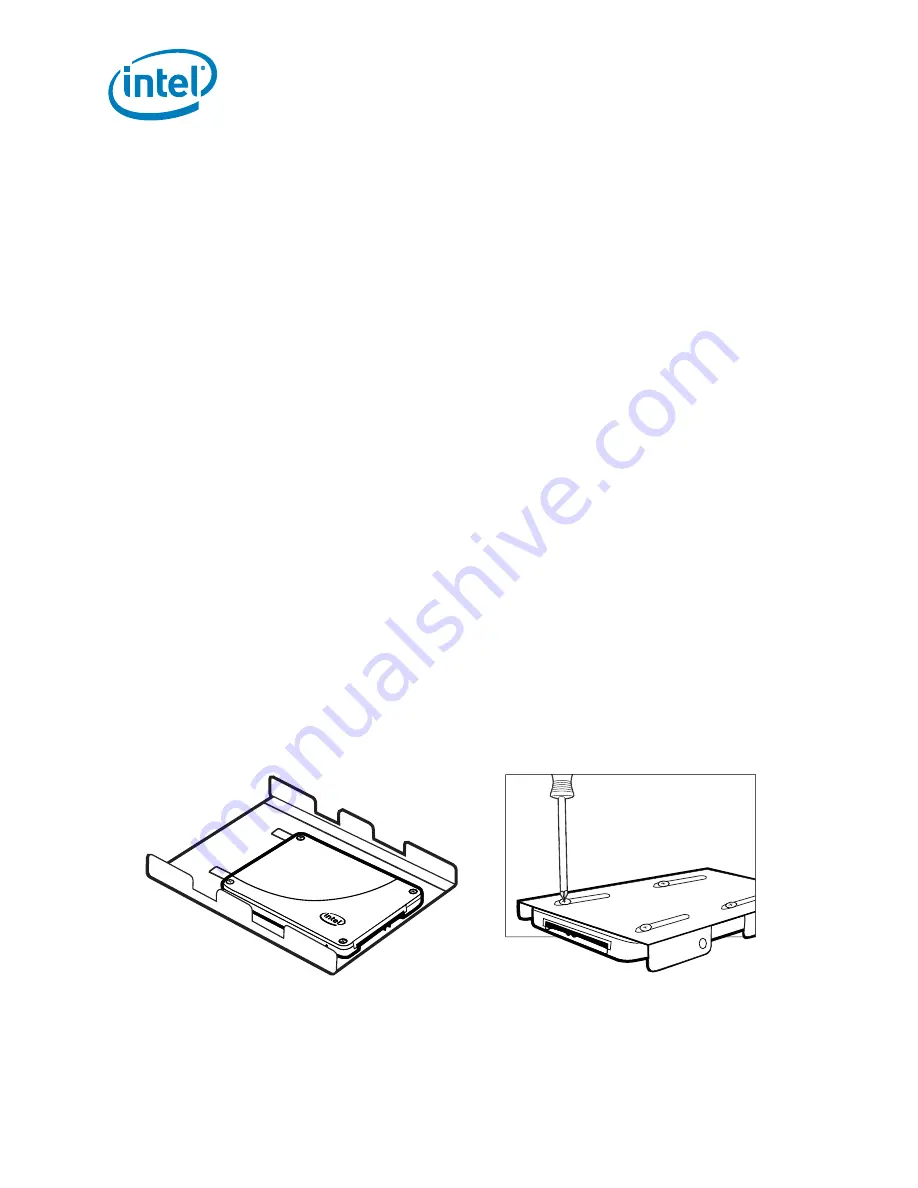
If your desktop computer has a 3.5-inch drive bay, attach the Intel SSD to the mounting
adapter. (This helps the SSD fit securely in a drive bay.) If your desktop computer has a 2.5-
inch drive bay, you do not need to attach the mounting adapter. Go to step 2 in this section.
a. With the SSD right side up (Intel logo showing), place the Intel SSD on the mounting
adapter. Make sure the edge of the Intel SSD (with connectors) aligns with the edge of the
mounting adapter. See
Figure 1
.
b. Turn the SSD and mounting adapter over and insert one screw in each mounting hole on the
bottom of the mounting adapter. See
Figure 1
.
Figure 1. Place and attach Intel SSD on mounting adapter
2.
Power off the computer. Keep the power cable connected.
3.
Remove the computer case.
Refer to your computer documentation to determine how to safely remove the computer case.
1. Connect the Intel SSD to your Computer


