manualshive.com logo in svg
background image

14 


MANUAL MODE 

1.  Press START in the main menu to start a workout in the manual mode. 

2.  Press UP or DOWN to select a workout program, choose 

“Manual”, and press MODE to enter. 

3.  Press UP or DOWN to preset TIME, DISTANCE, CALORIES and PULSE and press MODE to 

confirm. 

4.  Press the START/STOP key to start a workout. Press UP or DOWN to adjust resistance level. 

5. 

Press the START/STOP key to pause the workout. Press RESET to return to main menu.


PROGRAM MODE 

1.  Press  UP  or  DOWN  to  select  a  workout  program,  choose 

“Program”,  and  press  MODE  to 

enter. 

2.  Press UP or DOWN to preset the workout time. 

3.  Press the START/STOP key to start a workout. Press UP or DOWN to adjust resistance level. 

4.  Press the START/STOP key to pause the workout. Press RESET to return to main menu. 


USER PROGRAM MODE 

1.  Press UP or DOWN to select a workout program, choose 

“User”, and press MODE to enter. 

2.  Press UP or DOWN to set the resistance level of each column and press MODE to enter the 

settings of the next column (there are 20 columns in total). 

3.  Hold the MODE key to finish the setting. 

4.  Press UP or DOWN to preset the workout time. 

5.  Press the START/STOP key to start a workout. Press UP or DOWN to adjust resistance level. 

6.  Press the START/STOP key to pause the workout. Press RESET to return to main menu. 

H.R.C. MODE (HEART RATE CONTROL) 

1.  Press UP or DOWN to select a workout program, choose 

“H.R.C.” and press MODE to enter. 

2.  Press UP or DOWN to select 55%, 75%, 90% or TAG (target heart rate; default = 100 bpm). 

Содержание IN 14168

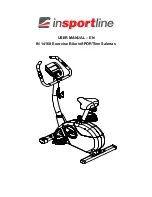
Страница 1: ...USER MANUAL EN IN 14168 Exercise Bike inSPORTline Salenas...

Страница 2: ...ETERS 3 ASSEMBLY 4 Package contents 5 Assembly steps 6 CONTROL PANEL 12 Display functions 12 Key functions 13 Operations 13 CORRECT WORKOUT POSITION 15 EXPLODED DRAWING 16 PARTS LIST 17 TERMS AND COND...

Страница 3: ...hing while exercising The loose parts could get stuck in parts of the machine Always wear sports shoes with rubber soles Place the machine on a flat and even surface It is not recommended to use or st...

Страница 4: ...4 ASSEMBLY...

Страница 5: ...M 4 Acorn nut for M8 bolt 2 M 2 Curved washer 8 19 2T 2 M 3 Washer 12 19 1T 4 M 5 Carriage bolt M8 75L 2 M 1 Allen Key 1 Box spanner 1 Screwdriver 1 Parts D B Main frame Handlebars C O Handlebar post...

Страница 6: ...ssembly steps STEP 1 1 Attach the front stabilizer I to the main frame D using two screws washers M 4 M 5 2 Attach the rear stabilizer J to the main frame D using two screws washers M 4 M 5 STEP 2 Scr...

Страница 7: ...EP 3 1 Affix the seat O onto the seat slider The slider can be adjusted to different angles Tighten the two nuts under the seat using a screwdriver Additionally the slider can be adjusted horizontally...

Страница 8: ...oles on the knob and the seat post align If you loosen the knob and move the seat post up and down the knob should lock into a hole in the seat post The maximum extension height is marked on the seat...

Страница 9: ...9 STEP 4 1 Connect the upper and lower sensor wire C 1 D 23 2 Insert the handlebar post C 3 into the main frame with screws D 24 and semi circular washers D 25 using an Allen wrench...

Страница 10: ...10 STEP 5 1 Pass the hand pulse wire B 3 through the hole 2 Affix the handlebar B onto the handlebar post C 3 using screws M 1 nuts M 2 and semi washers M 3...

Страница 11: ...11 STEP 6 Plug the wire B 3 C 1 and attach the computer A with 4 screws A 1 using a box wrench...

Страница 12: ...into a socket as pictured below CONTROL PANEL Display functions ITEM DESCRIPTION TIME Displays workout time during exercise Range 0 00 99 59 min SPEED Displays workout speed during exercise Range 0 0...

Страница 13: ...Watt constant training mode Key functions Operations POWER ON Plug the machine into the power supply The computer will power on and display all segments for 2 seconds After 4 minutes without pedaling...

Страница 14: ...s UP or DOWN to adjust resistance level 4 Press the START STOP key to pause the workout Press RESET to return to main menu USER PROGRAM MODE 1 Press UP or DOWN to select a workout program choose User...

Страница 15: ...isplay will show your heart rate recovery status in the range of F1 F6 1 0 OUTSTANDING 1 0 F 2 0 EXCELLENT 2 0 F 2 9 GOOD 3 0 F 3 9 FAIR 4 0 F 5 9 BELOW AVERAGE 6 0 POOR NOTE 1 When the user stops ped...

Страница 16: ...16 EXPLODED DRAWING...

Страница 17: ...L 1 D 2 Knob 1 G 5 Wave washer 2 D 3 Sensor wire 1 G 6 Flat washer 1 D 4 DC wire 1 G 7 Hexagonal screw M6 P1 0 12L 1 D 5 Screw M4 10L 1 G 8 Idler spring 1 D 6 Sensor fixed bracket 1 G 9 Idler 1 D 7 Fl...

Страница 18: ...Street 35 878 Prague 13000 Company Registration Number 26847264 registered in the Trade Register at Regional Court in Prague Section C Insert No 116888 According to valid legal regulations it depends...
Страница 19: ...itions were not fulfilled or in the case of reporting the defect by mistake etc the Seller is eligible to require a compensation for all the costs arising from the repair The cost shall be calculated...

Страница 20: ...SK INSPORTLINE s r o Headquarters Warranty Service centre Elektricna 6471 911 01 Trencin Slovakia CRN 36311723 VAT ID SK2020177082 Phone 421 0 326 526 701 E mail objednavky insportline sk reklamacie i...

Отзывы: