background image

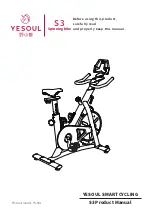
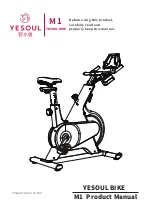
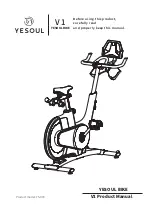
 V1 Product Manual

Product model: YS-003

Before using this product,
carefully read
and properly keep this manual.

V 1

YESOUL BIKE

YESOUL BIKE

Summary of Contents for V1

Page 1: ...V1 Product Manual Product model YS 003 Before using this product carefully read and properly keep this manual V 1 YESOUL BIKE YESOUL BIKE...

Page 2: ...t limit Rated maximum load Net weight Gross weight Overall dimensions Maximum tablet width 260mm iOS 10 0 or higher Android 5 0 or higher Magnetron resistance system Belt drive Button battery model CR...

Page 3: ...peed or high intensity sports Before attempting any high intensity short sprints pay attention to the body state and posture and apply a controllable speed 11 Wear professional cycling clothes or tigh...

Page 4: ...ground pipe assembly Rear ground pipe assembly Handle Elastic washer 8 2 1t Flat washer M8 D16 d8 5 1 5t Hexagon socket button head screw M8 P1 25 16L Screen bracket Hexagon socket button head screw...

Page 5: ...right Dumbbell set 1kg EA NO Name Quantity Picture Elastic washer 6 1 6t Accessories List Tools List Hex key 4mm 70LX25L Hex key 5mm 100LX30L Box ended wrench 8 10mm Box ended wrench 13 14 15 17 mm NO...

Page 6: ...se it may result in deformation 3 Check and con rm the adjusting footpad is fully locked into the front ground pipe assembly 1 Install the rear ground pipe assembly and tighten it with the hex key B a...

Page 7: ...d seat and lock the same onto the stand column with 2 sets of hexagon socket button head screws and elastic washers via the hex key B Place the handle on the handle bracket and lock the same with 4 se...

Page 8: ...hone holder align the support on the back of the holder with the screen bracket lock two sets of elastic washer and hexagon socket screw on the bracket via the hex key B As shown in the gure clip the...

Page 9: ...riding is not recommended as it is likely to loosen pedals After reverse riding check whether the pedals are locked in order to avoid safety issues arising from loose pedals 1 Take out the pedal assem...

Page 10: ...ove the two cruciform slot screws on the electronic control plate and pull out the plate from the back do not pull hard for the power cord on the back are connected to the cycle body remove the used b...

Page 11: ...ovement of hardware and software and optimization of design this manual may be inconsistent with the purchased product In case of any discrepancy in appearance interface and color the actual product s...

Page 12: ...charge on the product membership page as indicated on the interface APP installation and registration 1 You can scan the QR code above to download the Chinese or international version of APP and regi...

Page 13: ...e knob has been clamped in the hole of the column Tighten the knob as much as possible Loosen pull out and hold the rear column knob with one hand and lift or press the saddle with the other hand to t...

Page 14: ...ighten the knob as much as possible 4 Body level adjustment There are four adjustment pads at the bottom of the front and rear pedal tubes Screw these pads until they are tightly secured on the oor an...

Page 15: ...the same vertical line as the pedal that is the saddle is in the correct position Fig 3 3 o clock the right crank is parallel to oor in the right direction Fig 3 Saddle height Put the feet together st...

Page 16: ...bar height Each user can set up the appropriate handlebar height based on his or her body height and riding experience Recommendation The handlebar should be slightly higher than the saddle for new us...

Page 17: ...roove to prevent the belt from jumping out of the groove Inspection of body screws Always check the screws of all body parts for loosening or falling and tighten or replace them in time Inspection of...

Page 18: ...03 V1 Bicicleta Antes de usar el producto por favor lea detenidamente el manual de las instrucciones y gu rdelo bien Manual de instrucciones del producto VI Bicicleta YESOUL Escanee el c digo para ver...

Page 19: ...Peso neto Peso bruto Dimensiones del espacio La anchura m xima para disponer la tableta consiste en 260mm Versiones superiores a iOS 10 0 las superiores a Android 5 0 con las mismas incluidas Sistema...

Page 20: ...conformidad de examen f sico Preste atenci n primero al estado f sico y postura estableciendo una velocidad que se puede controlar antes de intentar cualquier sprint a distancia corta de alta intensid...

Page 21: ...erra delanteros Conjunto de tubo de suelo trasero Manillar Arandela el stica 8 2 1t Junta plana M8 D16 d8 5 1 5t Tornillo de cabeza cil ndrica con hex gono interior M8 P1 25 16L Soportes de pantalla T...

Page 22: ...m 70L 25L Llave hexagonal en L 5mm 100L 30L Llave de boca doble 8 10 mm Llave de boca doble 13 14 15 17mm L R Para su comodidad algunos de los accesorios vienen montados de f brica en la carrocer a 1...

Page 23: ...Por favor aseg rese de que las patas de ajuste est n completamente bloqueadas en su lugar antes de montar el conjunto contra el tubo del suelo 1 Coloque el conjunto del tubo de tierra pegajoso delante...

Page 24: ...s el sticas y los tornillos hexagonales de cabeza redonda plana con una llave hexagonal en forma de L B Introduzca el soporte de la pantalla en el conector del bloque de jaci n y je los 2 juegos de to...

Page 25: ...soporte de la pantalla y f jelo al soporte con 2 juegos de tornillos hexagonales de cabeza redonda plana como se muestra Retire el soporte de la tableta tel fono alinee el soporte de la parte posterio...

Page 26: ...e a ojaran f cilmente Compruebe por favor si los pedales est n bloqueados de nuevo despu s de la marcha atr s a nes de evitar problemas de seguridad debido a los pedales sueltos Gu a de instalaci n PA...

Page 27: ...tituir la bater a retire los dos tornillos con ranura en cruz del panel trasero tire del panel hacia atr s los cables de la parte trasera est n conectados al cuerpo no los arrastre retire la bater a v...

Page 28: ...nterfaces color etc Instalaci n completa lo indicado abajo solo sirve de referencia dependi ndose del caso real de compra Advertencia de seguridad Ajuste la bicicleta a su propia condici n antes de us...

Page 29: ...ina de a liaci n del producto y siga las instrucciones de la interfaz para obtener la a liaci n gratuita O Registro de la instalaci n de la APP 1 Puede escanear el c digo QR de arriba para descargar l...

Page 30: ...jero de la columna luego enrosque el pomo hasta el estado m s apretado 2 Ajustar la altura del sill n Con una mano a oje el pomo de la columna trasera y tire de l hacia fuera y mant ngalo ah con la ot...

Page 31: ...ndolo a la posici n requerida luego gire la perilla para su estado m s apretado 4 Ajustar el nivel del cuerpo En la parte inferior de las patas delanteras y traseras hay cuatro pies ajustables que se...

Page 32: ...a que la pierna pueda extenderse completamente Fig 2 La posici n delantera y trasera del sill n Coloque el zapato derecho en la cubierta del pie pise el pedal y pare en la posici n de las 3 en punto p...

Page 33: ...suario puede determinar una altura adecuada de manillar seg n su altura propia y las experiencias de ciclismo Aconsejamos que para los usuarios nuevos imagen 1 el manillar debe ser un poco alto que el...

Page 34: ...a correa salte fuera de la ranura Revisar los tornillos del cuerpo Revise frecuentemente los tornillos de diversas partes del cuerpo para comprobar si est n sueltos o se han ca do se deben apretar o s...

Page 35: ......

Page 36: ......

Page 37: ......

Reviews: