background image

98

IS-TV040928 TV de 27" listo para alta definición

www.insignia-products.com

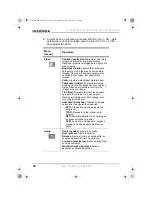
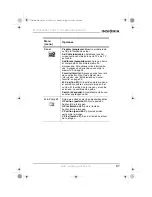
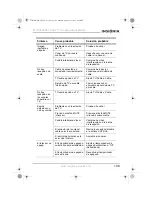
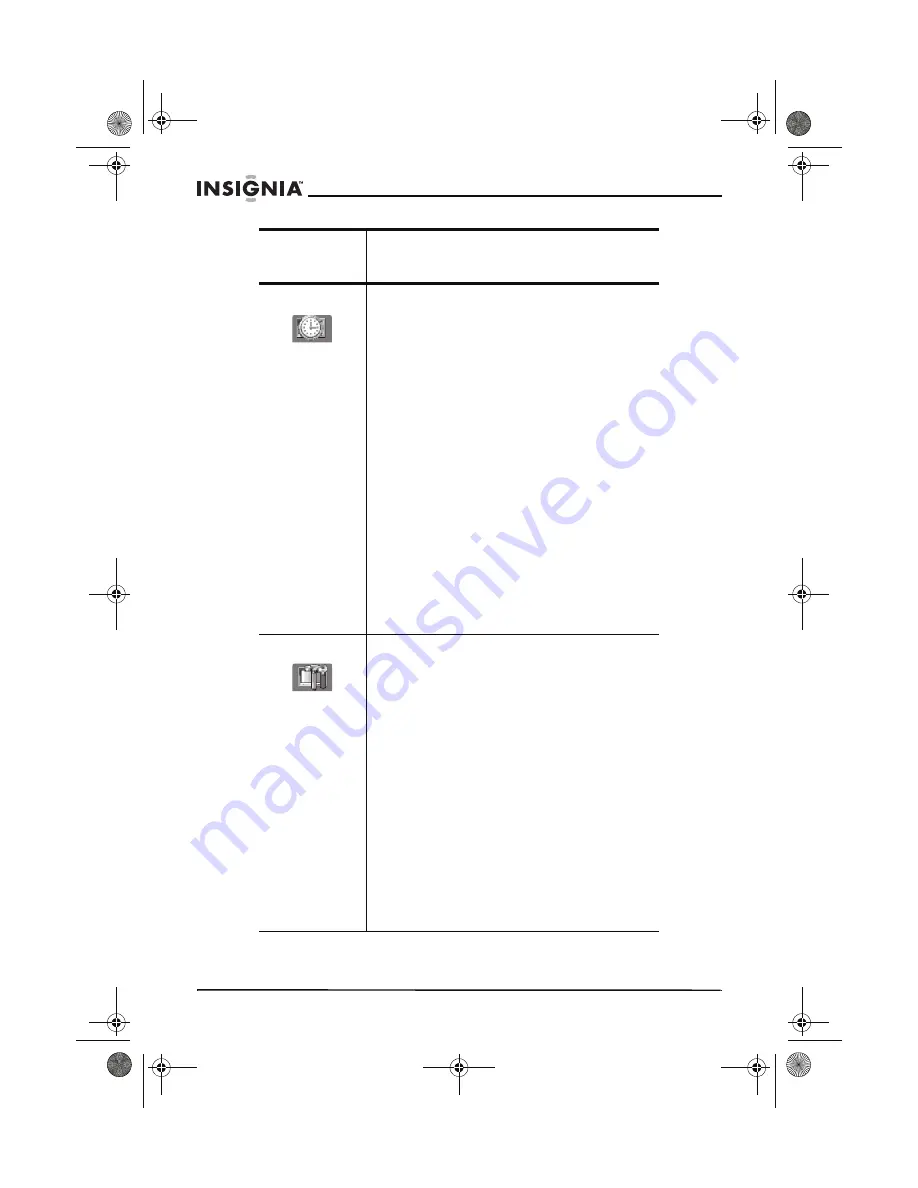
Time (tiempo)

Timer Off (temporizador de apagado)

Ajusta el tiempo que quiere que el TV listo 
para alta definición espere antes de apagarse 
automáticamente.

Timer On (temporizador de encendido)

Ajusta el tiempo que quiere que el TV listo 
para alta definición espere antes de 
encenderse automáticamente.

Timer Pr. (temporizador predeterminado)

Ajusta el tiempo que quiere que el TV listo 
para alta definición espere antes de sintonizar 
un canal predeterminado. Use la opción del 
número de programa para predeterminar el 
canal.

Prog No. (número de programa)

Predetermina un canal para sintonización 
automática. Use la opción “Timer Pr.” Para 
ajustar la hora en la que quiere que su TV 
listo para alta definición sintonice el canal 
predeterminado.

Air/Cable (aire/cable)

–Después de 

establecer la opción de “Prog No.”, selecciona 
el modo de Air (antenna) o de Cable para el 
canal establecido en la opción de “Prog No.”

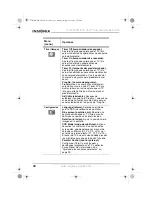
Configuración

Language (idioma)

–Selecciona el idioma 

para la OSD (visualización en pantalla).

Blue screen (pantalla azul)

–Muestra una 

pantalla azul cuando su TV listo para alta 
definición no recibe una señal de video.

Rotation (rotación)

–Ajusta la posición de la 

imagen en la pantalla.

CCD Mode (modo de subtítulos)

–Activa o 

desactiva los subtítulos. Cuando se activa 
esta opción, puede seleccionar el canal de 
datos de subtítulos (C1, C2, C3, o C4) y el 
canal de servicio de texto (T1, T2, T3, o T4). 
El canal de TV que esta viendo debe proveer 
los subtítulos para que esta opción funcione.

Parental Control (control paternal)

Configure el Chip-V para bloquear y 
desbloquear programas de TV y películas. 
Para obtener más información, vea 
“Ajustando los controles paternales” on 
page 99.

Menu 
(menú)

Opciones

27-inch HD Ready TV.book  Page 98  Monday, August 22, 2005  9:58 PM

Содержание IS-TV040928

Страница 1: ... Guide de l utilisateur Guía del Usuario TV de 27 po compatible HD TV de 27 listo para alta definición C M Y CM MY CY CMY K IS_27 inch HD Ready TV_FrontCvr pdf 8 22 2005 10 10 30 PM IS_27 inch HD Ready TV_FrontCvr pdf 8 22 2005 10 10 30 PM ...

Страница 2: ... HD Ready TV RETAIN INSTRUCTIONS Keep the safety and operating instructions for future reference HEED WARNINGS Follow to all warnings on your HD Ready TV and in the operating instructions FOLLOW INSTRUCTIONS Follow all operating and use instructions CLEANING Unplug your HD Ready TV from the wall outlet before cleaning Do not use liquid cleaners or aerosol cleaners Use a damp cloth for cleaning the...

Страница 3: ... your HD Ready TV in a built in installation such as a bookcase or rack unless you provide adequate ventilation or follow the manufacturer s instructions POWER SOURCE Operate your HD Ready TV only from the type of power source indicated on the rating plate If you are not sure of the type of power supply to your home consult your HD Ready TV dealer or local power company GROUNDING AND POLARIZATION ...

Страница 4: ...g an outside antenna system take extreme care to keep from touching such power lines or circuits because contact with them might be fatal OVERLOADING Do not overload wall outlets and extension cords because this can result in a risk of fire or electric shock OUTDOOR ANTENNA GROUNDING If an outside antenna or cable system is connected to your HD Ready TV make sure that the antenna or cable system i...

Страница 5: ...TV has been exposed to rain or water If your HD Ready TV does not operate normally by following the operating instructions Adjust only those controls that are covered by the operating instructions because an incorrect adjustment of other controls may result in damage and will often require extensive work by a qualified technician to restore your HD Ready TV to its normal operation If your HD Ready...

Страница 6: ...ctions when making any connections SOUND VOLUME Reduce the volume to the minimum level before you turn on your HD Ready TV Otherwise sudden high volume sound may cause hearing loss or speaker damage SOUND DISTORTION If your HD Ready TV outputs distorted sound for a long time the speakers may overheat and cause a fire HEADPHONES When you use the headphones keep the volume at a moderate level If you...

Страница 7: ...es signals from the remote control Do not block 3 Power indicator When your HD Ready TV is turned on the power indicator lights 4 TV AV button Press to change the video source 5 MENU button Press to open the on screen menu 6 VOL and VOL Press to decrease or increase the volume 7 CH and CH Press to change channels 1 4 5 6 7 2 3 27 inch HD Ready TV book Page 6 Monday August 22 2005 9 58 PM ...

Страница 8: ...e into these jacks 2 AV output Plug an external device such as a VCR or stereo into these AV output jacks 3 AV1 input Plug an external device such as a VCR into these jacks 4 AV2 input Plug an external device such as a video camcorder into these jacks 2 3 4 5 1 6 27 inch HD Ready TV book Page 7 Monday August 22 2005 9 58 PM ...

Страница 9: ...w insignia products com 5 COMPONENT2 Plug a component video device into these jacks 6 RF Plug your antenna cable TV or satellite dish into this jack Connection Description 27 inch HD Ready TV book Page 8 Monday August 22 2005 9 58 PM ...

Страница 10: ... Ready TV www insignia products com Remote control Button Description 1 Power Press to turn your HD Ready TV on and off 2 3 4 5 6 1 7 8 9 10 11 12 13 14 15 16 27 inch HD Ready TV book Page 9 Monday August 22 2005 9 58 PM ...

Страница 11: ...the current channel number and audio mode 7 AUDIO Press to select the audio mode 8 SCAN Press to scan through the available channels 9 PICTURE Press to select the picture mode 10 Last channel Press to return to the last channel you were watching 11 MENU Press to open the on screen display OSD 12 MUTE Press to mute the sound Press again to restore sound 13 FREEZE Press to freeze the picture Press a...

Страница 12: ... Installing the remote control batteries To install the remote control batteries 1 Open the battery cover 2 Insert two AAA batteries Make sure that the symbols on the battery match the marks inside the battery compartment 27 inch HD Ready TV book Page 11 Monday August 22 2005 9 58 PM ...

Страница 13: ...12 IS TV040928 27 HD Ready TV www insignia products com 3 Replace the battery cover REMOTE CONTROL SIGNAL RANGE 27 inch HD Ready TV book Page 12 Monday August 22 2005 9 58 PM ...

Страница 14: ...ady TV and the remote control When direct sunlight or an incandescent lamp fluorescent lamp or any other strong light shines on the remote sensor the remote control function may be unstable Do not try to recharge the batteries They are not intended to be recharged Use only the size and type of batteries specified Do not mix different types of batteries together or old batteries with fresh ones Whe...

Страница 15: ...er to the cable converter box input jack then connect another 75 Ω cable from the converter box output jack to the A jack on an A B switch box not supplied 3 Connect a 75 Ω cable from the splitter to the B jack on the A B switch box 4 Connect the A B switch box to the VHF UHF jack on the back of your HD Ready TV 5 To watch scrambled channels set the switch box to the A position set your HD Ready T...

Страница 16: ...tenna has a 300 Ω twin lead wire use a 300 75 Ω matching transformer not included To connect an outdoor VHF UHF antenna with separate VHF and UHF 300 Ω twin leads 1 Connect the UHF twin lead wire to a combiner not supplied 2 Connect the VHF twin lead to a 300 75 Ω matching transformer not supplied 3 Attach the transformer to the combiner 4 Attach the combiner to the antenna jack VHF UHF 75 Ω Combi...

Страница 17: ...f your VHF antenna has a twin lead wire use a 300 75 Ω matching transformer connect the transformer to the combiner Connecting external A V devices CONNECTING A VCR Use the following illustration to connect a VCR to the AV outputs on the back of your HD Ready TV UHF 300 Ω VHF 75 Ω Combiner VCR for recording Video and audio inputs Video and audio outputs Signal direction Yellow video White audio le...

Страница 18: ...A STEREO SYSTEM Use the following illustration to connect a stereo system to the AV outputs on the back of your HD Ready TV Signal direction Audio inputs Audio outputs White audio left mono Red audio right 27 inch HD Ready TV book Page 17 Monday August 22 2005 9 58 PM ...

Страница 19: ...e input menu 2 Press the CH or CH button to select AV1 or S VIDEO 3 Press the VOL or VOL button to confirm your selection Note For better video you can use the S VIDEO jack if your source supports it S Video input uses the same circuit as A V1 Only one of the jacks can be used S Video has priority if both connectors are inserted Yellow video White audio left mono Red audio right Signal direction S...

Страница 20: ...O THE AV 2 INPUTS Use the following illustration to connect an external A V device to the AV2 inputs on the side of your HD Ready TV Inputs Outputs Signal direction Yellow video White audio left mono Red audio right 27 inch HD Ready TV book Page 19 Monday August 22 2005 9 58 PM ...

Страница 21: ...to connect an external A V device to the component inputs on the side of your HD Ready TV DVD player Signal direction Set top box Signal direction Video outputs Video inputs Audio outputs Audio inputs Yellow video White audio left mono Red audio right Green Y Blue Pa Ca 27 inch HD Ready TV book Page 20 Monday August 22 2005 9 58 PM ...

Страница 22: ...our TV on or off Warning Your HD Ready TV is equipped with a polarized alternating current line plug a plug having one blade wider than the other This plug will fit into the power outlet only one way This is a safety feature If you are unable to insert the plug fully into the outlet try reversing the plug If the plug still does not fit contact your electrician to replace your obsolete outlet To pr...

Страница 23: ...ew seconds When you see a channel you want to watch press the SCAN button To watch a TV program when your HD Ready TV is connected to a cable TV converter box or satellite box 1 Turn on your HD Ready TV 2 Set your HD Ready TV to the output channel of the converter box or satellite box usually 3 or 4 3 Use the converter box or satellite box to select channels Selecting the picture mode You can sele...

Страница 24: ... the audio format You can select STEREO select if the TV program is broadcast in stereo SAP select if the TV program has a second audio program SAP MONO select if the TV program is broadcast in mono Adjusting HD Ready TV settings Your HD Ready TV has an on screen display OSD you can use to adjust various settings such as brightness contrast and audio You can also use the OSD to set timers and pare...

Страница 25: ...ases the level to show a smoother picture Tint Increases the color level to add more green to skin tones Decreases the color level to add more red to skin tones Advanced submenu You can select the following options DCTI Provides color transitions without bleeding TFNR Reduces noise snow in the picture DETI Maintains fine image detail in color saturated areas SVM Increases picture sharpness and pro...

Страница 26: ...sition Adjust the horizontal position of the picture H Size Adjust the horizontal size of the picture V Position Adjusts the vertical position of the picture V Size Adjusts the vertical size of the picture Time Timer Off Sets the amount of time you want your HD Ready TV to wait before automatically turning off Timer On Sets the amount of time you want your HD Ready TV to wait before automatically ...

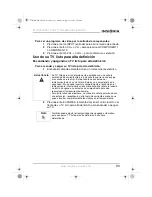
Страница 27: ...une to the channel you want to erase 2 Press the MENU button one or more times to open the CHANNEL menu 3 Press CH or CH to select Add Erase 4 Press the VOL or VOL button to select ON 5 To add the channel back to the list repeat these steps and select OFF Setup Language Selects the language for the OSD Blue screen Displays a blue screen when your HD Ready TV is not receiving a video signal Rotatio...

Страница 28: ...ton to select Parental Control 3 Press the number buttons to enter your password The default password is 0000 4 Press the CH or CH button to select Block 5 Press the VOL or VOL button to turn blocking on or off To block movies 1 Press MENU one or more times to open the SETUP menu 2 Press the CH or CH button to select Parental Control 3 Press the number buttons to enter your password The default pa...

Страница 29: ...uggestive dialogue 7 Press the VOL or VOL button to block or view the rating To block Canadian English ratings 1 Press MENU one or more times to open the SETUP menu 2 Press the CH or CH button to select Parental Control 3 Press the number buttons to enter your password The default password is 0000 4 Press the CH or CH button to select Canadian English 5 Press the VOL or VOL button to open the Cana...

Страница 30: ...lder 13 ans children 13 years of age and older 16 ans children 16 years of age and older 18 ans adults only 7 Press the VOL or VOL button to block or view the rating Specifications Note Design and specifications are subject to change without notice Power supply AC 120 V 60 Hz Power consumption 220 W Dimensions 30 W 20 5 D 22 8 H inches 76 2 W 52 1 D 57 9 H cm Weight 103 6 lbs 46 kg CRT 27 inch HD ...

Страница 31: ...nd is not clear Make sure that the outside antenna is connected correctly Reposition the outside antenna Picture shows a double or triple image but the sound is clear The multiple image is called ghosting Connect your HD Ready TV to an outside antenna Make sure that you use good quality cables and terminations Reposition the outside antenna Picture has lines waves and the sound is distorted Electr...

Страница 32: ...o sound TV station experiencing problems Try another channel MUTE button is pressed Press MUTE button again Possible local interference Check for source of reception disturbance Antenna Cable connector is not connected Check Cable connection or VHF UHF antenna Volume is set to minimum Increase volume TV Shuts off The Sleep Timer is set Set the Sleep Timer to Off The Off Timer is set Clear the Off ...

Страница 33: ...ate within 23 feet or reduce the light in the room There is an obstacle in the path of the beam Clear the path of the beam The batteries are weak Replace the batteries The batteries are not inserted correctly Insert correctly Symptom Possible cause Possible solution Parental Control is not working correctly BLOCK is set to Off Set BLOCK to On News or sports event being broadcast Parental Control d...

Страница 34: ...h case the user will be required to correct the interference at his own expense FCC CAUTION Pursuant to 47CFR Part 15 21 of the FCC rules any changes or modifications to this monitor not expressly approved by the manufacturer could cause harmful interference and would void the user s authority to operate this device 2005 Insignia Insignia and the Insignia logo are trademarks of Best Buy Enterprise...

Страница 35: ...me the property of Insignia and are not returned to you If service of products or parts are required after the Warranty Period expires you must pay all labor and parts charges This warranty lasts as long as you own your Insignia product during the Warranty Period Warranty coverage terminates if you sell or otherwise transfer the product HOW TO OBTAIN WARRANTY SERVICE If you purchased the product a...

Страница 36: ... PRODUCT ALL EXPRESS AND IMPLIED WARRANTIES FOR THE PRODUCT INCLUDING BUT NOT LIMITED TO ANY IMPLIED WARRANTIES OF AND CONDITIONS OF MERCHANTABILITY AND FITNESS FOR A PARTICULAR PURPOSE ARE LIMITED IN DURATION TO THE WARRANTY PERIOD SET FORTH ABOVE AND NO WARRANTIES WHETHER EXPRESS OR IMPLIED WILL APPLY AFTER THE WARRANTY PERIOD SOME STATES PROVINCES AND JURISDICTIONS DO NOT ALLOW LIMITATIONS ON H...

Страница 37: ... Conserver les instructions de sécurité et de fonctionnement pour toute référence ultérieure RESPECTER LES AVERTISSEMENTS Respecter tous les avertissements sur cet appareil ainsi que dans les instructions d utilisation OBSERVER LES INSTRUCTIONS Toutes les instructions d utilisation et de fonctionnement doivent être appliquées NETTOYAGE Débrancher l appareil de la prise murale avant tout nettoyage ...

Страница 38: ... d une source de chaleur Ne pas installer l appareil dans un meuble encastré comme une bibliothèque ou sur une étagère sauf si une ventilation adéquate a été prévue ou si les instructions du fabricant ont été respectées SOURCE D ALIMENTATION Ne brancher cet appareil qu à la source d alimentation indiquée sur la plaque signalétique de l appareil En cas d incertitude sur la tension d alimentation él...

Страница 39: ... autres circuits d alimentation et électriques ni à un emplacement où elle pourrait tomber sur de tels circuits ou lignes électriques Lors de l installation d une antenne externe faire très attention à ne pas toucher de telles lignes électriques ou circuits car tout contact peut être mortel SURCHARGE Les prises murales et les rallonges ne doivent pas être surchargées ce qui pourrait provoquer des ...

Страница 40: ... d autres dangers Toutes les réparations doivent être réalisées par du personnel qualifié DÉGÂTS NÉCESSITANT UN ENTRETIEN Débrancher cet appareil de la prise murale et utiliser les services d un technicien qualifié dans les conditions suivantes Lorsque le cordon d alimentation ou la fiche sont endommagés Si un liquide a été répandu ou des objets sont tombés dans l appareil Si l appareil a été expo...

Страница 41: ...aliser les contrôles de sécurité de routine afin de déterminer que l appareil est en bon état de fonctionnement CHALEUR Installer l appareil à l écart de sources de chaleur telles que radiateurs bouches de chaleur fours ou autres appareils y compris les amplificateurs qui produisent de la chaleur BRANCHEMENT Pour connecter l appareil à d autres équipements mettre ces derniers hors tension et les d...

Страница 42: ...ule que la terre du câble doit être connectée au système de mise à la terre de l immeuble aussi prêt que possible du point d entrée du câble Caractéristiques Avant Élément Description 1 Touche Alimentation Appuyer sur cette touche pour mettre l appareil hors et sous tension 2 Capteur de la télécommande Reçoit les signaux de la télécommande Ne pas bloquer la transmission des signaux 3 Témoin de mis...

Страница 43: ...ionner la source d entrée vidéo 5 Touche MENU Permet d accéder au menu d écran ou d en sortir 6 VOL et VOL Appuyer sur cette touche pour augmenter ou diminuer le volume sonore 7 CH et CH Appuyer sur ces touches pour changer de canal Élément Description 2 3 4 5 1 6 27 inch HD Ready TV book Page 41 Monday August 22 2005 9 58 PM ...

Страница 44: ...nétoscope ou une stéréo dans ces prises AV 3 Entrée AV1 Brancher un périphérique externe tel qu un magnétoscope dans ces prises 4 Entrée AV2 Brancher un périphérique externe tel qu un caméscope dans ces prises 5 COMPONENT2 Brancher une composante vidéo dans ces prises 6 RF Brancher l antenne la TV câblée ou l antenne satellite dans cette prise 27 inch HD Ready TV book Page 42 Monday August 22 2005...

Страница 45: ...www insignia products com Télécommande Touche Description 1 Alimentation Appuyer sur cette touche pour mettre l appareil sous et hors tension 2 3 4 5 6 1 7 8 9 10 11 12 13 14 15 16 27 inch HD Ready TV book Page 43 Monday August 22 2005 9 58 PM ...

Страница 46: ...er le canal ou le mode d entrée activé 7 AUDIO Appuyer sur cette touche pour sélectionner le mode audio 8 SCAN Appuyer sur cette touche pour balayer les canaux TV disponibles 9 PICTURE Appuyer sur cette touche pour sélectionner le mode d image 10 Canal précédent Appuyer sur cette touche pour revenir au dernier canal visionné 11 MENU Appuyer sur cette touche pour accéder aux menus d écran OSD 12 MU...

Страница 47: ...installer les piles de la télécommande 1 Ouvrir le couvercle du compartiment à piles 2 Insérer deux piles de type AAA S assurer que les symboles sur la pile concordent avec les repères à l intérieur du compartiment des piles 16 ZOOM Appuyer sur cette touche agrandir l image Touche Description 27 inch HD Ready TV book Page 45 Monday August 22 2005 9 58 PM ...

Страница 48: ...TV de 27 po compatible HD www insignia products com 3 Remettre le couvercle du compartiment des piles en place RAYON DE FONCTIONNEMENT DE LA TÉLÉCOMMANDE 27 inch HD Ready TV book Page 46 Monday August 22 2005 9 58 PM ...

Страница 49: ...éviseur et la télécommande Le fonctionnement de la télécommande risque d être instable si le capteur du téléviseur est exposé à la lumière solaire directe à la lumière d une lampe incandescente d un tube fluorescent ou de toute source lumineuse puissante Ne pas tenter de recharger les piles Elles ne sont pas conçues pour cela N utiliser que la taille et le type de pile spécifiés Ne pas mélanger di...

Страница 50: ... décodeur puis raccorder un autre câble de 75 Ω de la prise de sortie du décodeur à la prise A d un commutateur A B non fourni 3 Raccorder un câble de 75 Ω du répartiteur à la prise B du commutateur A B 4 Raccorder le commutateur A B à la prise VHF UHF à l arrière de l appareil 5 Pour visualiser des canaux cryptés régler le commutateur en position A régler l appareil sur le canal de sortie du déco...

Страница 51: ... câble bifilaire de 300 Ω utiliser un transformateur compatible de 300 à 75 Ω non fourni Pour connecter une antenne extérieure VHF UHF avec câbles bifilaires VHF et UHF de 300 Ω 1 Connecter le câble bifilaire UHF à un mélangeur non fourni 2 Connecter le câble bifilaire VHF à un transformateur compatible 300 à 75 Ω non fourni 3 Relier le transformateur au mélangeur 4 Relier le mélangeur à la prise ...

Страница 52: ...âble bifilaire utiliser un transformateur compatible de 300 à 75 Ω puis connecter le transformateur au mélangeur Raccordement à des périphériques A V CONNEXION À UN MAGNÉTOSCOPE Utiliser l illustration ci après pour connecter un magnétoscope aux sorties AV situées à l arrière de l appareil UHF 300 Ω VHF 75 Ω Mélangeur Magnétoscope pour l enregistrement Entrées vidéo et audio Sorties vidéo et audio...

Страница 53: ...SYSTÈME STÉRÉO Utiliser l illustration ci après pour connecter un système stéréo aux sorties AV situées à l arrière de l appareil Direction du signal Entrées audio Sorties audio Blanc audio gauche mono Rouge audio droite 27 inch HD Ready TV book Page 51 Monday August 22 2005 9 58 PM ...

Страница 54: ...D 2 Appuyer sur CH ou CH pour sélectionner AV1 ou S VIDEO 3 Appuyer sur VOL ou VOL pour confirmer la sélection Remarque Pour obtenir une meilleure vidéo il est possible d utiliser la prise S Vidéo si la source la prend en charge L entrée S vidéo utilise le même circuit que A V1 Seulement l un d entre eux peut être utilisé S vidéo est prioritaire si les deux connecteurs sont branchés Jaune vidéo Bl...

Страница 55: ...AUX ENTRÉES AV 2 Utiliser l illustration ci après pour connecter un périphérique A V externes aux entrées AV2 situées sur le côté de l appareil Entrées Sorties Direction du signal Jaune vidéo Blanc audio gauche mono Rouge audio droite 27 inch HD Ready TV book Page 53 Monday August 22 2005 9 58 PM ...

Страница 56: ...ur connecter un périphérique A V externe aux entrées composantes situées sur le côté de l appareil Lecteurs de DVD Direction du signal Décodeur Direction du signal Sorties vidéo Entrées vidéo Sorties audio Entrées audio Jaune vidéo Blanc audio gauche mono Rouge audio droite Vert Y Bleu Pa Ca 27 inch HD Ready TV book Page 54 Monday August 22 2005 9 58 PM ...

Страница 57: ...rectement à un canal Pour un canal à un chiffre appuyer sur la touche jusqu à l affichage de puis appuyer sur la touche numérique correspondant au numéro de ce canal Pour un canal à deux chiffres appuyer sur la touche jusqu à l affichage de puis appuyer sur les touches numériques correspondant au numéro de ce canal Avertissement Cet appareil est équipé d une prise de courant CA polarisée à deux pl...

Страница 58: ...e sélectionner un mode de l image permettant d améliorer l affichage vidéo Chaque mode d image a ses propres réglages d image tels que la couleur la luminosité le contraste la netteté et la teinte Pour sélectionner le mode de l image Appuyer sur la touche PICTURE Image une ou plusieurs fois pour naviguer parmi les modes d image disponibles Sélections possibles Film pour des images fines Standard p...

Страница 59: ...ssion visualisée est diffusée en mode mono Réglage des paramètres de la TV compatible HD Cet appareil est doté de menus d écran OSD qui permettent de régler divers paramètres tels que la luminosité le contraste et l audio Il est aussi possible d utiliser l OSD pour régler les temporisations et les contrôles parentaux Pour utiliser l OSD 1 Appuyer sur la touche MENU de la télécommande une ou plusie...

Страница 60: ...la couleur pour ajouter plus de rouge aux tons chair Advanced Sous menu des fonctions avancées Il est possible de sélectionner les options suivantes DCTI Amélioration numérique de la transition des couleurs Empêche le chevauchement des couleurs TFNR Réduction de l erreur temporelle et filtrage du bruit Diminue les parasites neige de l image DETI Optimiseur des détails de la couleur Permet d obteni...

Страница 61: ... plus d informations se reporter à Configuration d un canal favori on page 60 M Fine Permet d améliorer la qualité défectueuse de l image ou du son En cas de bonne qualité d image ou de son ne pas modifier cette option Search Recherche Recherche automatiquement les canaux TV dotés d un signal H et V Uniquement pour les entrées de composantes vidéo Position H Permet de régler les paramètres de la p...

Страница 62: ...n hertzienne ou câble Quand l option du numéro de programme est réglée sélectionner Réception hertzienne ou câble pour le canal préréglé Configuration OSD Language Langue OSD Permet de sélectionner la langue d affichage à l écran Blue screen Écran bleu Affiche un écran bleu quand l appareil ne reçoit pas de signal vidéo Rotation Règle la position de l image sur l écran CCD Mode Sous titrage Permet...

Страница 63: ...er 4 Appuyer sur VOL ou VOL pour sélectionner ON Activé 5 Pour ajouter de nouveau le canal sur la liste répéter ces étapes et sélectionner OFF Désactivé Configuration du contrôle parental Le contrôle parental permet d interdire des émissions TV et des films en fonction de leur classification Pour accéder au contrôle parental il est nécessaire d utiliser un mot de passe CONFIGURATION DU MOT DE PASS...

Страница 64: ...ur CH ou CH pour sélectionner la classification à interdire Sélections possibles Autorisé G tout public PG avertissement aux parents suggéré PG 13 interdit aux moins de 13 ans R interdit NC 17 interdit aux moins de 17 ans X pour adultes uniquement 7 Appuyer sur Vol ou Vol pour interdire ou autoriser la classification Pour interdire les émissions de TV classifiées aux États Unis 1 Appuyer sur MENU ...

Страница 65: ...h Canada anglophone 5 Appuyer sur Vol ou Vol pour afficher le sous menu Canadian English Canada anglophone 6 Appuyer sur CH ou CH pour sélectionner la classification à interdire Sélections possibles E non classifié C enfants C8 interdit aux enfants de moins de 8 ans G tout public PG avertissement aux parents suggéré 14 interdit aux enfants de moins de 14 ans 18 au dessus de 18 ans 7 Appuyer sur Vo...

Страница 66: ...ssification Caractéristiques Remarque La conception et les spécifications sont sujettes à modifications sans avis préalable Problèmes et solutions Utiliser les informations suivantes pour dépanner les problèmes les plus courants Alimentation CA 120 V 60 Hz Consommation électrique 220 W Dimensions 30 L 20 5 P 22 8 H pouces 76 2 L 52 1 P 57 9 H cm Poids 103 6 livres 46 kg TRC 27 po compatible HD Sor...

Страница 67: ...r S assurer que l antenne extérieure est correctement branchée Repositionner l antenne extérieure Image dédoublée ou triple mais le son est clair L image multiple est appelée image fantôme Connecter l appareil à une antenne extérieure S assurer d utiliser des câbles et des connecteurs de bonne qualité Repositionner l antenne extérieure L image forme des lignes vagues et le son est déformé Une inte...

Страница 68: ...13 TV Câble réglé sur TV Régler l option TV Câble sur Câble Pas de son ou son médiocre La chaîne de télévision a des problèmes Essayer un autre canal La touche MUTE Sourdine est enfoncée Appuyer de nouveau sur la touche MUTE Sourdine Interférences locales possibles Vérifier la source de brouillage de la réception Le connecteur de l antenne du réseau câblé n est pas branché Vérifier la connexion au...

Страница 69: ...on d alimentation CA à une prise électrique CA Anomalie Cause éventuelle Solution possible La télécommande ne fonctionne pas La télécommande n est pas orientée vers le capteur Orienter la télécommande vers le capteur de télécommande La distance est trop grande ou l éclairage de la pièce est excessif Utiliser la télécommande dans un rayon de 23 pieds ou réduire le niveau d éclairage de la pièce Un ...

Страница 70: ...mercial Ce matériel génère utilise et peut rayonner de l énergie radiofréquence S il n est pas installé et utilisé conformément aux instructions il peut provoquer des interférences nuisibles aux communications radio Son utilisation dans une zone résidentielle peut également causer des interférences nuisibles Dans ce cas il incombe à l utilisateur de remédier à ce problème à ses propres frais Anoma...

Страница 71: ...s 1 MAIN D OEUVRE Pendant la période de garantie si ce produit est considéré comme étant défectueux Insignia le réparera ou le remplacera à sa convenance gratuitement ou paiera les frais de main d œuvre à tout service de réparation agréé par Insignia Au delà de la période de garantie l utilisateur sera redevable de tous les frais afférents à la main d œuvre 2 PIÈCES DÉTACHÉES En outre Insignia fou...

Страница 72: ...produits ou pièces nécessitent une réparation après l expiration de la Période de garantie l acheteur devra payer tous les frais de main d œuvre et les pièces Cette garantie reste en vigueur tant que l acheteur reste propriétaire du produit Insignia pendant la Période de garantie La garantie prend fin si le produit est revendu ou transféré d une quelconque façon que ce soit à tout autre propriétai...

Страница 73: ... AUCUNE AUTRE GARANTIE EXPRESSE RELATIVE À CE PRODUIT TOUTES LES GARANTIES EXPRESSES OU IMPLICITES POUR CE PRODUIT Y COMPRIS MAIS SANS LIMITATION TOUTE GARANTIE DE QUALITÉ MARCHANDE D ADÉQUATION À UN BUT PARTICULIER SONT LIMITÉES À LA PÉRIODE DE GARANTIE APPLICABLE TELLE QUE DÉCRITE CI DESSUS ET AUCUNE GARANTIE EXPRESSE OU IMPLICITE NE S APPLIQUERONT APRÈS LA PÉRIODE DE GARANTIE CERTAINS ÉTATS ET ...

Страница 74: ...E LAS INSTRUCCIONES Guarde las instrucciones de seguridad y operación para referencia futura PRESTE ATENCIÓN A LAS ADVERTENCIAS Preste atención a todas las advertencias sobre su TV listo para alta definición y las instrucciones de operación SIGA LAS INSTRUCCIONES Siga todas las instrucciones de operación y uso LIMPIEZA Desconecte su TV listo para alta definición del tomacorriente en la pared antes...

Страница 75: ... Ranuras y aberturas en el gabinete en y en la parte posterior o inferior se proveen por ventilación para asegurar la operación confiable del TV listo para alta definición y para protegerlo contra el sobrecalentamiento Estas aberturas no se deben bloquear ni cubrir No coloque el TV listo para alta definición en una cama un sofá una alfombra u otra superficie similar No coloque su TV listo para alt...

Страница 76: ...tipo de enchufe con conexión a tierra PROTECCIÓN DEL CABLE DE ALIMENTACIÓN Los cables de alimentación eléctrica deben colocarse de manera que no se pisen o sean aplastados por artículos colocados sobre ellos o contra ellos Preste especial atención a los cables de enchufes receptáculos y al punto en que salen del TV listo para alta definición RAYOS Para proteger su TV listo para alta definición dur...

Страница 77: ...BJETOS Y LÍQUIDOS Nunca inserte objetos de ningún tipo a través de las aberturas del TV listo para alta definición ya que estos pueden tocar puntos de voltaje peligrosos o hacer cortocircuito con otros componentes lo cual puede causar un incendio o choque eléctrico Nunca derrame ni rocíe líquidos de ninguna clase sobre el TV listo para alta definición REPARACIÓN No trate de reparar este TV listo p...

Страница 78: ...definición muestra un cambio evidente en el funcionamiento esto indica que se necesita reparación PIEZAS DE REPUESTO Cuando se necesitan repuestos asegúrese de que el técnico de reparación use repuestos especificados por el fabricante o que tengan las mismas características que la parte original Las substituciones no autorizadas pueden resultar en incendio choque eléctrico u otros peligros VERIFIC...

Страница 79: ...io AUDÍFONOS Al usar los audífonos mantenga el volumen a un nivel moderado Si usa los audífonos continuamente con sonido de volumen alto esto puede causar daño al oído NOTA PARA EL INSTALADOR DEL SISTEMA DE TV POR CABLE Este recordatorio se proporciona para que el instalador del sistema de cable preste atención al Artículo 820 40 del NEC el cual proporciona pautas para una correcta conexión a tier...

Страница 80: ... del control remoto Recibe señales del control remoto No se debe cubrir 3 Indicador de alimentación Cuando su TV listo para alta definición esta encendido el indicador de alimentación se ilumina 4 Botón TV AV Presionar para cambiar la fuente de video 5 Botón MENU Presione para acceder o cerrar el menú de pantalla 6 VOL y VOL Presione para aumentar o reducir el volumen 1 4 5 6 7 2 3 27 inch HD Read...

Страница 81: ... Conecte un dispositivo de video por componentes en estos conectores 2 AV salida Conecte un dispositivo externo tal como una videograbadora o estéreo a estas tomas de salida de AV 3 AV1 entrada Conecte un dispositivo externo como una videograbadora en estas tomas Componente Descripción 2 3 4 5 1 6 27 inch HD Ready TV book Page 78 Monday August 22 2005 9 58 PM ...

Страница 82: ...ecte un dispositivo externo como una videograbadora en estas tomas 5 COMPONENT2 Conecte un dispositivo de video por componentes en estas tomas 6 RF Conecte su antena TV por cable o antena de satélite en esta toma Conexión Descripción 27 inch HD Ready TV book Page 79 Monday August 22 2005 9 58 PM ...

Страница 83: ...ición www insignia products com Control remoto Botón Descripción 1 Alimentación Presione para encender y apagar su TV listo para alta definición 2 3 4 5 6 1 7 8 9 10 11 12 13 14 15 16 27 inch HD Ready TV book Page 80 Monday August 22 2005 9 58 PM ...

Страница 84: ... y el modo de audio 7 AUDIO Presione para seleccionar el modo del audio 8 SCAN escanear Presione para escanear canales los canales de TV disponibles 9 PICTURE imagen Presione para seleccionar el modo de imagen 10 Last channel último canal Presione para regresar al último canal que se estaba viendo 11 MENU menú Presione para mostrar la visualización en pantalla OSD 12 MUTE silenciar Presionar para ...

Страница 85: ...inición Instalación de las pilas del control remoto Para instalar las pilas del control remoto 1 Abra la cubierta de las pilas 2 Inserte dos pilas AAA Asegúrese de que los símbolos en la pila hagan juego con las marcas en el compartimiento de las pilas 27 inch HD Ready TV book Page 82 Monday August 22 2005 9 58 PM ...

Страница 86: ...040928 TV de 27 listo para alta definición www insignia products com 3 Vuelva a colocar la cubierta de las pilas RANGO DE SEÑAL DEL CONTROL REMOTO 27 inch HD Ready TV book Page 83 Monday August 22 2005 9 58 PM ...

Страница 87: ... el sensor del control remoto al frente de su TV listo para alta definición y el control remoto El funcionamiento del control remoto puede ser inestable si el sensor del control remoto recibe luz solar directa luz de una lámpara incandescente o fluorescente o cualquier otro tipo de luz fuerte No intente recargar las pilas No están diseñadas para ser recargadas Use sólo el tamaño y tipo de pilas es...

Страница 88: ...ego conecte otro cable de 75 Ω desde el conector de salida de la caja conversora al conector A en la caja conmutadora de A B no incluida 3 Conecte un cable de 75 Ω desde el divisor al conector B en la caja conmutadora de A B 4 Conectar la caja conmutadora de A B al conector VHF UHF en la parte posterior de su TV listo para alta definición 5 Para ver los canales codificados ajuste la caja conmutado...

Страница 89: ...onductores de 300 Ω use un transformador de empalme de 300 75 Ω no suministrado Para conectarse a una antena de VHF UHF exterior con conductores dobles de 300 Ω separados para VHF y UHF 1 Conecte el conductor doble de UHF a un combinador no suministrado 2 Conecte el cable de VHF de dos conductores a un transformador de empalme de 300 75 Ωv no suministrado 3 Conecte el transformador al combinador 4...

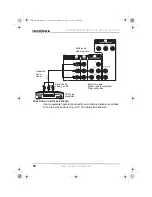
Страница 90: ... 2 Conecte el combinador al conector de la antena O Si su antena de VHF tiene un cable de dos conductores use un transformador de empalme de 300 75 Ω luego conecte el transformador al combinador Conexión a dispositivos de A V externos CONEXIÓN DE UN VCR Use la siguiente ilustración para conectar una videograbadora a las salidas de AV en la parte posterior de su TV listo para alta definición UHF de...

Страница 91: ...e figura para conectar un sistema estéreo a las salidas AV en la parte posterior de su TV listo para alta definición VCR para grabación Entradas de video y audio Salidas de video y audio Dirección de la señal Amarillo video Blanco audio izq mono Rojo audio der 27 inch HD Ready TV book Page 88 Monday August 22 2005 9 58 PM ...

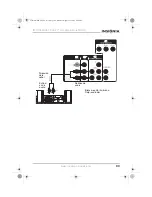
Страница 92: ...V de 27 listo para alta definición www insignia products com Dirección de la señal Entrad as de audio Salidas de audio Blanco audio izq mono Rojo audio der 27 inch HD Ready TV book Page 89 Monday August 22 2005 9 58 PM ...

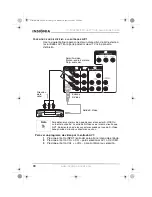
Страница 93: ...ara abrir el menú de entrada 2 Presione el botón CH o CH para seleccionar AV1 o S VIDEO 3 Presione el botón VOL o VOL para confirmar su selección Nota Para obtener un mejor video puede usar el conector S VIDEO si su fuente lo soporta La entrada S Video usa el mismo circuito que A V1 Solamente uno de los conectores puede ser usado S Video tiene prioridad si los dos conectores se usan Amarillo video...

Страница 94: ...ENTRADAS AV 2 Use la siguiente figura para conectar un dispositivo de A V externo a las entradas AV2 en la parte posterior de su TV listo para alta definición Entradas Salidas Dirección de la señal Amarillo video Blanco audio izq mono Rojo audio der 27 inch HD Ready TV book Page 91 Monday August 22 2005 9 58 PM ...

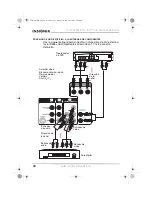
Страница 95: ...spositivo de A V externo a las entradas de componentes al lado de su TV listo para alta definición Reproductor de DVD Dirección de la señal Caja digital Dirección de la señal Salidas de video Entradas de video Salidas de audio Entradas de audio Amarillo video Blanco audio izq mono Rojo audio der Verde Y Azul Pa Ca 27 inch HD Ready TV book Page 92 Monday August 22 2005 9 58 PM ...

Страница 96: ...agar su TV Advertencia Su TV listo para alta definición está equipado con un enchufe polarizado de corriente alterna un enchufe que tiene una espiga más ancha que la otra Este enchufe se conecta en el tomacorriente de una sola forma Esta es una característica de seguridad Si no puede insertar completamente el enchufe en el tomacorriente intente darle vuelta al enchufe Si el enchufe todavía no entr...

Страница 97: ...canales uno por uno Cada canal aparece por unos segundos Cuando vea un canal que desea ver presione el botón SCAN Para ver un programa de TV cuando su TV listo para alta definición está conectado a una caja conversora o de satélite 1 Encienda su TV listo para alta definición 2 Ajuste su TV listo para alta definición al canal de salida de la caja conversora o de satélite usualmente 3 ó 4 3 Use la c...

Страница 98: ...del formato del audio Para seleccionar el formato del audio Presione el botón STEREO estéreo para seleccionar el formato del audio Se puede seleccionar STEREO estéreo Seleccione si el programa de TV se transmite en estéreo SAP programa de audio secundario Seleccione si el programa de TV tiene un programa de audio secundario SAP MONO Seleccione si el programa de TV esta transmitido en mono Cambiand...

Страница 99: ...ás limpias y claras Reduce el nivel para mostrar una imagen más suavizada Tint tinte Aumenta el nivel de color para agregar más verde a los tonos de piel Reduce el nivel de color para agregar más rojo a los tonos de piel Advanced Avanzado submenú Puede seleccionar las siguientes opciones DCTI Provee transiciones de color sin sangrado TFNR Reduce el ruido nieve en la imagen DETI Mantiene detalles f...

Страница 100: ...oritos Para obtener más información vea Estableciendo un canal favorito on page 99 M Fine fino M Si la calidad de la imagen o el sonido son pobres mejora la imagen o el sonido Si la calidad de la imagen y el sonido es buena no cambie esta opción Search búsqueda Automáticamente busca canales que tengan señal H V H y V Solo para entradas de video de componentes H Position posición H Ajusta posición ...

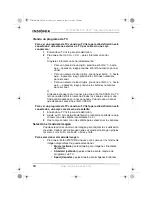
Страница 101: ...ado Air Cable aire cable Después de establecer la opción de Prog No selecciona el modo de Air antenna o de Cable para el canal establecido en la opción de Prog No Configuración Language idioma Selecciona el idioma para la OSD visualización en pantalla Blue screen pantalla azul Muestra una pantalla azul cuando su TV listo para alta definición no recibe una señal de video Rotation rotación Ajusta la...

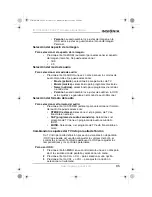
Страница 102: ...e quiere borrar 2 Presione el botón MENU una o más veces para abrir el menú CHANNEL canal 3 Presione el botón CH o CH para seleccionar Add Erase agregar borrar 4 Presione el botón VOL o VOL para seleccionar ON activado 5 Para agregar de nuevo el canal a la lista repita estos pasos y seleccione OFF desactivado Ajustando los controles paternales Los controles paternales le permiten bloquear programa...

Страница 103: ...preestablecida es 0000 4 Presione el botón CH o CH para seleccionar MPAA Rating clasificación de MPAA 5 Presione botón Vol o Vol para abrir el submenú de clasificación de MPAA 6 Presione el botón CH o CH para seleccionar la clasificación que desea bloquear Se puede seleccionar Unblocked desbloqueado G general audiences audiencias generales PG parental guidance suggested guía paternal recomendada P...

Страница 104: ...loquear clasificaciones de TV canadienses en inglés 1 Presione el botón MENU una o más veces para abrir el menú SETUP ajustes 2 Presione el botón CH o CH para seleccionar Parental Control control paternal 3 Presione los botones numéricos para ingresar su contraseña La contraseña preestablecida es 0000 4 Presione el botón CH o CH para seleccionar Canadian English inglés canadiense 5 Presione botón ...

Страница 105: ... seleccionar la clasificación que desea bloquear Se puede seleccionar E sin clasificación G niños 8 ans niños de por lo menos 8 años 13 ans niños de por lo menos 13 años 16 ans niños de por lo menos 16 años 18 ans solo para adultos 7 Presione el botón VOL o VOL para bloquear o ver la clasificación Especificaciones Nota El diseño y las especificaciones están sujetos a cambio sin previo aviso Fuente...

Страница 106: ...e 27 listo para alta definición www insignia products com Sistema de TV NTSC M Impedancia de la antena VHF UHF 75 Ω Accesorios Control remoto Guía del usuario 27 inch HD Ready TV book Page 103 Monday August 22 2005 9 58 PM ...

Страница 107: ... interferencia y el sonido no está claro Asegúrese de que la antena externa esté conectada correctamente Reubique la antena exterior La pantalla muestra imágenes dobles o triples pero el sonido esta claro Las imágenes múltiples se llaman ghosting fantasmas Conecte su TV listo para alta definición a una antena exterior Asegúrese de que use cables y terminaciones de alta calidad Reubique la antena e...

Страница 108: ...os canales superiores al 13 TV cable ajustado a TV Ajuste TV Cable a Cable Sonido defectuoso o no hay sonido Problemas con la estación de TV Pruebe otro canal Presionó el botón MUTE silenciar Presione el botón MUTE silenciar nuevamente Posible interferencia local Compruebe si hay interferencia con la fuente de recepción El conector de la antena cable no está conectado Revise la conexión del cable ...

Страница 109: ... no está conectado Conecte el cable de alimentación de CA a una tomacorriente eléctrico Síntoma Causa probable Solución probable El control remoto no funciona El control remoto no está apuntando al sensor Apunte el control remoto al sensor remoto La distancia es excesiva o hay demasiada luz en la habitación Reduzca la distancia a menos de 23 pies o reduzca la luz en la habitación Existe un obstácu...

Страница 110: ...l equipo funciona en un ambiente comercial Este equipo genera usa y puede emitir energía de radiofrecuencia Si no se instala y usa de acuerdo con el manual de instrucciones este aparato puede causar interferencias perjudiciales a las comunicaciones de radio Es probable que la operación de este equipo en un área residencial cause interferencias dañinas en cuyo caso el usuario deberá corregir la int...

Страница 111: ...eberá cubrir todos los gastos de mano de obra 2 REPUESTOS Además Insignia proveerá sin costo alguno repuestos ya sean nuevos o como nuevos como reemplazo de los componentes que se encuentren defectuosos durante el Período de Garantía Después del período de garantía usted deberá cubrir todos los gastos ocasionados por los repuestos Para obtener servicio de garantía usted deberá llevar el Producto c...

Страница 112: ...ductos y repuestos reemplazados bajo esta garantía se volverán propiedad de Insignia y no se le regresarán a usted Si se requiere la reparación de productos o partes después de que se vence el Período de Garantía usted deberá pagar todos los costos de mano de obra y de repuestos Esta garantía estará vigente con tal que usted sea el dueño de su producto Insignia durante el periodo de garantía El al...

Страница 113: ...E NINGUNA OTRA GARANTÍA EXPRESA CON RESPECTO AL PRODUCTO TODAS LAS GARANTÍAS EXPRESAS E IMPLÍCITAS DE ESTE PRODUCTO INCLUYENDO PERO SIN LIMITARSE A CUALQUIER GARANTÍA IMPLÍCITA DE O CONDICIONES DE COMERCIALIZACIÓN O IDONEIDAD PARA UN USO PARTICULAR ESTÁN LIMITADAS EN DURACIÓN AL PERÍODO DE GARANTÍA DECLARADO ANTERIORMENTE Y NINGUNA GARANTÍA YA SEA EXPRESA O IMPLÍCITA SE APLICARÁ DESPUÉS DEL PERÍOD...

Страница 114: ...of their respective owners 2005 produits Insignia Tous droits réservés Tous les autres produits ou noms de marques sont des marques de commerce qui appartiennent à leurs proprié taires respectifs 2005 productos Insignia Todos los derechos reservados Todos los demás productos y marcas son marcas comerciales registradas de sus respectivos dueños C M Y CM MY CY CMY K IS_BACK CVR Half A4 _press pdf 8 ...

Отзывы: