background image

INFOSEC UPS SYSTEM - 15, rue du Moulin - 44880 Sautron - FRANCE - www.infosec-ups.com 

Hot Line – Tel + 33 (0)2 40 76 15 82 - Fax + 33 (0)240 94 29 51 - [email protected] – 07 19 AA 36 205 09 

17 

A F T E R   S A L E S   S E R V I C E  


IMPORTANT! 


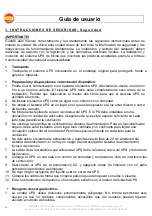
When calling the After-Sales Department, please have the following information ready, it will be 

required regardless of the problem: UPS model, serial number and date of purchase.  

Please  provide  an  accurate  description  of  the  problem  with  the  following  details:  type  of 

equipment powered by the UPS, indicator led status, alarm status, installation and environmental 

conditions. 

You will find the technical information you require on your guarantee or on the identification plate 

on the back of the unit. If convenient you may enter the details in the following box.  


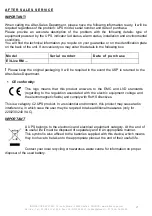
Model 

Serial number 

Date of purchase 

E3 Live RM … 


Please keep the original packaging. It will be required in the event the USP is returned to the 

After-Sales Department. 


CE conformity: 


This  logo  means  that  this  product  answers  to  the  EMC  and  LVD  standards 

(regarding  to  the  regulation  associated  with  the  electric  equipment  voltage  and 

the electromagnetic fields) and comply with RoHS directives. 


This is a category C2 UPS product. In a residential environment, this product may cause radio 

interference, in which case the user may be required to take additional measures (only for 

220/230/240 VAC). 


IMPORTANT 


A UPS belongs to the electronic and electrical equipment category. At the end of 

its useful life it must be disposed of separately and in an appropriate manner. 

This symbol is also affixed to the batteries supplied with this device, which means 

they too have to be taken to the appropriate place at the end of their useful life. 


Contact your local recycling or hazardous waste centre for information on proper 

disposal of the used battery. 


Содержание 66089N1

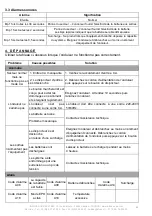
Страница 1: ...00 750 1000 1500 VA Notice d utilisation ________________________ 2 User guide______________________________ 15 Gu a de usuario _________________________ 26 Bedienungsanleitung _____________________ 3...

Страница 2: ...oit tre install dans un local bien ventil et non confin pour une circulation optimale de l air ambiant Laisser suffisamment d espace de chaque c t pour l a ration 5 Ne rien poser sur l onduleur et lai...

Страница 3: ...s lectriques ou lectroniques comportant des charges inductives telles que moteurs ou lampes fluorescentes 7 Ne pas connecter l onduleur des appareils lectrom nagers tels que micro ondes aspirateurs s...

Страница 4: ...eil Vous pouvez galement les reporter dans le cadre ci dessous Mod le Num ro de s rie Date d achat E3 Live RM Veuillez conserver l emballage d origine il sera indispensable pour un ventuel retour de v...

Страница 5: ...inal dans un endroit s r pour une utilisation future D baller et v rifier le contenu de l emballage L emballage d exp dition contient Un onduleur Un c ble d alimentation Equerres de fixation Une notic...

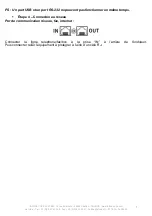
Страница 6: ...raccordement sur les prises de sortie IEC brancher simplement les appareils sur les prises l aide d un c ble IEC M F tape 3 Connexion de communication Ports de communication Port USB Port RS232 Slot i...

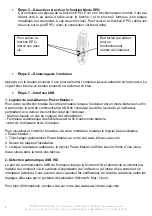
Страница 7: ...29 51 hotline infosec fr 07 19 AA 36 205 09 7 PS Un port USB et un port RS 232 ne peuvent pas fonctionner en m me temps tape 4 Connexion au r seau Por de communication r seau fax internet Connecter la...

Страница 8: ...eur permettant ce dernier de contr ler l tat de l onduleur Alarme visuelle en cas de coupure de l alimentation Fermeture automatique des fichiers avant la fin d autonomie batterie Arr t de l ordinateu...

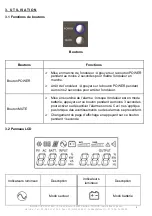
Страница 9: ...onduleur en marche Arr t de l onduleur Appuyer sur le bouton POWER pendant au moins 2 secondes pour arr ter l onduleur Bouton MUTE Mise en sourdine de l alarme lorsque l onduleur est en mode batterie...

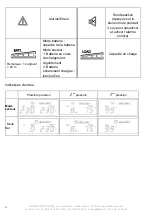
Страница 10: ...me Erreur Son d sactiv Appuyez sur le bouton mute pendant 3 sec pour d sactiver et activer l alarme sonore Remarque 1 segment 25 Mode batterie capacit de la batterie Mode secteur 1 Batterie en cours d...

Страница 11: ...Le disjoncteur d entr e s est d clench 2 D branchez le cordon d alimentation de l onduleur puis appuyez sur le bouton du disjoncteur L onduleur ne s allume pas Le bouton marche arr t est con u pour vi...

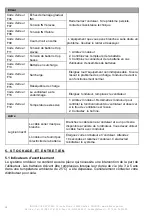
Страница 12: ...e l onduleur revient son fonctionnement normal Code d erreur F15 D s quilibre de charge Code d erreur F18 Le ventilateur a t endommag teignez l onduleur remplacez le ventilateur Code d erreur F19 Temp...

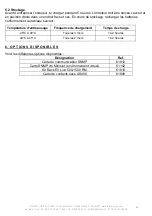
Страница 13: ...dans un endroit frais et sec En cours de stockage recharger les batteries conform ment au tableau suivant Temp rature d entreposage Fr quence de chargement Temps de charge 25 C 40 C Tous les 3 mois 1...

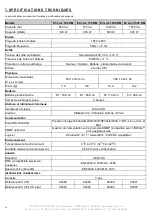
Страница 14: ...aximales P x L x H mm 230 x 433 x 44 389 x 433 x 44 Poids kg 7 6 8 6 14 2 16 2 Batterie Batterie plomb tanche 6V 7AH x2 6V 9AH x2 6V 7AH x4 6V 9AH x4 Temps de recharge typique 8 heures Alarmes et indi...

Страница 15: ...ch side for ventilation 5 Do not place anything on top of the UPS and leave a space of about 20cm around it on all sides otherwise there is a risk that it may overheat or even cause a fire 6 The mains...

Страница 16: ...essive consumption laser printers should not be connected to the UPS 9 Please replace the fuse only with the same type and amperage in order to avoid fire hazards 10 Use only CEE 7 7 plugs About batte...

Страница 17: ...rchase E3 Live RM Please keep the original packaging It will be required in the event the USP is returned to the After Sales Department CE conformity This logo means that this product answers to the E...

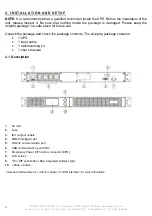
Страница 18: ...the package is damaged Please keep the original package in a safe place for future use Unpack the package and check the package contents The shipping package contains 1 UPS 1 input cable 1 rackmountin...

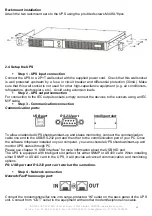
Страница 19: ...ng an IEC M F cable Step 3 Communication connection Communication ports USB port RS 232 port Intelligent slot To allow unattended UPS shutdown start up and status monitoring connect the communication...

Страница 20: ...n battery mode at the end of its operating time the UPS s USB port can be connected to the computer hence offering several monitoring management benefits Visual alarm in the event of a power failure A...

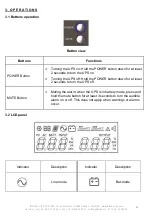
Страница 21: ...Turning the UPS on Hold the POWER button down for at least 2 seconds to turn the UPS on Turning the UPS off Hold the POWER button down for at least 2 seconds to turn the UPS off MUTE Button Muting th...

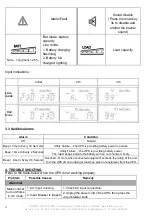
Страница 22: ...ery 30 Seconds Utility Failure The UPS is providing battery power to outlets Beep 1 time In Every 2 Seconds Utility Failure The UPS is providing battery power The rapid beeps indicate the battery will...

Страница 23: ...4 hours Unit has been damaged by a surge or spike Contact Technical Support Alarm Alarm code A06 Battery capacityis low Alarm code A09 Battery disconnected Alarm code A14 Over load occurs Alarm code...

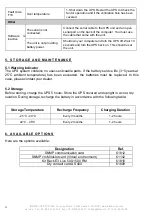
Страница 24: ...urn the UPS back on This should reset the unit 5 S T O R AG E AN D M AI N T E N AN C E 5 1 Warning indicator The UPS system contains no user serviceable parts If the battery service life 3 5 years at...

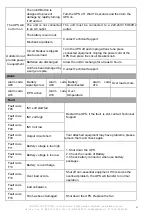
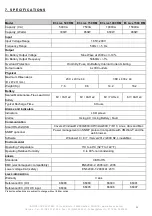
Страница 25: ...imensions D x W x H mm 230 x 433 x 44 389 x 433 x 44 Weight Kg 7 6 8 6 14 2 16 2 Battery Sealed Maintenance Free Lead Acid Battery 6V 7AH x2 6V 9AH x2 6V 7AH x4 6V 9AH x4 Typical Recharge Time 8 Hours...

Страница 26: ...uesto a la luz solar directa o cerca de fuentes de calor 4 No bloquee las rejillas de aire en la carcasa del UPS El UPS debe instalarse en una ubicaci n con ventilaci n adecuada Aseg rese de que exist...

Страница 27: ...Aseg rese de que la carga conectada no supere las posibilidades del UPS Para asegurar la mejora del tiempo de autonom a y una mayor vida til de la bater a recomendamos una carga equivalente de 1 3 de...

Страница 28: ...carga el ctrica S E R V I C I O P O S T V E N T A IMPORTANTE Cuando avise al Departamento Post Venta tenga preparada la siguiente informaci n ya que se le requerir independientemente del problema Mode...

Страница 29: ...que significa que tambi n deben ser desechadas en un lugar adecuado al final de su vida til P ngase en contacto con el centro de residuos peligrosos y reciclaje local para obtener m s informaci n ace...

Страница 30: ...ci n RS 232 6 Puerto de comunicaci n USB HID 7 Conector de funci n de apagado de emergencia EPO 8 Pantalla de LCD 9 Bot n de encendido apagado luz indicadora integrada azul 10 Bot n de silencio D i s...

Страница 31: ...Puerto USB Puerto RS 232 Ranura inteligente Para configurar el encendido apagado del sistema ininterrumpido de potencia UPS as como el monitoreo de su estado conecte el cable de comunicaci n al puert...

Страница 32: ...de la autonom a el puerto de comunicaci n USB del sistema de alimentaci n puede conectarse a la computadora que permite que esta ltima controle el estado del sistema de alimentaci n Alarma visual en c...

Страница 33: ...durante al menos 2 segundos para poner en marcha el sistema de alimentaci n Parada del sistema de alimentaci n Presione el bot n POWER durante al menos 2 segundos para detener el sistema de alimentaci...

Страница 34: ...05 09 34 3 2 3 2 Panel de LCD Indicador Descripci n Indicador Descripci n Modo de l nea Modo de bater a Alarma falla Sonido desactivado Presione la tecla de silencio 3 segundo y active el sonido de ti...

Страница 35: ...lor nominal de la unidad Apague el UPS y desconecte al menos una pieza del equipo del UPS 4 SOLUCI N DE PROBLEMAS Use la tabla a continuaci n cuando el sistema de alimentaci n no funcione correctament...

Страница 36: ...falla F09 Cortocircuito de salida El equipo adjunto podr a tener problemas elim nelos y compruebe otra vez C digo de falla F11 El voltaje de bater a es muy alto 1 Apague el UPS 2 Compruebe los conteos...

Страница 37: ...gase en contacto con su distribuidor 5 2 Almacenamiento Antes de almacenar cargue el sistema ininterrumpido de potencia UPS por 5 horas Almacene el sistema ininterrumpido de potencia UPS cubierto y ve...

Страница 38: ...sico Dimensiones m ximas D x W x H mm 230 x 433 x 44 389 x 433 x 44 Peso kg 7 6 8 6 14 2 16 2 Bater a Bater a de cido de plomo gratuita de mantenimiento herm tico 6 V 7 AH x2 6 V 9 AH x2 6 V 7 AH x4...

Страница 39: ...e USV Anlage nicht in der N he von Wasserstellen oder in feuchter Umgebung 3 Installieren Sie die USV Anlage nicht an einem Ort mit direkter Sonneneinstrahlung oder nahe an einer Heizung 4 Blockieren...

Страница 40: ...an 9 Der Potenzialausgleich muss ggf mit einer externen Batteriebank berpr ft werden Angeschlossene Produkte 1 Der gesamte Kriechstrom der USV und angeschlossenen Ger te sollte 3 5 mA nicht berschrei...

Страница 41: ...en Ringe oder andere Metallgegenst nde von den H nden entfernen Werkzeuge mit isoliertem Griff verwenden Vor dem Anschlie en oder Trennen der Batterieklemmen die Ladestromquelle unterbrechen Zum Auswe...

Страница 42: ...sorgung der verbrauchten Batterie 2 I N S T AL L AT I O N U N D AN S C H L U S S HINWEIS Es wird empfohlen die USV von einem ausgebildeten Techniker installieren zu lassen Bevor Sie die Anlage install...

Страница 43: ...reichend gesch tzt ist Stellen Sie sicher dass keine anderen Hochleistungsger te an diese Steckdose angeschlossen sind z B Klimaanlagen K hlschr nke Kopierer Benutzen Sie keine elektrischen Verl ngeru...

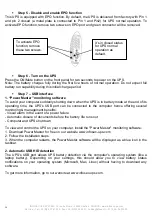
Страница 44: ...tivieren l sen Sie zwei Schrauben am EPO Port Der gr ne Anschluss wird dann entfernt Schritt 6 Einschalten der USV Dr cken Sie zwei Sekunden lang die ON Mute Taste auf der Vorderseite um die USV einzu...

Страница 45: ...Microsoft Mac Linux vorgenommenen Einstellungen anzeigen Weitere Informationen hierzu k nnen Sie auf unserer Website www infosec ups com herunterladen 3 BETRIEB 3 1 Bedientasten Tasten bersicht Taste...

Страница 46: ...6 3 2 LCD Display Anzeige Beschreibung Anzeige Beschreibung Line Betrieb Batteriebetrieb Alarm Fehler Stummschalten Dr cken Sie 3 Sek lang die Stummschalttaste um den Buzzer Ton zu aktivieren deaktivi...

Страница 47: ...ab und stecken Sie mindestens ein angeh ngtes Ger t aus 4 ST RUNGSBEHEBUNG Falls die USV nicht einwandfrei arbeitet suchen Sie in der unten stehenden Tabelle nach Informationen Problem M gliche Ursac...

Страница 48: ...gel aufweisen Trennen Sie sie und pr fen Sie erneut Fehlercode F11 Batteriespannung ist zu hoch 1 Schalten Sie die USV ab 2 berpr fen Sie den Zustand der Batterie 3 Pr fen Sie den Batterieanschluss we...

Страница 49: ...erden Kontaktieren Sie in diesem Fall Ihren H ndler 5 2 Lagerung Laden Sie die USV vor der Lagerung 5 Stunden auf Lagern Sie die USV abgedeckt und senkrecht stehend an einem k hlen trockenen Ort Laden...

Страница 50: ...imale Ma e TxBxHmm 230 x 433 x 44 389 x 433 x 44 Gewicht Kg 7 6 8 6 14 2 16 2 Batterie Versiegelte wartungsfreie Bleibatterie 6V 7AH x2 6V 9AH x2 6V 7AH x4 6V 9AH x4 bliche Ladedauer 8 Stunden Alarmsi...

Отзывы: