EonStor CS Installation Guide
page 103 / 133
Installation Guide
Import Domain User
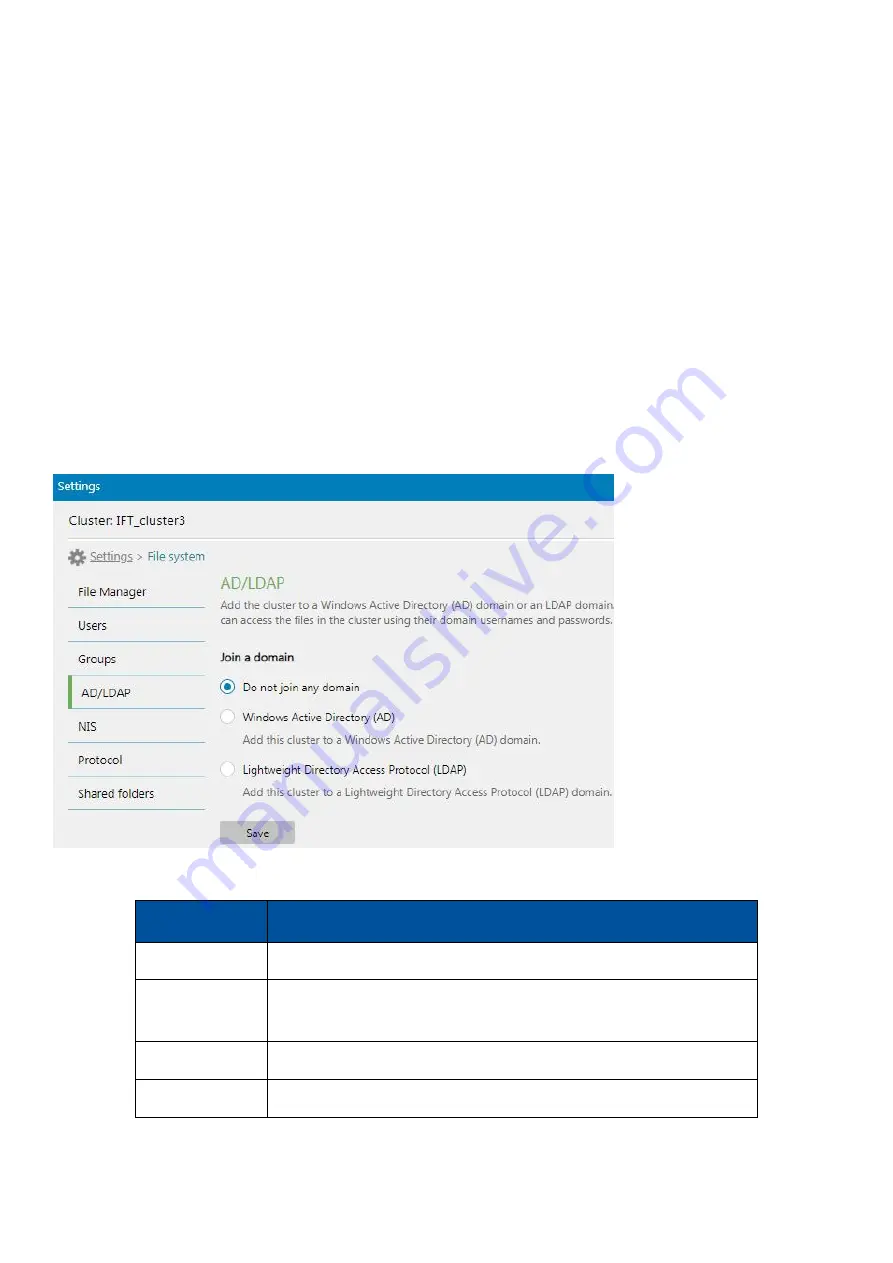
The cluster can join a Windows Active Directory (AD) domain and a Lightweight Directory Access Protocol
(LDAP) domain. After joining a domain, the cluster retrieves information of domain users for management.
Note!
To add/delete/edit domain users or user groups, go to the domain server to do proper management.
1. Go to
Settings > File system > AD/LDAP
2. Select the type of domain to join the cluster to: Windows active directory or Lightweight Directory Access
Protocol (LDAP).
3. Specify the information by domain type:
Windows AD domain
:
Name
Description
AD server
Specify the IP address or domain of the Windows AD server.
AD security
Select whether to protect the connection with the Windows AD
server:
None
or
TLS
.
Username
Specify the administrative username of the Windows AD server.
Password
Specify the administrative password of the Windows AD server.
Содержание EonStor CS
Страница 13: ...EonStor CS Installation Guide page 13 133 Installation Guide Troubleshooting Flow Chart Abnormal LED status 3...
Страница 14: ...EonStor CS Installation Guide page 14 133 Installation Guide Troubleshooting Flow Chart Abnormal LED status 4...
Страница 15: ...EonStor CS Installation Guide page 15 133 Installation Guide Troubleshooting Flow Chart Abnormal LED status 5...
Страница 16: ...EonStor CS Installation Guide page 16 133 Installation Guide Troubleshooting Flow Chart Abnormal LED status 6...
Страница 17: ...EonStor CS Installation Guide page 17 133 Installation Guide Troubleshooting Flow Chart...
Страница 50: ...EonStor CS Installation Guide page 50 133 Installation Guide...
Страница 55: ...EonStor CS Installation Guide page 55 133 Installation Guide...
Страница 57: ...EonStor CS Installation Guide page 57 133 Installation Guide...
Страница 60: ...EonStor CS Installation Guide page 60 133 Installation Guide...
Страница 63: ...EonStor CS Installation Guide page 63 133 Installation Guide...
Страница 64: ...EonStor CS Installation Guide page 64 133 Installation Guide...
Страница 69: ...EonStor CS Installation Guide page 69 133 Installation Guide...
Страница 78: ...EonStor CS Installation Guide page 78 133 Installation Guide 3 Click Save to change the settings...
Страница 82: ...EonStor CS Installation Guide page 82 133 Installation Guide...
Страница 85: ...EonStor CS Installation Guide page 85 133 Installation Guide 4 Click Save to save the settings...
Страница 87: ...EonStor CS Installation Guide page 87 133 Installation Guide...
Страница 93: ...EonStor CS Installation Guide page 93 133 Installation Guide...
Страница 99: ...EonStor CS Installation Guide page 99 133 Installation Guide...
Страница 107: ...EonStor CS Installation Guide page 107 133 Installation Guide...
Страница 109: ...EonStor CS Installation Guide page 109 133 Installation Guide...
Страница 113: ...EonStor CS Installation Guide page 113 133 Installation Guide 4 Specify the network settings for the new node...
Страница 116: ...EonStor CS Installation Guide page 116 133 Installation Guide...
Страница 121: ...EonStor CS Installation Guide page 121 133 Installation Guide 4 Specify the network settings for the new node...
Страница 129: ...EonStor CS Installation Guide page 129 133 Installation Guide 6 Click Next and set up the schedule...
Страница 131: ...EonStor CS Installation Guide page 131 133 Installation Guide...


