31
1.
Verify that the UPS’s switches are totally at “0” position.
2.
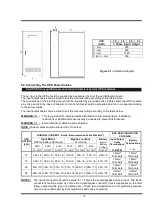
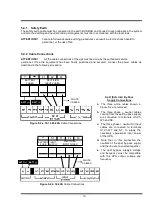
Connect the AC input supply cables between the mains distribution panel and the UPS “AC Input” (U1-V1-
W1-N1) terminals.
ATTENTION!!!
ENSURE CORRECT PHASE SEQUENCE
If there is a phase sequence fault, A21/A39 “ROTATE PHASE” message appears on
the front panel and the UPS can’t work.
3.
Connect the UPS output cables between the UPS output “AC output” (U2-V2-W2-N2) and the load
distribution panel.
4.
Make the connection of the battery groups. Please look at the Battery Installation item for it.
ATTENTION!!!
Remove the battery fuse before making the connection of the battery circuit
Breaker during the battery installation. (Turn off into “0” (OFF) position)
5.
The “BATT(+)” and “BATT(-)” cables, coming from the battery group terminals must be connected to the
lower ends of the BATTERY “+” and “-” respectively.
6.
If a battery circuit breaker is going to be used, it should be connected in series with the “BATT(+)” and
“BATT(-)” cables.
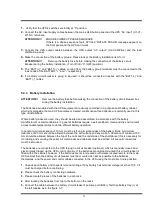
5.4.3 Battery Installation
ATTENTION!!!
Remove the battery fuse before making the connection of the battery circuit breaker box
during the battery installation.
The batteries associated with the UPS equipment are usually contained in a purpose-built battery cabinet,
which sits alongside the main UPS equipment. Sealed, maintenance-free batteries are normally used in this
type of installations.
Where battery racks are used, they should be sited and assembled in accordance with the battery
manufacturer’s recommendations. In general, batteries require a well-ventilated, clean and dry environment
at reasonable temperatures to obtain efficient battery operation.
In general a minimum space of 10 mm must be left on all vertical sides of the battery block. A minimum
clearance of 20 mm should be allowed between the cell surface and any walls. A clearance of minimum150
mm should be allowed between the top of the cells and the underside of the shelf above (this is necessary for
monitoring and servicing the cells). All metal racks and cabinets must be earthed. All live cell connections
must be shrouded.
The batteries are connected to the UPS through a circuit breaker (optional), which is manually closed and
electronically tripped via the UPS control circuitry. If the batteries are cabinet-mounted this circuit breaker is
fitted within the cabinet; however, if the batteries are rack-mounted or otherwise located remote to the main
UPS cabinet then the battery circuit breaker must be mounted as near as possible to the batteries
themselves, and the power and control cables connected to the UPS using the most direct route possible.
1. Unpack each battery and check its terminal voltage. If any battery has terminal voltage less than 10,5 V it
must be charged before continuing.
2. Please check the battery connecting hardware.
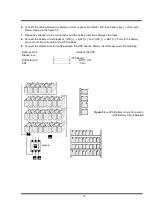
3. Please locate 8 pieces of the batteries to each rack.
4. Start locating the batteries from top to the bottom on the racks.
5. Connect the cable between the battery circuit breaker’s positive port (BAT+) first then battery tray (+) at
the left topside as in the figure 5-3
Содержание MagicLight ML-310
Страница 2: ......
Страница 27: ...24 Figure 3 2 Parallel UPS connection...
Страница 36: ...33 optional Figure 5 3 b UPS Battery Group Connection With Battery Fuse...
Страница 43: ...AGKK9241 05 2013...


