27
While the Test is Running
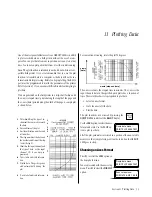
In most cases, all the HERMIT 2000 data reduction functions are
available to you while a test is running. The exceptions are (1) the
first minute of a test in the log sample mode, and (2) an entire test
in the Linear 2 sample mode.
• You can
VIEW DATA
for any test or step stored in memory.
• You can print or plot the test data of any test using the
DUMP
DATA
function.
• You can modify the transducer and alarm parameters of the test
that is running.
• You can take manual readings on any transducer by using the
read function contained in the
XD
menus.
You may be interrupted occasionally
as the intrument collects and records
a data point. The elapsed time of the
test or step will be displayed.
There is no function that you can perform that will cause the HER-
MIT 2000 to miss or delay taking a data point.
Battery Life Tip
Don’t waste battery power and memory endurance by
leaving the HERMIT 2000 running after the test is fin-
ished. Use the STOP function to turn data recording off.
READY
Section 8: Viewing Stored Data
*** DATA POINT ***
1440.00 min.
Test 0: Stop
(Enter to confirm)
Test 0: Stop
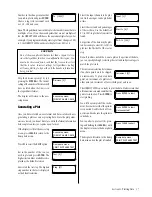
Stopping the Test
Press the
STOP
key while in the
READY
display.
You are prompted to confirm the stop
function by pressing the
ENTER
key.
(If you don’t want to stop the test,
press
CLEAR
.)
The HERMIT 2000 will stop the test
. . .
. . . and return to the
READY
display.
Note
: A test cannot be stopped during the first minute of the log
sample mode (log cycles 1 and 2). In the Linear 2 sample mode,
there will be no opportunity to confirm or cancel the
STOP
selec-
tion.
8 Viewing Stored Data
Data from any test may be viewed at any time. From
the
READY
display, press the
VIEW DATA
key.
You cannot access the view data
function if no data have been col-
lected.
The HERMIT 2000 will prompt for a
test number and displays the high-
est test number as the default. To se-
lect the default, just press
ENTER
; or key in your selection and press
ENTER
.
You are then prompted to select the
test step. The highest step number is
displayed as the default.
Next select the percentage into the
test to begin viewing. Zero percent is
the beginning of the test, 100 percent
is the end of the test (or the most recent data point if the test is still
running).
The display will show the elapsed
time in minutes and the data in the
specified units for input channel 1.
Note:
The temperature value re-
corded for a dual type input will be
added to the top line of the display.
The bottom line will display elapsed
time in minutes and the primary value.
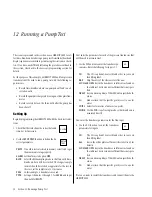
Scanning the Data
Use the
SCAN
keys to scan through the recorded
data.
SCAN UP
scans in the direction of
increas-
ing
elapsed time;
SCAN DOWN
scans in the di-
rection of
decreasing
elapsed time. These keys
will auto-repeat if you continue to hold them
down.
VIEW
DATA
(no data collected)
Test [1]?
_
Step [0]?
_
View % [100]?
_
Input 1: Level (F)
-
¯
0.0000
27.632
Input 1:
20.00
o
C
-
¯
0.0000 134.781
SCAN
STOP


