background image

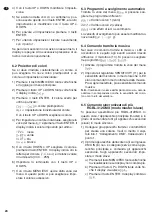
4) Con il tasto UP o DOWN modificare lʼimposta-

zione.

5) Se esistono delle voci di un sottomenù, pos-

sono essere aperte con il tasto ENTER, e le loro
impostazioni si modificano con il tasto UP o
DOWN.

6) Per salvare unʼimpostazione premere il tasto

ENTER.

7) Per ulteriori impostazioni iniziare nuovamente

con il punto 1.

Se per alcuni secondi non si aziona nessun tasto, il
display si spegne. Alla successiva pressione di un
tasto si accende nuovamente.

6.2 Proiettore di colori

Se si deve irradiare costantemente un colore, si
può scegliere fra nove colori preimpostati e un
colore ad impostazione individuale:

1) Premere il tasto MENU / ESC tante volte finché

si raggiunge il menù principale.

2) Premere il tasto UP o DOWN tante volte finché

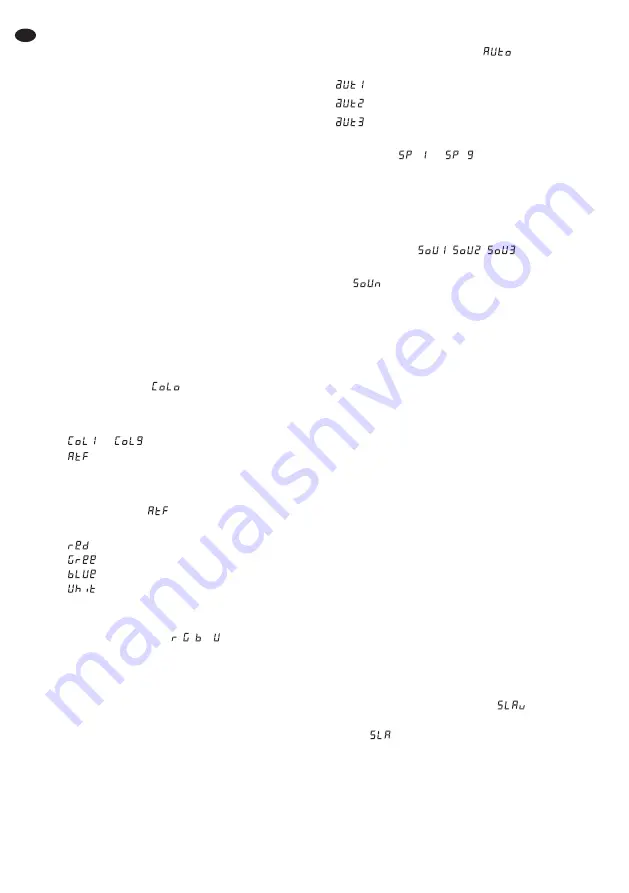
il display indica

.

3) Premere il tasto ENTER. Il colore scelto per

ultimo è attivato:

… 

= colore preimpostato

= impostazione individuale del colore

Con il tasto UP o DOWN scegliere il colore.

4) Per impostare un colore individuale, scegliere la

voce del menù

e premere il tasto ENTER. Il

display indica il colore impostato per ultimo:

= rosso

= verde
= blu
= bianco

5) Con il tasto DOWN o UP scegliere il colore e

premere il tasto ENTER. Il display indica ora la
lettera per il colore ( ,  ,  o  ) e il relativo valore
di luminosità (000 … 255).

6) Impostare la luminosità con il tasto UP o

DOWN.

7) Con il tasto MENU / ESC uscire dalla voce del

menù. A questo punto si può scegliere e impo-
stare il colore successivo.

6.3 Programmi a svolgimento automatico

Tramite la voce del menù

si possono sce-

gliere tre programmai differenti:

= Cambio colori 1 (lento)

= Cambio colori 2 (veloce)

= vari effetti di luci a scorrimento

La velocità di svolgimento può essere modificata a
nove livelli (

… 

).

6.4 Comando tramite la musica

Nel caso di comando tramite la musica, i LED si
accendono in seguito agli eventi acustici rilevati
attraverso il microfono (10). Si possono scegliere
tre programmi (

).

1) Attivare il programma tramite la voce del menù

.

2) Impostare il regolatore SENSITIVITY (11) per la

sensibilità del microfono in modo tale che i LED
siano comandati in modo ottimale dalla musica.
Più si apre il selettore, più è sensibile il comando
musica.

N. B.: Cambiando il volume dellʼimpianto di musica, occorre
adattare in corrispondenza anche la sensibilità del micro-
fono con lʼaiuto del selettore.

6.5 Comando sincronizzato di più 

RGBL-412DMX (modo master / slave)

Si possono assemblare più RGBL-412DMX. In
questo caso, lʼapparecchio principale (master) è in
grado di comandare tutti gli apparecchi secondari
(slave) in modo sincrono.

1) Collegare gli apparecchi tramite i contatti DMX

per creare una catena. Vedi in merito il capi-
tolo 6.6.1 “Collegamento DMX”, tralasciando il
punto 1.

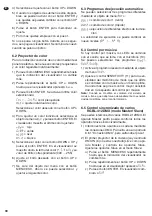
2) Il primo apparecchio della catena [il cui ingresso

DMX IN (6) non è collegato] serve come appa-
recchio principale e comanda gli apparecchi
secondari. Sugli apparecchi secondari impo-
stare il modo slave:
a) Premere il tasto MENU / ESC tante volte finché

la visualizzazione sul display non cambia più.

b) Premere il tasto UP o DOWN tante volte fin-

ché il display visualizza

.

c) Premere il tasto ENTER. Il display cambia a

.

24

I

Содержание RGBL-412DMX

Страница 1: ...MANUAL DE INSTRUCCIONES INSTRUKCJA OBS UGI VEILIGHEIDSVOORSCHRIFTEN SIKKERHEDSOPLYSNINGER S KERHETSF RESKRIFTER TURVALLISUUDESTA LED DMX LICHTEFFEKT PANEL LED DMX LIGHT EFFECT PANEL BARRE DMX LEDS PA...

Страница 2: ...izaci n Le deseamos una buena utilizaci n para su nue vo aparato img Stage Line Por favor lea estas instrucciones de uso atentamente antes de hacer funcionar el aparato De esta manera conocer todas la...

Страница 3: ...Versi n del Firmware Wersja firmware a automatisch ablaufende Programme Programs running automatically Programmes d roulement automatique Programmi a svolgimento automatico Los programas se ejecutan a...

Страница 4: ...7 XLR Buchse DMX OUT DMX Signalausgang zum Anschluss an den DMX Eingang eines wei teren DMX gesteuerten Ger tes 8 Tasten zurAuswahl des Betriebsmodus und zum ndern von Einstellungen ber das Men 9 Dis...

Страница 5: ...eweils einer Griffschraube 1 links und rechts am Ger t befestigen Zum Ausrichten des Ger ts die zwei Feststell schrauben 1 oder 4 l sen Die gew nschte Nei gung des Ger ts einstellen und die Schrauben...

Страница 6: ...chste Farbe an gew hlt und eingestellt werden 6 3 Automatisch ablaufende Programme ber den Men punkt k nnen drei verschie dene Programme ausgew hlt werden Farbwechsel 1 langsam Farbwechsel 2 schnell v...

Страница 7: ...n le einstellen Um das RGBL 412DMX mit einem Lichtsteuerge r t bedienen zu k nnen m ssen die DMX Start adresse Kap 6 6 3 und die Anzahl der DMX Kan le eingestellt werden Die Anzahl der DMX Kan le h ng...

Страница 8: ...6 12 G LEDs 9 12 G LEDs 5 6 W LEDs 5 6 13 B LEDs 9 12 B LEDs 5 6 R LEDs 7 8 14 W LEDs 9 12 W LEDs 5 6 G LEDs 7 8 15 R LEDs 13 16 R LEDs 7 8 B LEDs 7 8 16 G LEDs 13 16 G LEDs 7 8 W LEDs 7 8 17 B LEDs 1...

Страница 9: ...Fl ssigkeit verwenden die k nnte in das Ger t laufen und Besch digungen verursachen 8 Technische Daten Datenprotokoll DMX 512 Anzahl der DMX Kan le 4 6 10 18 32 oder 34 Lichtquelle 16 RGBW LEDs Leistu...

Страница 10: ...7 XLR jack DMX OUT DMX signal output for con nection to the DMX input of another DMX con trolled unit 8 Buttons to select the operating mode and to change adjustments via the menu 9 Display 10 Microph...

Страница 11: ...ed inclination of the unit and retighten the screws 5 Setting into Operation Connect the supplied mains cable to the mains jack 12 first and then to a socket 230 V 50 Hz Thus the unit is switched on T...

Страница 12: ...rograms can be selected via the menu item colour change 1 slow colour change 2 fast different running light effects The running speed can be changed in nine steps 6 4 Music control In case of music co...

Страница 13: ...GBL 412DMX with a light controller the DMX start address chap ter 6 6 3 and the number of DMX channels have to be adjusted The number of DMX channels depends on the functions required and possibly on...

Страница 14: ...5 6 12 G LEDs 9 12 G LEDs 5 6 W LEDs 5 6 13 B LEDs 9 12 B LEDs 5 6 R LEDs 7 8 14 W LEDs 9 12 W LEDs 5 6 G LEDs 7 8 15 R LEDs 13 16 R LEDs 7 8 B LEDs 7 8 16 G LEDs 13 16 G LEDs 7 8 W LEDs 7 8 17 B LEDs...

Страница 15: ...quid it may leak into the unit and cause damage 8 Specifications Data protocol DMX 512 Number of DMX channels 4 6 10 18 32 or 34 Light source 16 RGBW LEDs Power of each LED 8 W Power supply 230 V 50 H...

Страница 16: ...R femelle DMX OUT sortie signal DMX brancher l entr e DMX d un autre appareil g r par DMX 8 Touches pour s lectionner le mode de fonction nement et modifier les r glages via le menu 9 Affichage 10 Mic...

Страница 17: ...xez les triers avec respectivement une vis 1 gauche et droite sur l appareil Pour orienter l appareil desserrez les deux vis 1 ou 4 R glez l inclinaison voulue puis revissez les vis 5 Fonctionnement R...

Страница 18: ...la prochaine couleur et la r gler 6 3 Programmes d roulement automatique Via le point de menu vous pouvez s lection ner trois programmes diff rents changement couleur 1 lent changement couleur 2 rapi...

Страница 19: ...aux DMX Pour pouvoir utiliser le RGBL 412DMX avec un contr leur il faut r gler l adresse de d marrage DMX chapitre 6 6 3 et le nombre de canaux DMX Ce dernier d pend des fonctions n ces saires et parf...

Страница 20: ...G LEDs 5 6 W LEDs 5 6 13 B LEDs 9 12 B LEDs 5 6 R LEDs 7 8 14 W LEDs 9 12 W LEDs 5 6 G LEDs 7 8 15 R LEDs 13 16 R LEDs 7 8 B LEDs 7 8 16 G LEDs 13 16 G LEDs 7 8 W LEDs 7 8 17 B LEDs 13 16 B LEDs 7 8 R...

Страница 21: ...cun cas vous ne devez utiliser de liquide qui pourrait couler dans l appareil et l endommager 8 Caract ristiques techniques Protocole donn es DMX 512 Nombres de canaux DMX 4 6 10 18 32 ou 34 Source de...

Страница 22: ...tro apparecchio con comando DMX 7 Presa XLR DMX OUT uscita dei segnali DMX per il collegamento con l ingresso DMX di un ulteriore apparecchio con comando DMX 8 Tasti per selezionare il modo di funzion...

Страница 23: ...oppure pu essere collo cato per terra Fissare gli angoli a destra e a sini stra dell apparecchio usando le viti zigrinate 1 Per orientare l apparecchio allentare le due viti di bloccaggio 1 o 4 Impos...

Страница 24: ...i a svolgimento automatico Tramite la voce del men si possono sce gliere tre programmai differenti Cambio colori 1 lento Cambio colori 2 veloce vari effetti di luci a scorrimento La velocit di svolgim...

Страница 25: ...omandare il RGBL 412DMX con un unit di comando luce occorre impostare l indi rizzo di start DMX Cap 6 6 3 e il numero dei canali DMX Il numero dei canali DMX dipende dalle funzioni richieste e eventua...

Страница 26: ...6 12 G LED 9 12 G LED 5 6 W LED 5 6 13 B LED 9 12 B LED 5 6 R LED 7 8 14 W LED 9 12 W LED 5 6 G LED 7 8 15 R LED 13 16 R LED 7 8 B LED 7 8 16 G LED 13 16 G LED 7 8 W LED 7 8 17 B LED 13 16 B LED 7 8...

Страница 27: ...ecchio danneggiandolo 8 Dati tecnici Protocollo dati DMX 512 Numero dei canali DMX 4 6 10 18 32 o 34 Sorgente luminosa 16 LED RGBW Potenza per LED 8 W Alimentazione 230 V 50 Hz Potenza assorbita max 1...

Страница 28: ...para conectar un controlador o para la salida de se al DMX de otro aparato controlado por DMX 7 Toma XLR DMX OUT Salida de se al DMX para conectar a la entrada DMX de otro aparato controlado por DMX...

Страница 29: ...d en el techo o en el suelo Fije los soportes con un tornillo estriado 1 a izquierda y derecha del aparato Para alinear el aparato afloje los dos tornillos de cierre 1 4 Ajuste la inclinaci n deseada...

Страница 30: ...3 Programas de ejecuci n autom tica Se pueden seleccionar tres programas diferentes mediante el objeto de men cambio de color 1 lento cambio de color 2 r pido ejecuci n de diferentes efectos de ilumi...

Страница 31: ...con trolador hay que ajustar la direcci n de inicio DMX apartado 6 6 3 y el n mero de canales DMX El n mero de canales DMX depende de las funcio nes necesarias y posiblemente del n mero de canales de...

Страница 32: ...9 12 G LEDs 5 6 W LEDs 5 6 13 B LEDs 9 12 B LEDs 5 6 R LEDs 7 8 14 W LEDs 9 12 W LEDs 5 6 G LEDs 7 8 15 R LEDs 13 16 R LEDs 7 8 B LEDs 7 8 16 G LEDs 13 16 G LEDs 7 8 W LEDs 7 8 17 B LEDs 13 16 B LEDs...

Страница 33: ...e nunca ning n l quido podr a derramarse en el interior del aparato y provocar alg n da o 8 Especificaciones Protocolo de datos DMX 512 N mero de canales DMX 4 6 10 18 32 34 Fuente de luz 16 LEDs RGBW...

Страница 34: ...iego reflektora 7 Wyj cie DMX OUT na z czu XLR do pod czania wej cia DMX kolejnego efektu wiet lnego 8 Przyciski do wyboru pozycji i zmiany warto ci parametr w w menu 9 Wy wietlacz 10 Mikrofon do ster...

Страница 35: ...i regulatory 1 po obu stronach urz dzenia Dla uzyskania danej pozycji poluzowa regula tory przy uchwytach monta owych 1 lub 4 Usta wi wybran pozycj i dokr ci je 5 Przygotowanie urz dzenia do pracy Pod...

Страница 36: ...ESC Mo na teraz wybra inny kolor 6 3 Programy automatyczne Poprzez polecenie menu mo na wybra trzy r ne programy zmiany kolor w 1 wolno zmiany kolor w 2 szybko r ne efekty biegn cego wiat a Regulacja...

Страница 37: ...startowy DMX rozdz 6 6 3 oraz liczb kana w DMX Liczba kana w DMX zale y od danej funkcjo nalno ci oraz ilo ci dost pnych kana w kontro lera W rozdz 6 6 4 opisano mo liwe do uzyskania funkcje przy ste...

Страница 38: ...diody 5 6 W diody 5 6 13 B diody 9 12 B diody 5 6 R diody 7 8 14 W diody 9 12 W diody 5 6 G diody 7 8 15 R diody 13 16 R diody 7 8 B diody 7 8 16 G diody 13 16 G diody 7 8 W diody 7 8 17 B diody 13 16...

Страница 39: ...sta si do wn trza urz dzenia 8 Specyfikacja Protok danych DMX 512 Liczba kana w DMX 4 6 10 18 32 lub 34 r d o wiat a 16 dioda RGBW Moc ka dej diody 8 W Zasilanie 230 V 50 Hz Pob r mocy max 170 VA Wymi...

Страница 40: ...raat moet in elk geval worden hersteld door een gekwalificeerd vakman G Trek de stekker nooit met het snoer uit het stop contact maar met de stekker zelf G Verwijder het stof met een droge zachte doek...

Страница 41: ...ret per sonel G Tag aldrig netstikket ud af stikkontakten ved at tr kke i kablet tag fat i selve stikket G Til reng ring m kun benyttes en t r bl d klud der m under ingen omst ndigheder benyttes kemik...

Страница 42: ...v kunnig personal G Drag aldrig ur kontakten genom att dra i sladden utan ta tag i kontaktkroppen G Reng r endast med en mjuk och torr trasa anv nd aldrig kemikalier eller vatten vid reng ring G Om en...

Страница 43: ...rota virtajohtoa pistorasiasta joh dosta vet m ll G K yt puhdistamiseen pelk st n kuivaa peh me kangasta l k yt kemikaaleja tai vett G Laitteen takuu raukeaa eik valmistaja maahan tuoja tai myyj ota v...

Страница 44: ...MONACOR INTERNATIONAL GmbH Co KG Zum Falsch 36 28307 Bremen Germany Copyright by MONACOR INTERNATIONAL All rights reserved A 1425 99 01 04 2013...

Отзывы: