Part 1 - Getting Started
12
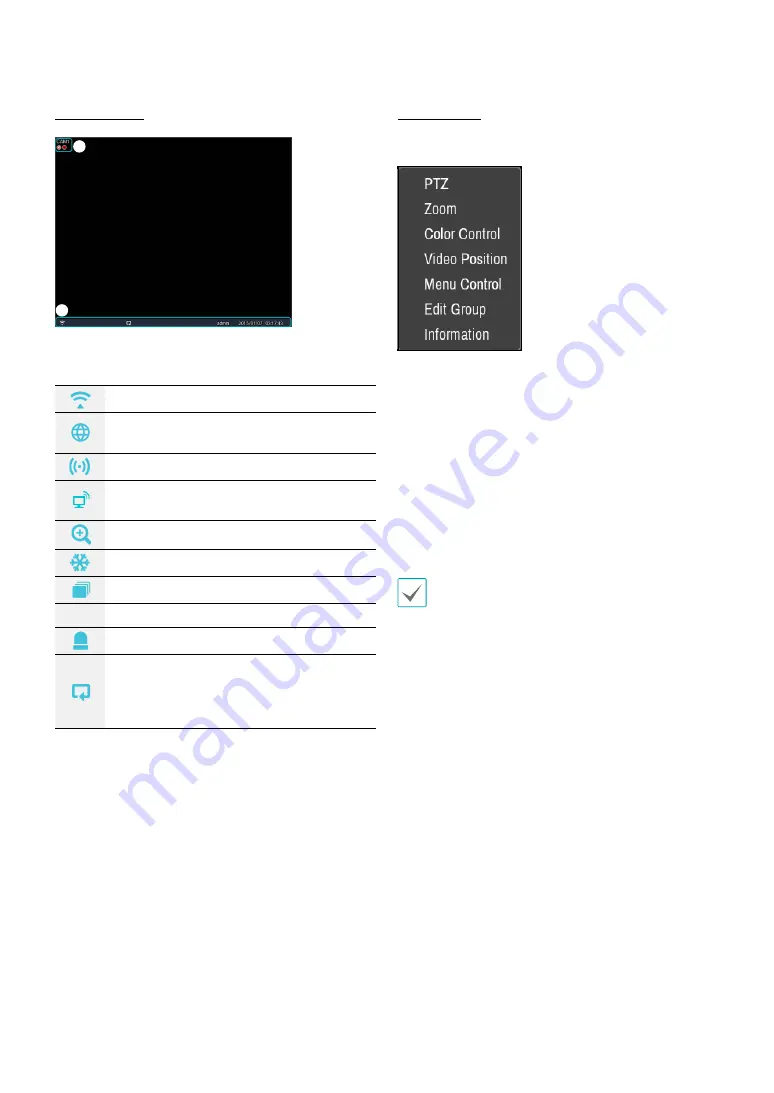
Camera Screen
2
1
1
Camera Title:
Indicates the camera’s title.
2
Status Indication:
Displays system status icons.
Indicates remote control receptivity.
Indicates connection to the DVR from a
remote program.
Indicates two-way audio connection.
Indicates connection to the DVR using the
VNC service.
Indicates a zoomed in state.
Indicates Freeze is in use.
Indicates Sequence is in use.
1/2
Indicates the current screen's group.
Indicates an event monitoring.
Indicates HDD use. The icon to the left
is shown if using the overwrite setting.
Otherwise, remaining HDD space is shown as
a percentage value.
Camera Menu
Right-click on the video display area to bring up the
camera menu.
•
PTZ:
Allows you to control the selected camera as long
as it has Pan, Tilt and Zoom capabilities. It is the same
as pressing the PTZ button.
•
Zoom:
Zooms the current image of the selected
camera on the screen. It is the same as pressing the
ZOOM button. Selecting Zoom again in the Camera
Menu again exits the Zoom mode.
•
Color Control
: Adjusts the camera’s color settings.
• Video Position:
Adjusts the video position in left/right
directions.
• Menu Control:
Adjusts the camera’s self-settings.
•
Menu Control
is supported only for the cameras that
use Pelco-C/H-C Protocol and support UTC (Up The
Coax) function.
•
Menu Control
is not supported if the port is set to
RS232 or RS485 in the PTZ setting.
•
Edit Group:
Enter to the Edit Group mode in the split
screen layout.
• Information:
Displays currently connected camera
information and recording status.


