Part 2 - Configuration
39
Camera Setup
Refer to the
for basic
information on using the Setup menus.
General
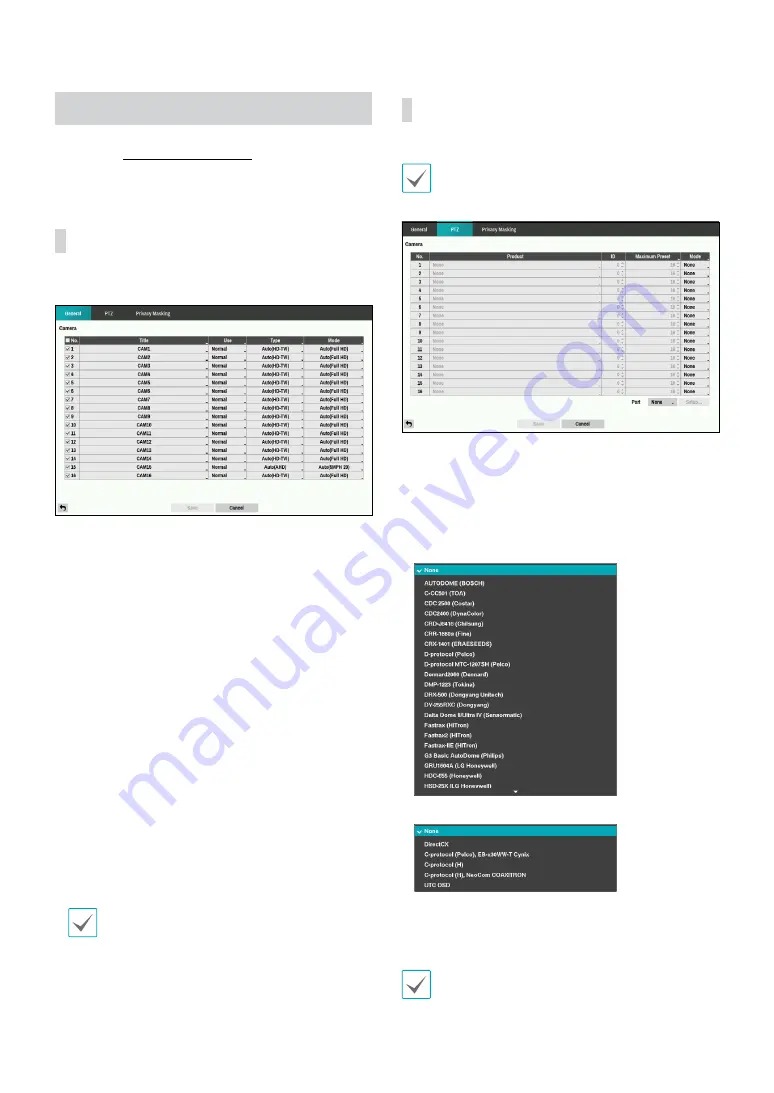
Enable/disable the covert view and rename cameras.
•
No.:
Turn the camera number On or Off.
•
Title
: Edit the camera’s name.
•
Use
: Set the camera as
Normal
,
Covert 1
, or
Covert 2
.
Live images and video recordings from cameras that
have been set as
Covert 1
or
Covert 2
will not be
available to users who do not have covert camera
access. Setting a camera as
Covert 1
hides its images
but does display OSD information about the camera.
Setting a camera as
Covert 2
hides its images as well
as OSD information about the camera as if it has been
deactivated completely.
•
Type:
Select the type supported by the camera
among Auto, SD, HD-TVI and AHD. Selecting
Auto
allows the DVR to automatically detect the type
supported by the camera.
•
Mode:
Select the width resolution supported by
the camera among Auto, 720, 960, HD, Full HD, 3MP,
4MPH, 4MP, 5MPH and 5MP. Selecting
Auto
allows
the DVR to automatically detect the width resolution
supported by the camera.
When selecting
Auto
, the 720, HD, Full HD, 3M, 4M
and 5M mode are supported. The input resolution
is applied without rebooting the system. If the
camera’s width resolution is 960 and
Mode
is set to
Auto
,
720
mode will be applied.
PTZ
You will only be able to set up PTZ devices if the PTZ
port is set to RS232 or RS485.
•
Product:
You can select the PTZ camera you wish to
configure.
•
ID:
You can assign IDs to each camera by highlighting
the box under the ID heading. Change the number
by highlighting it and using the Up and Down arrow
buttons to increase and decrease the number. The
PTZ ID number can be set from 0 to 256.
<RS232/RS485>
<UTC>
•
Mode:
Select
None, UTC, RS232,
or
RS485
. UTC is
only used for HD, Full HD, 3M, 4M and 5M cameras.
UTC may not work properly depending on the type of
camera.


