Part 1 – Introduction
11
Installation
Installation of this product does not require the use of
special tools.
For more information on other devices comprising the
overall system, refer to their respective
installation
manuals
.
Product color and design may vary depending on the
model.
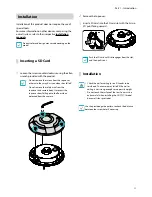
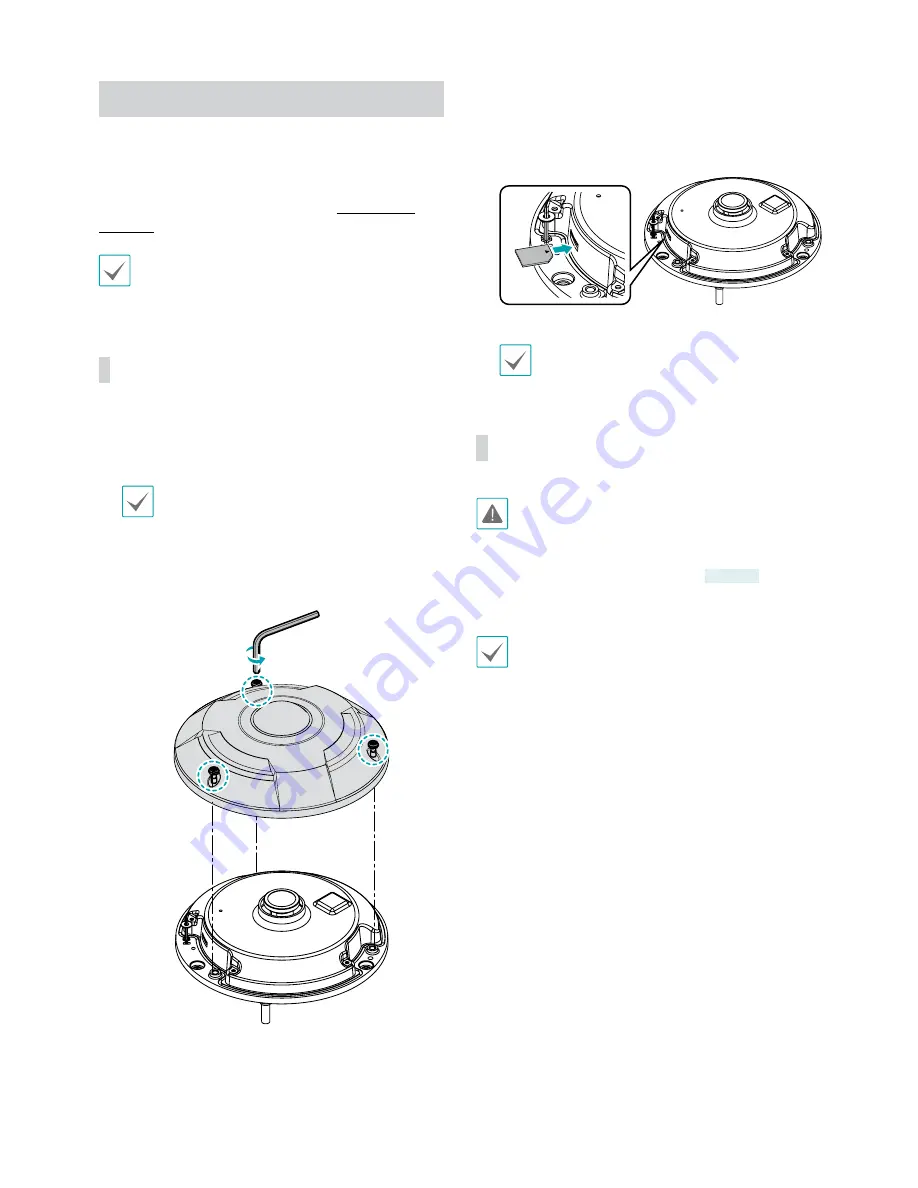
Inserting a SD Card
1
Loosen the screws counterclockwise using the allen
wrench provided with the product.
• Do not remove the screws from the top cover,
otherwise, they may hurt you when they fall off.
• Do not remove the safety wire from the
top cover and camera body. It prevents the
top cover from falling on to the floor when
detached from the camera.
2
Remove the top cover.
3
Insert a SD card into the SD card slot with the 'micro
SD' print facing upward.
P
LFUR
6'
Push the SD card until it disengages from the slot,
and then pull it out.
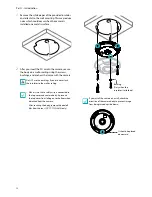
Installation
• Check the wall or ceiling to see if it needs to be
reinforced. The camera may fall off if the wall or
ceiling is not strong enough to support its weight.
• Do not touch the surface of the lens. You must be
extra careful when installing the
DC-Y1513
model
because its lens protrudes.
Use the provided guide pattern to check the distance
between the screw holes if necessary.
Содержание DC-E3212WRX
Страница 1: ...Powered by Network Camera Installation Manual DC Y1513 DC Y1513W ...
Страница 19: ......
Страница 20: ...IDIS Co Ltd For more information please visit at www idisglobal com ...

